Block Visitors by IP, Location, Email, Phone, or Name
Conditions let you block or redirect visitors based on their IP address, country, state/province, or city. Each condition you create applies to all incoming visitors in real time — no restart required.
Requires: Free plan
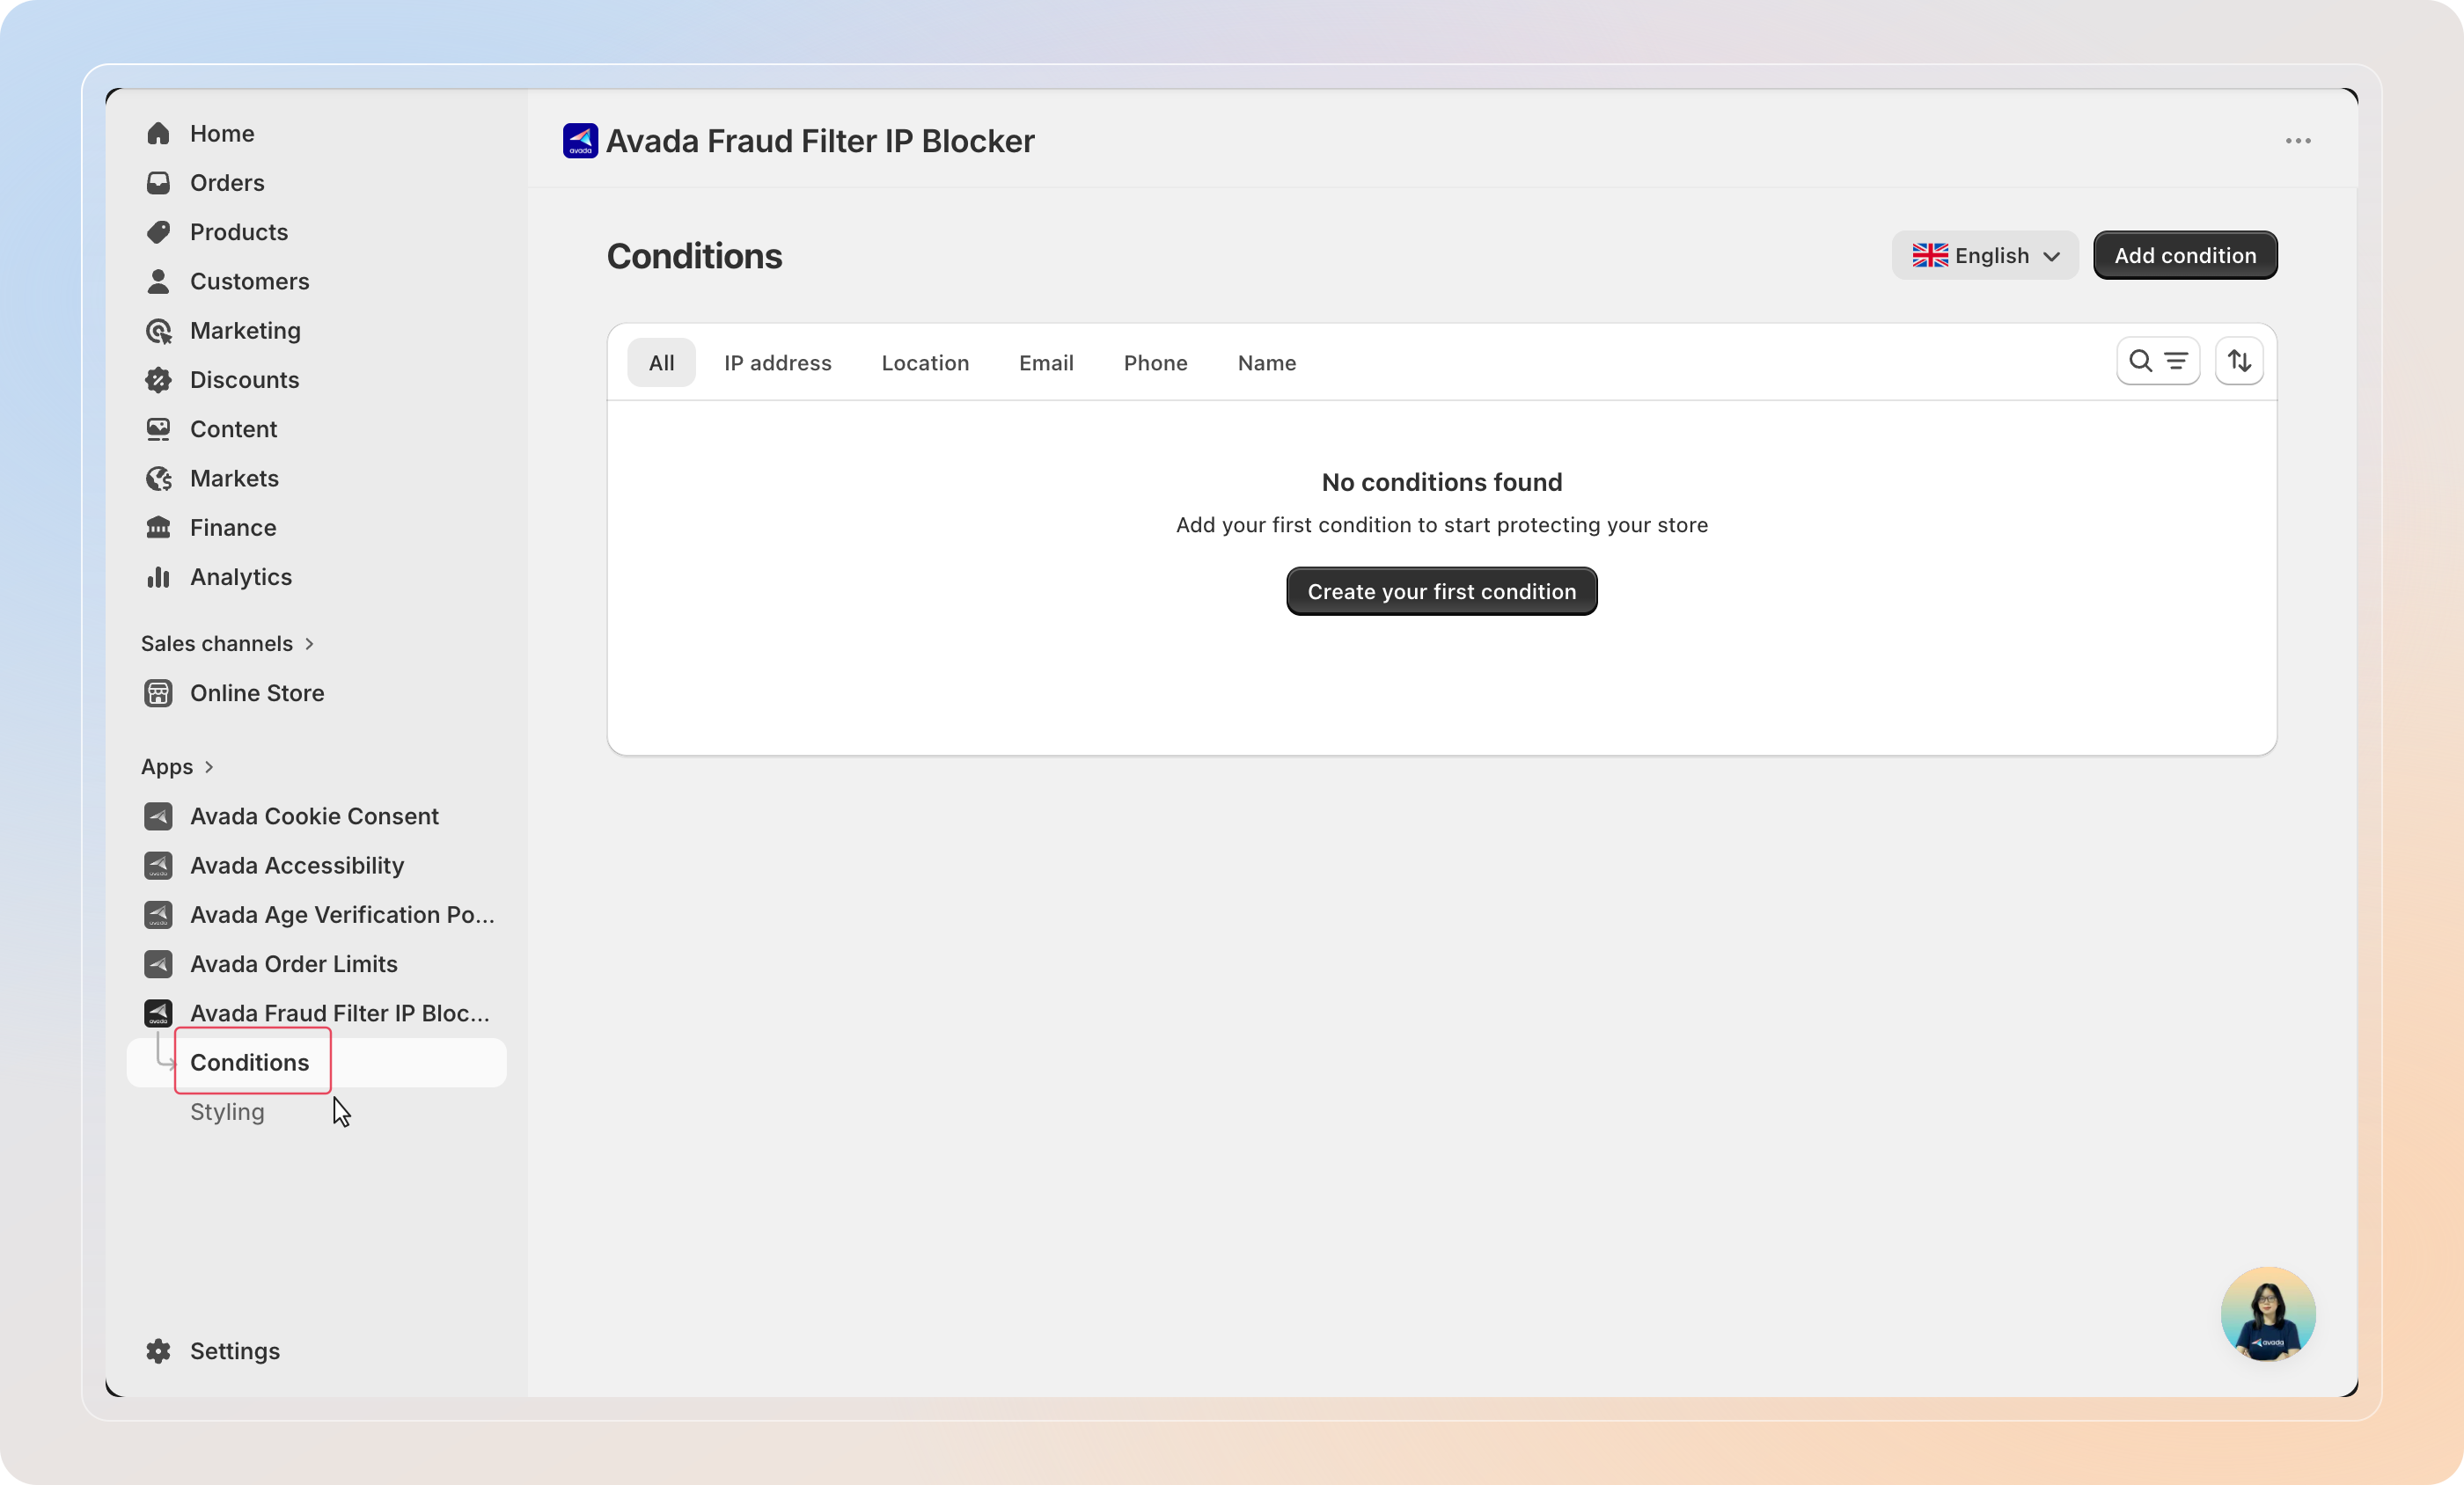
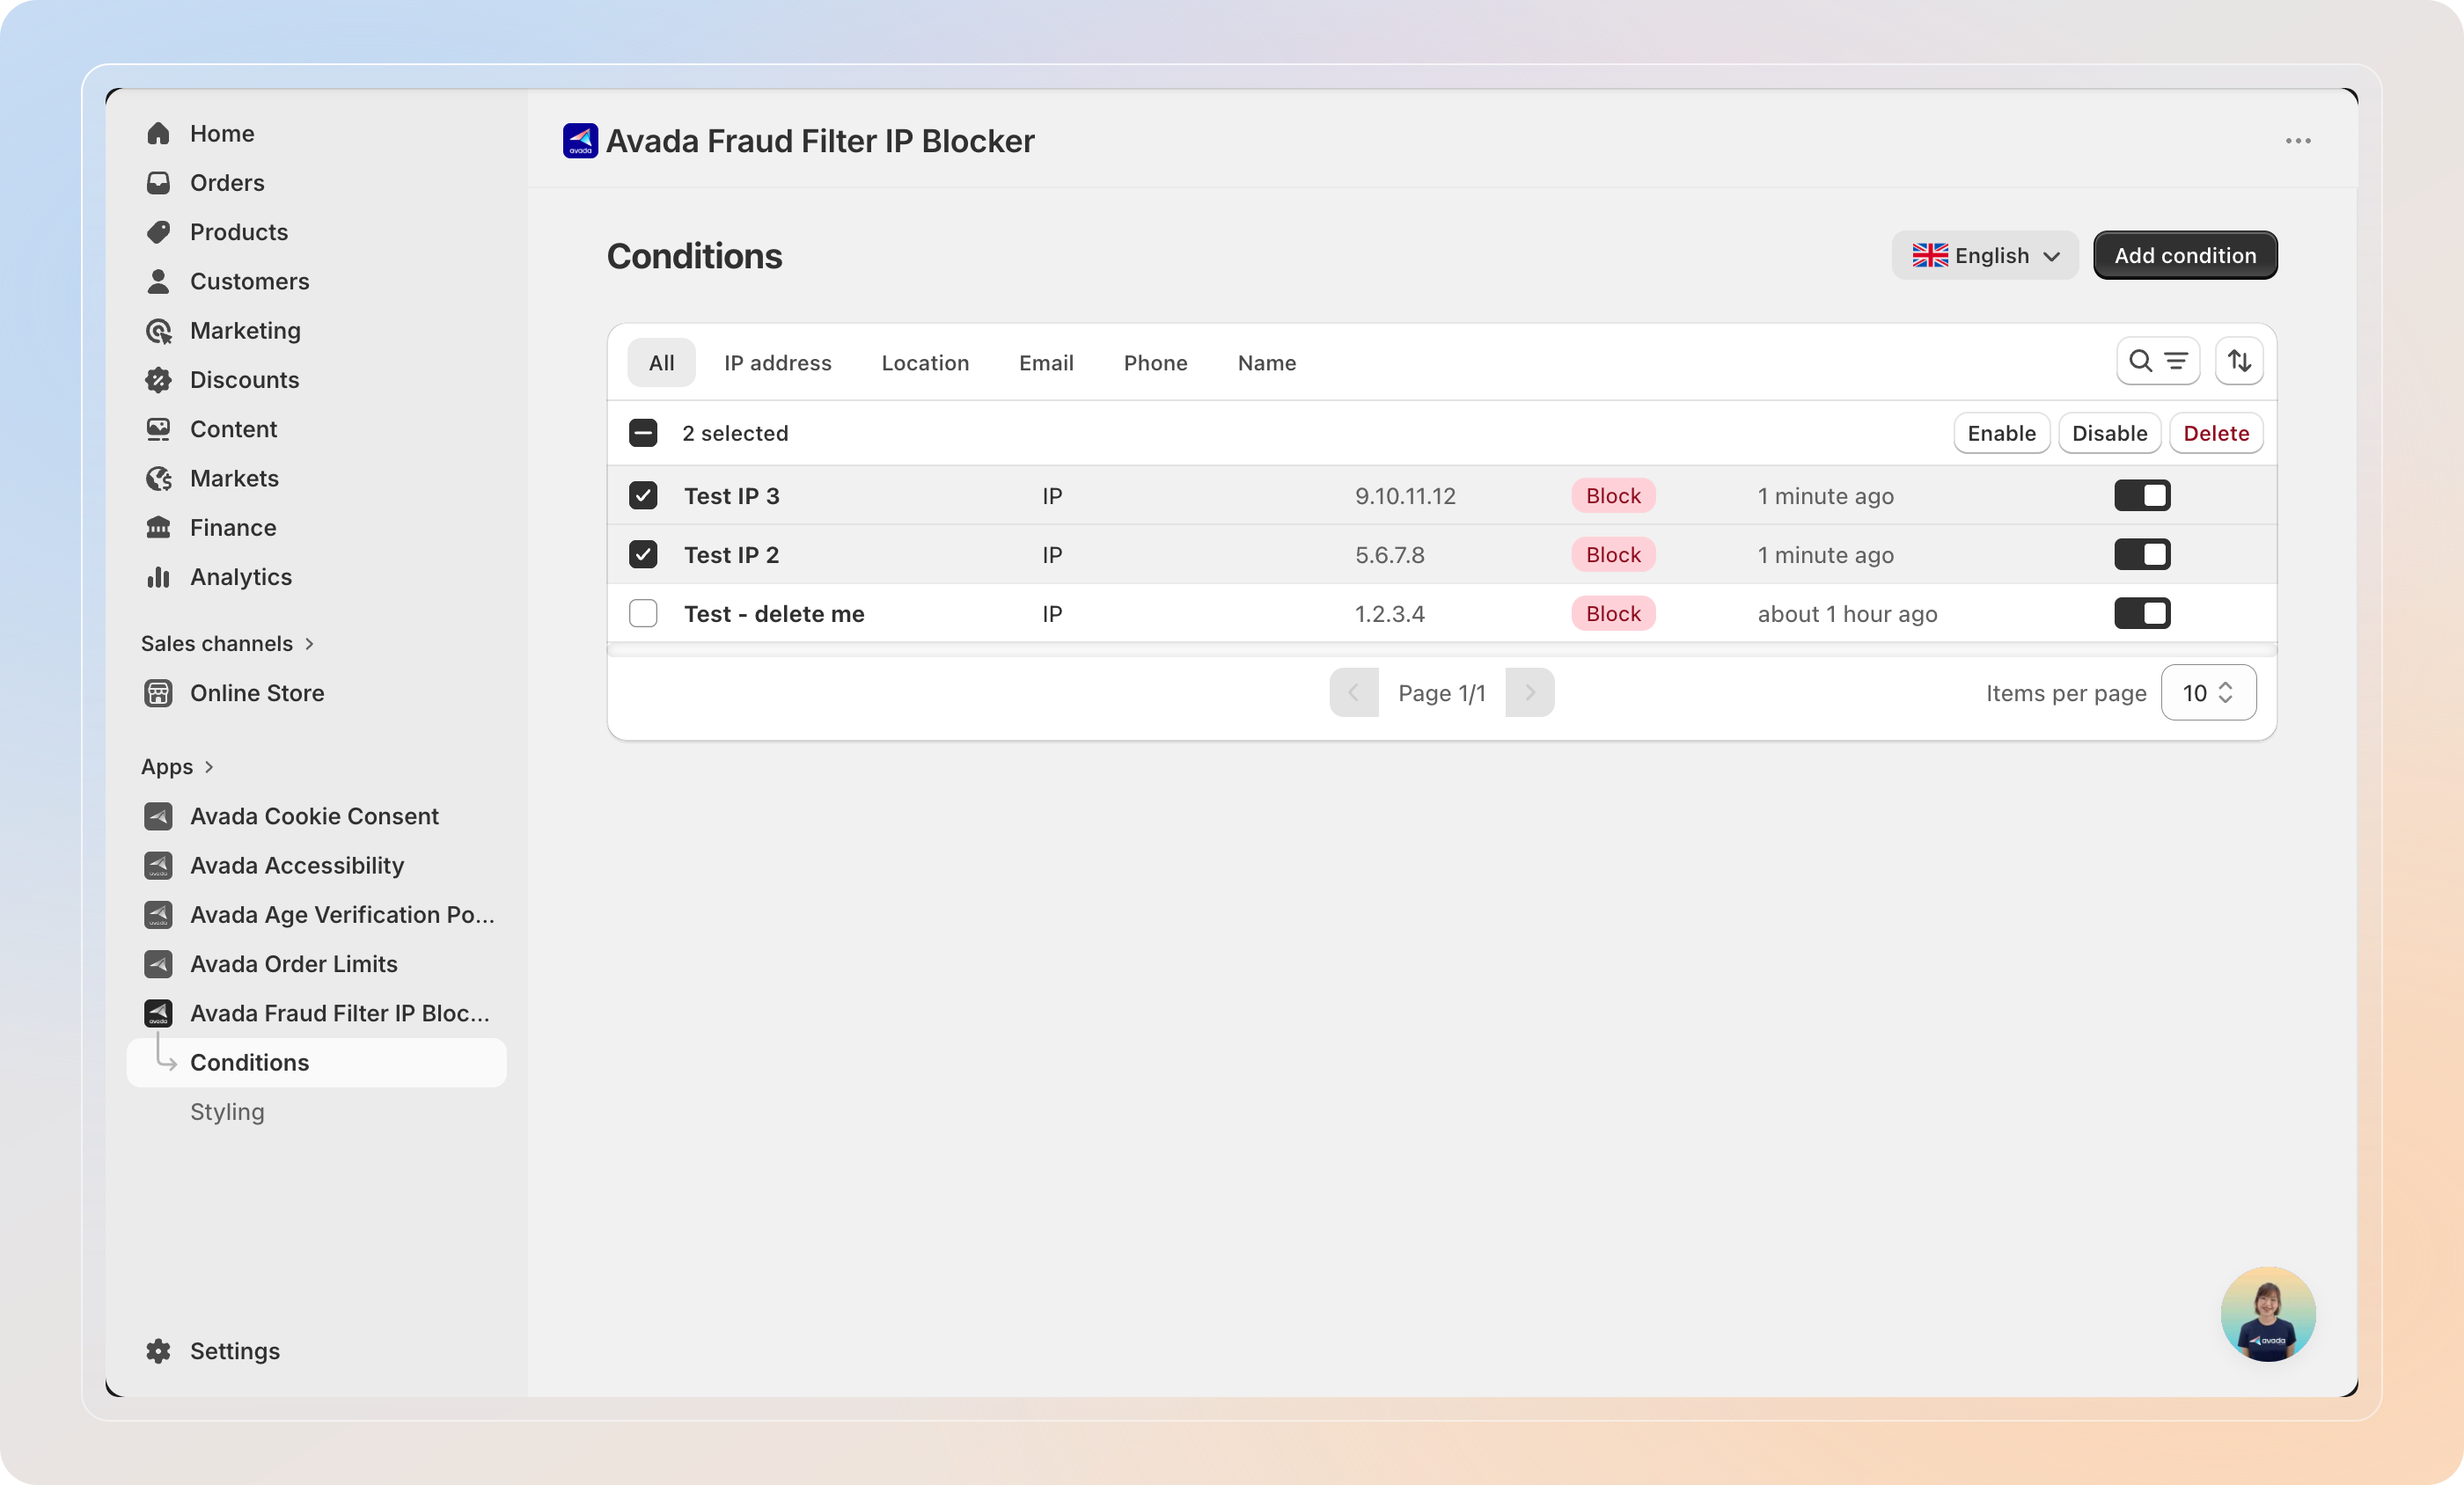
Open Conditions
In the app sidebar, click Conditions.
The list shows all your saved conditions, organized by type: All, IP address, Location, Email, Phone, and Name.
Add a New Condition
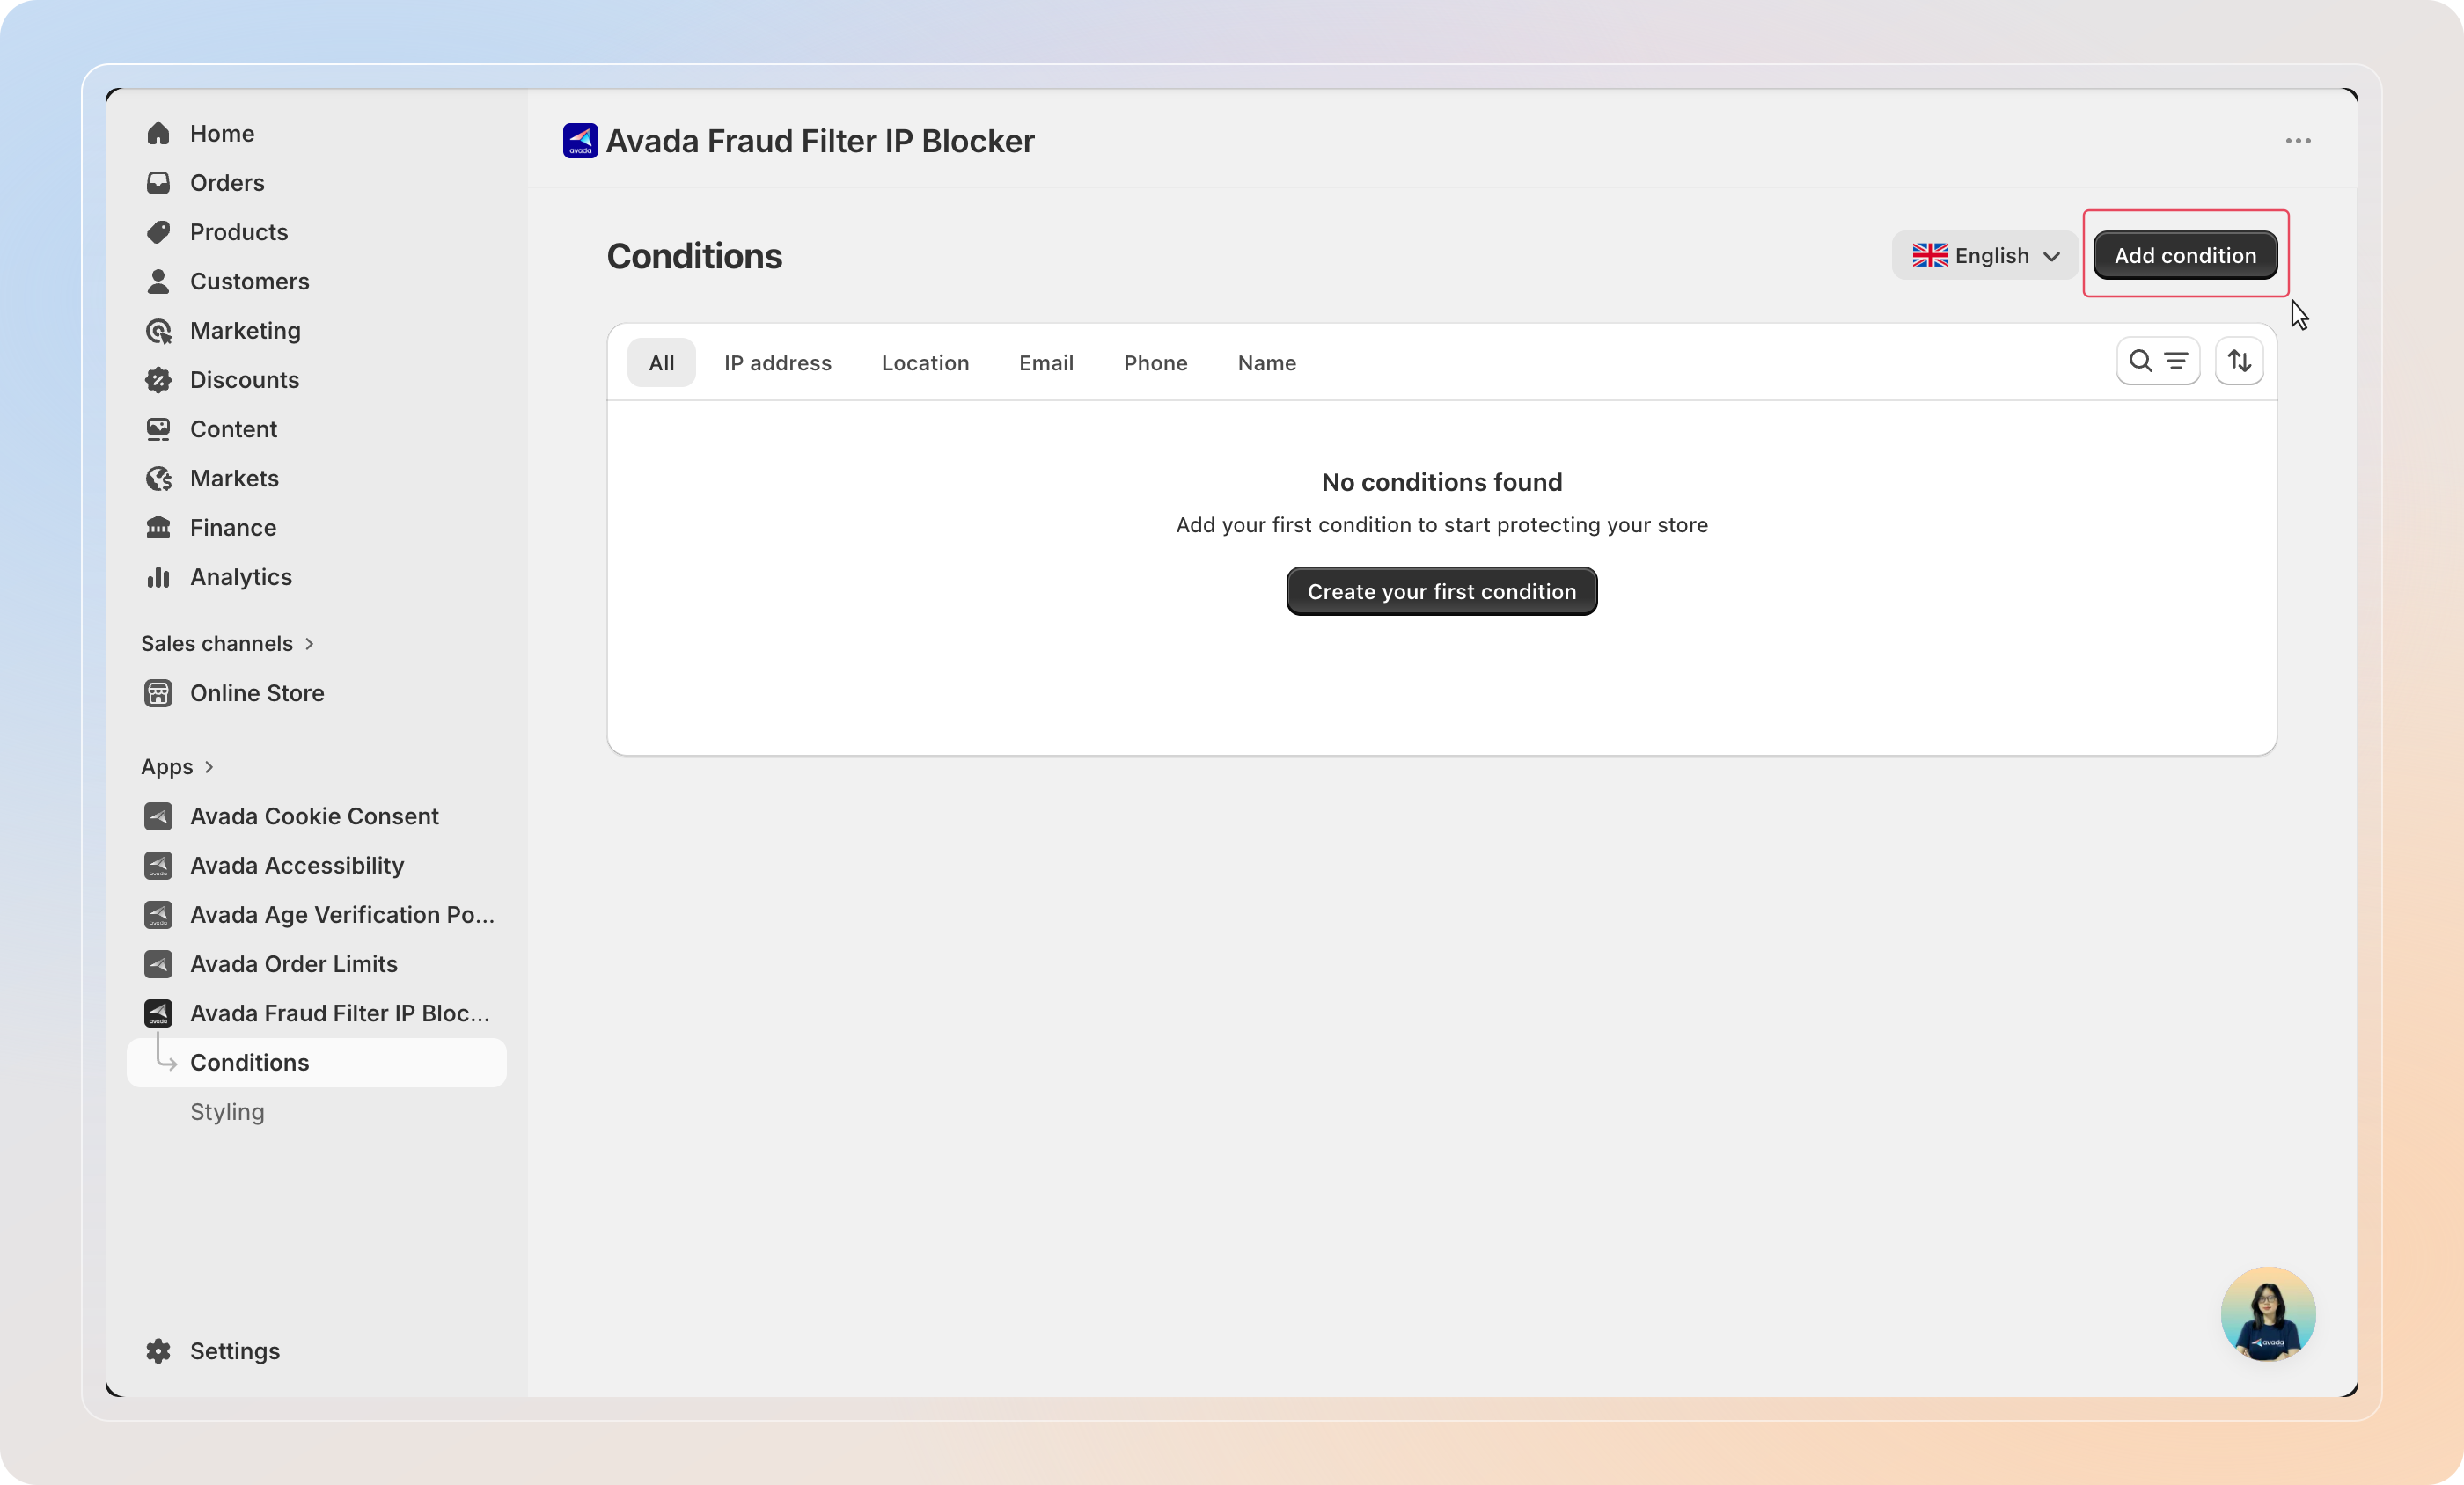
Click Add condition in the top right.
This opens the Condition detail page where you configure what to match and what action to take.
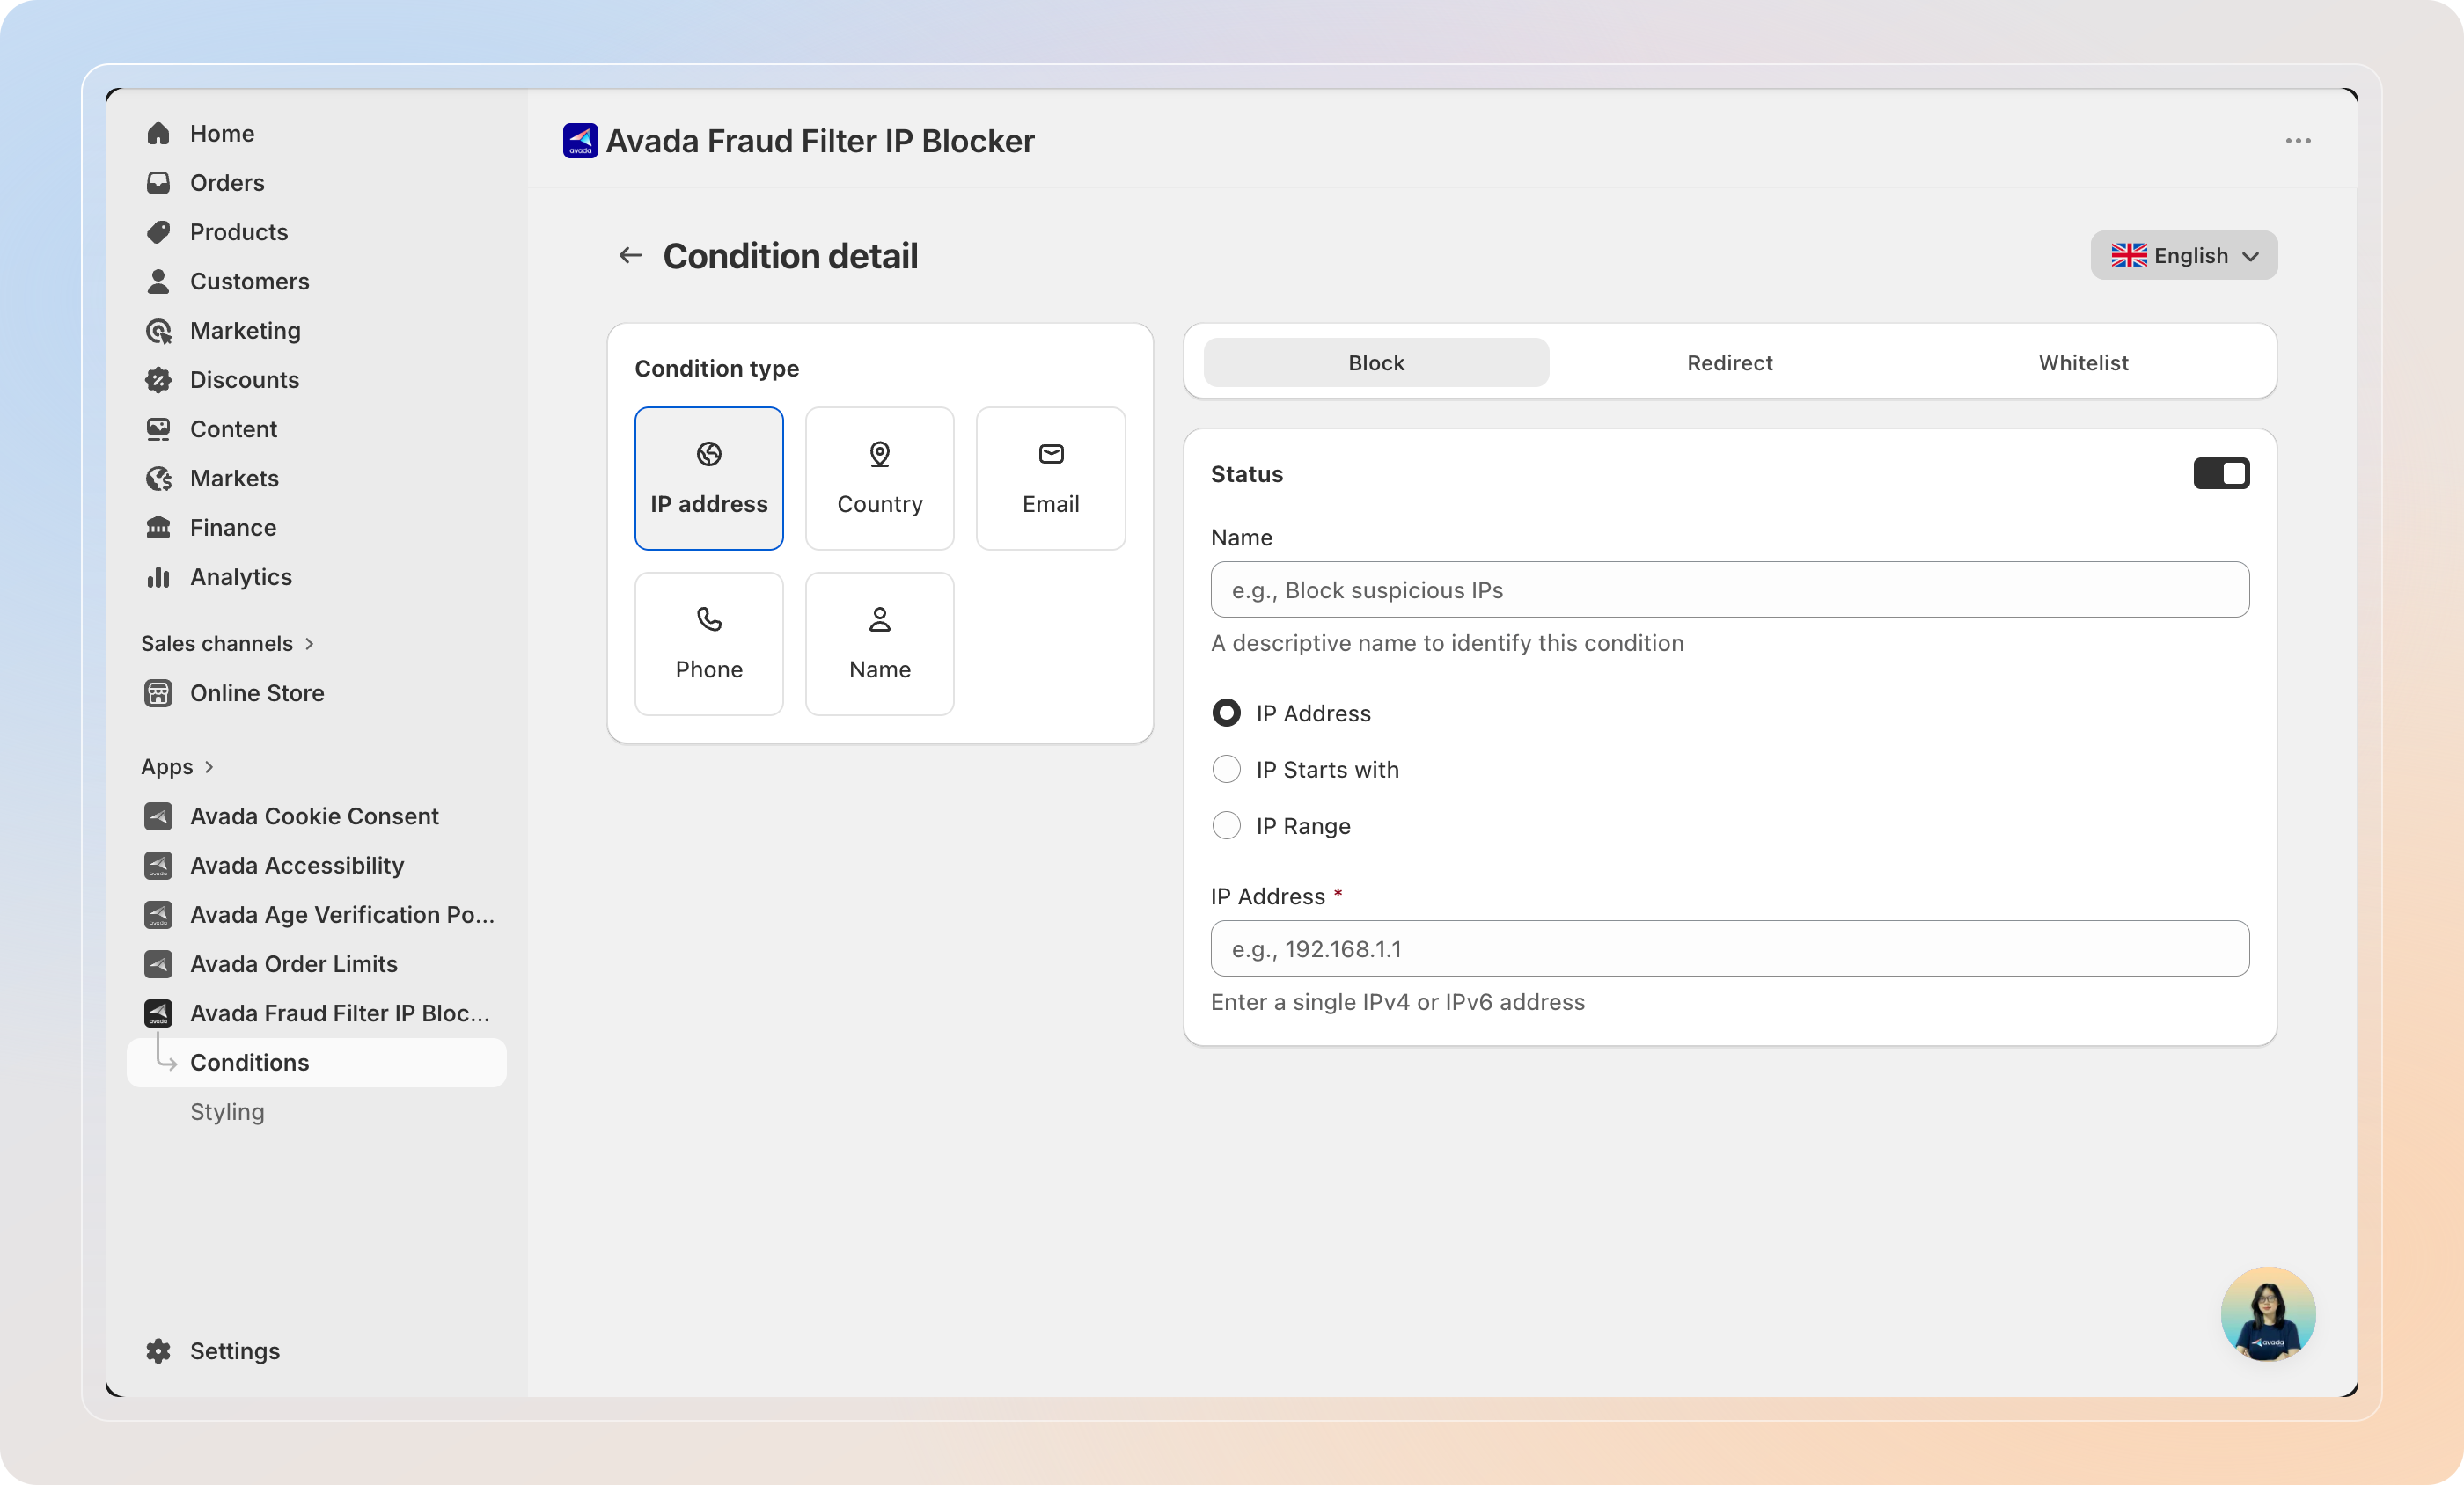
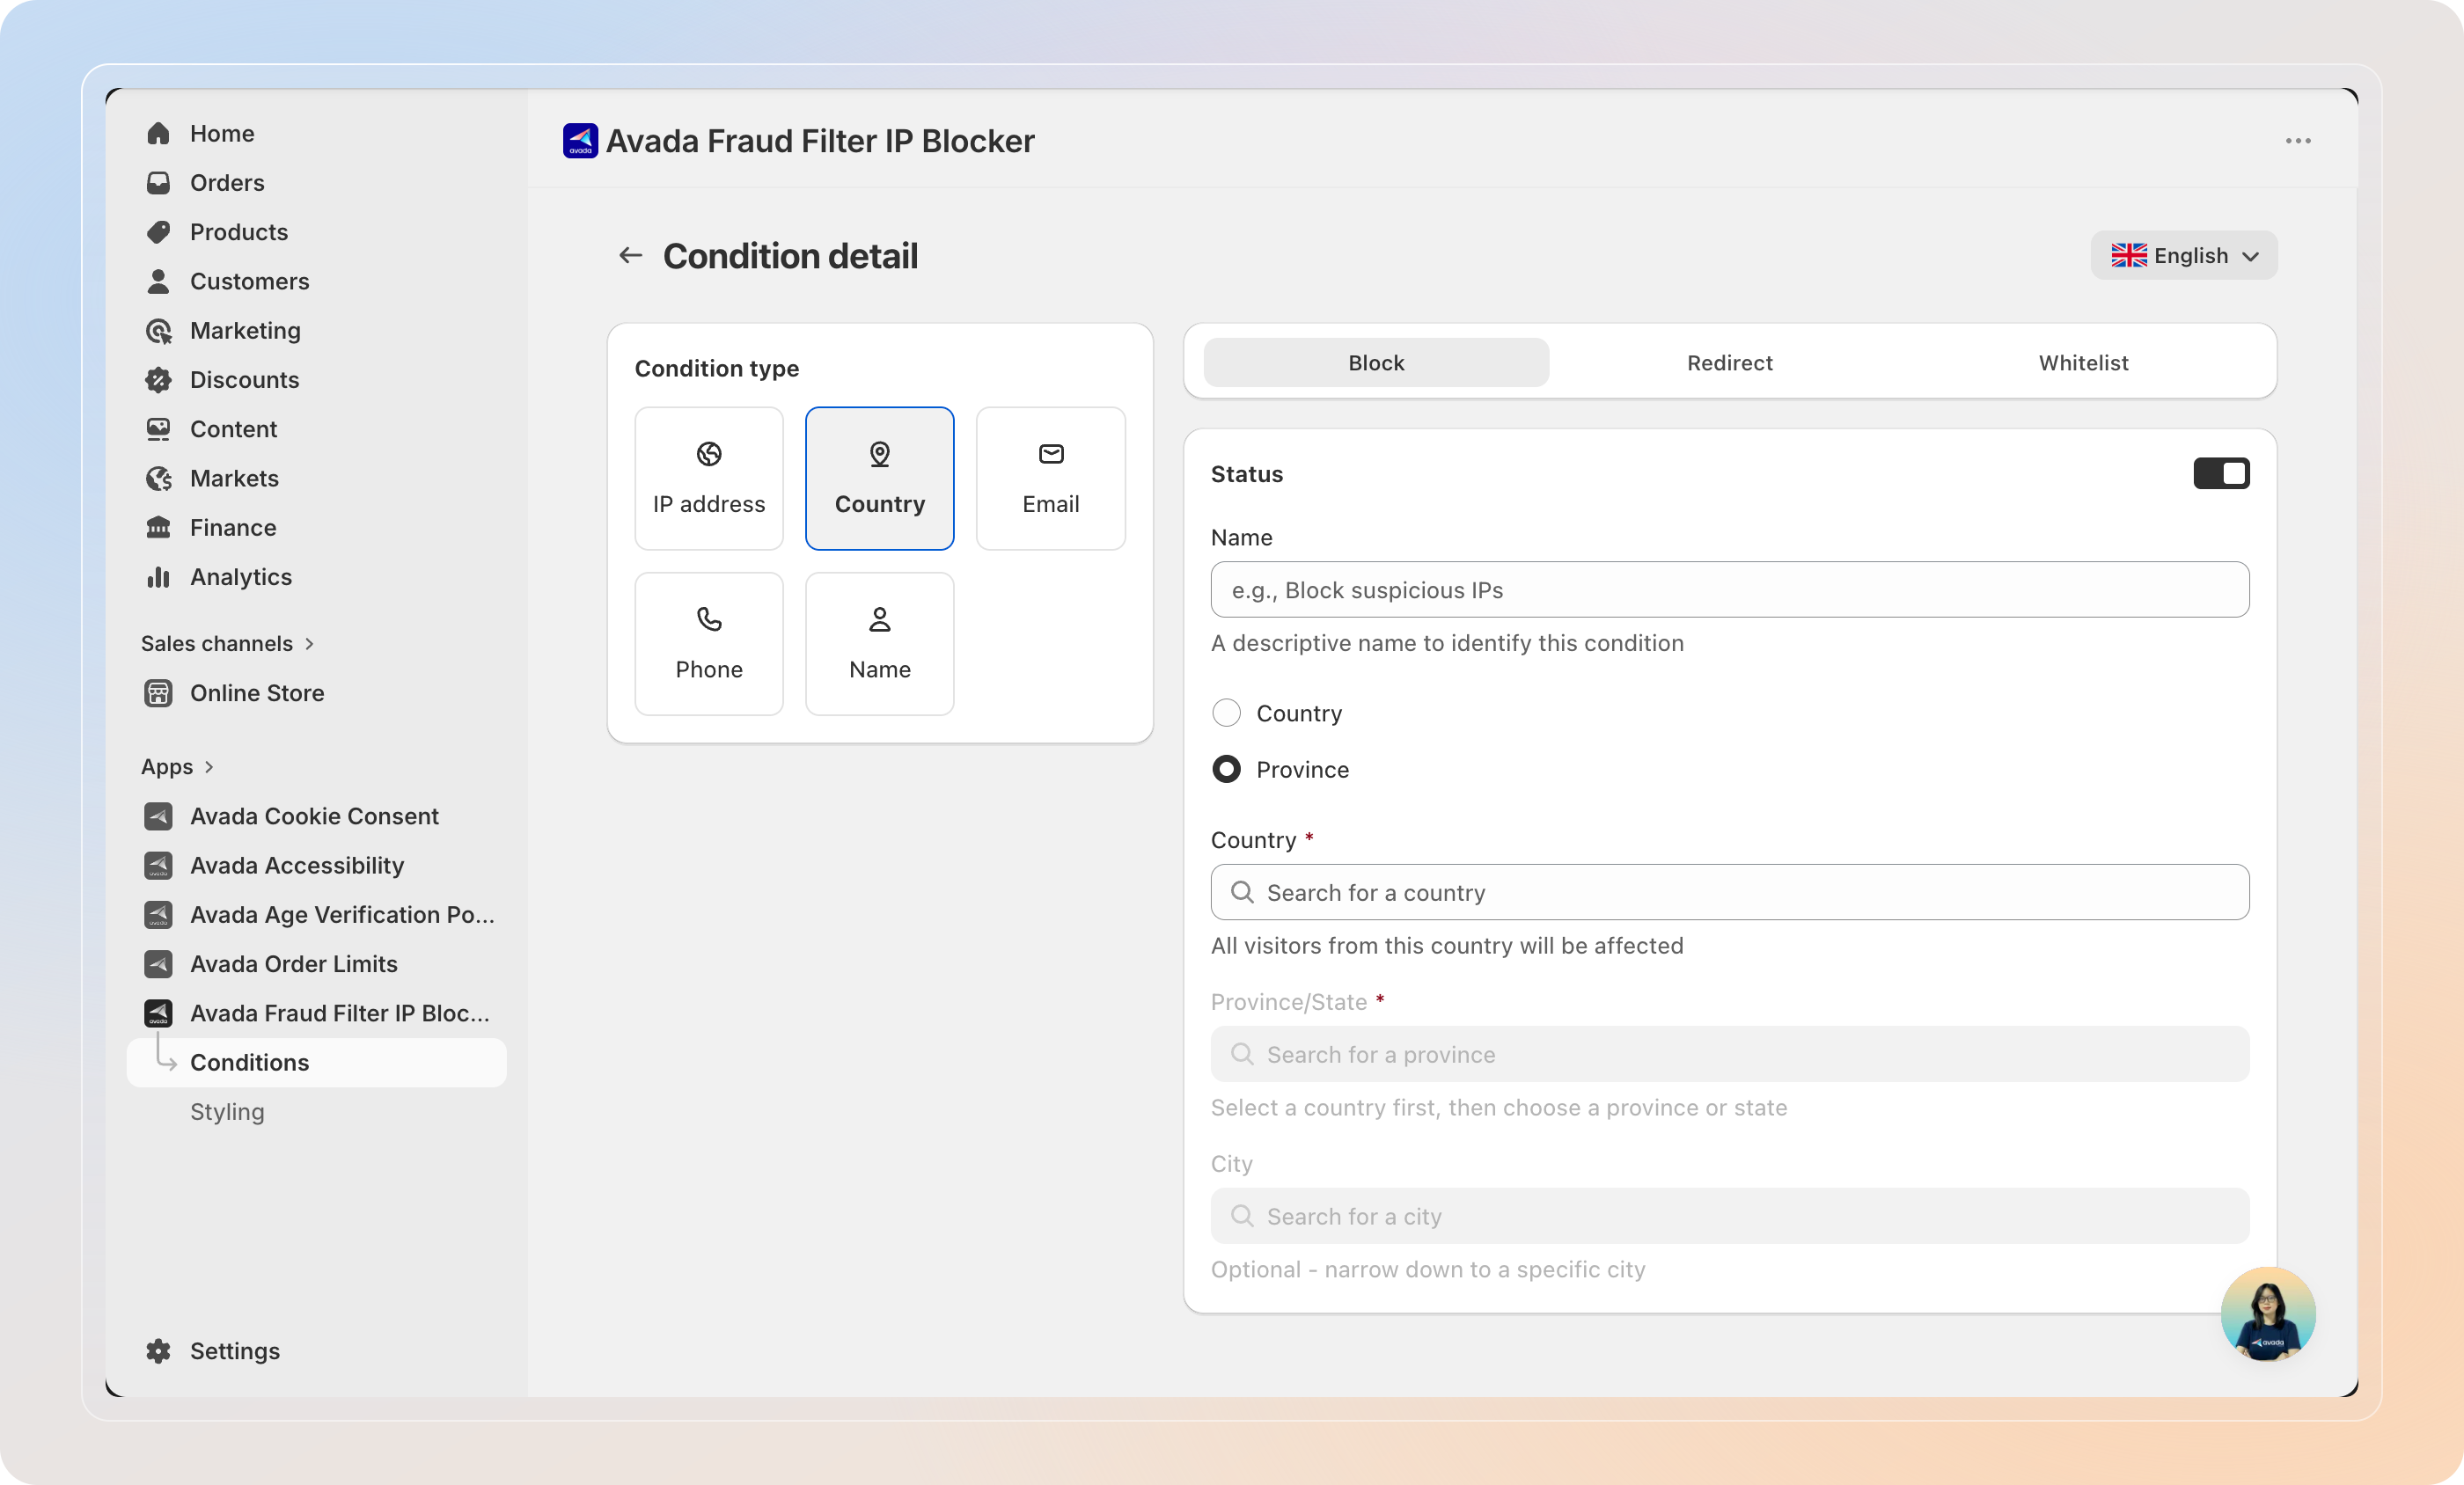
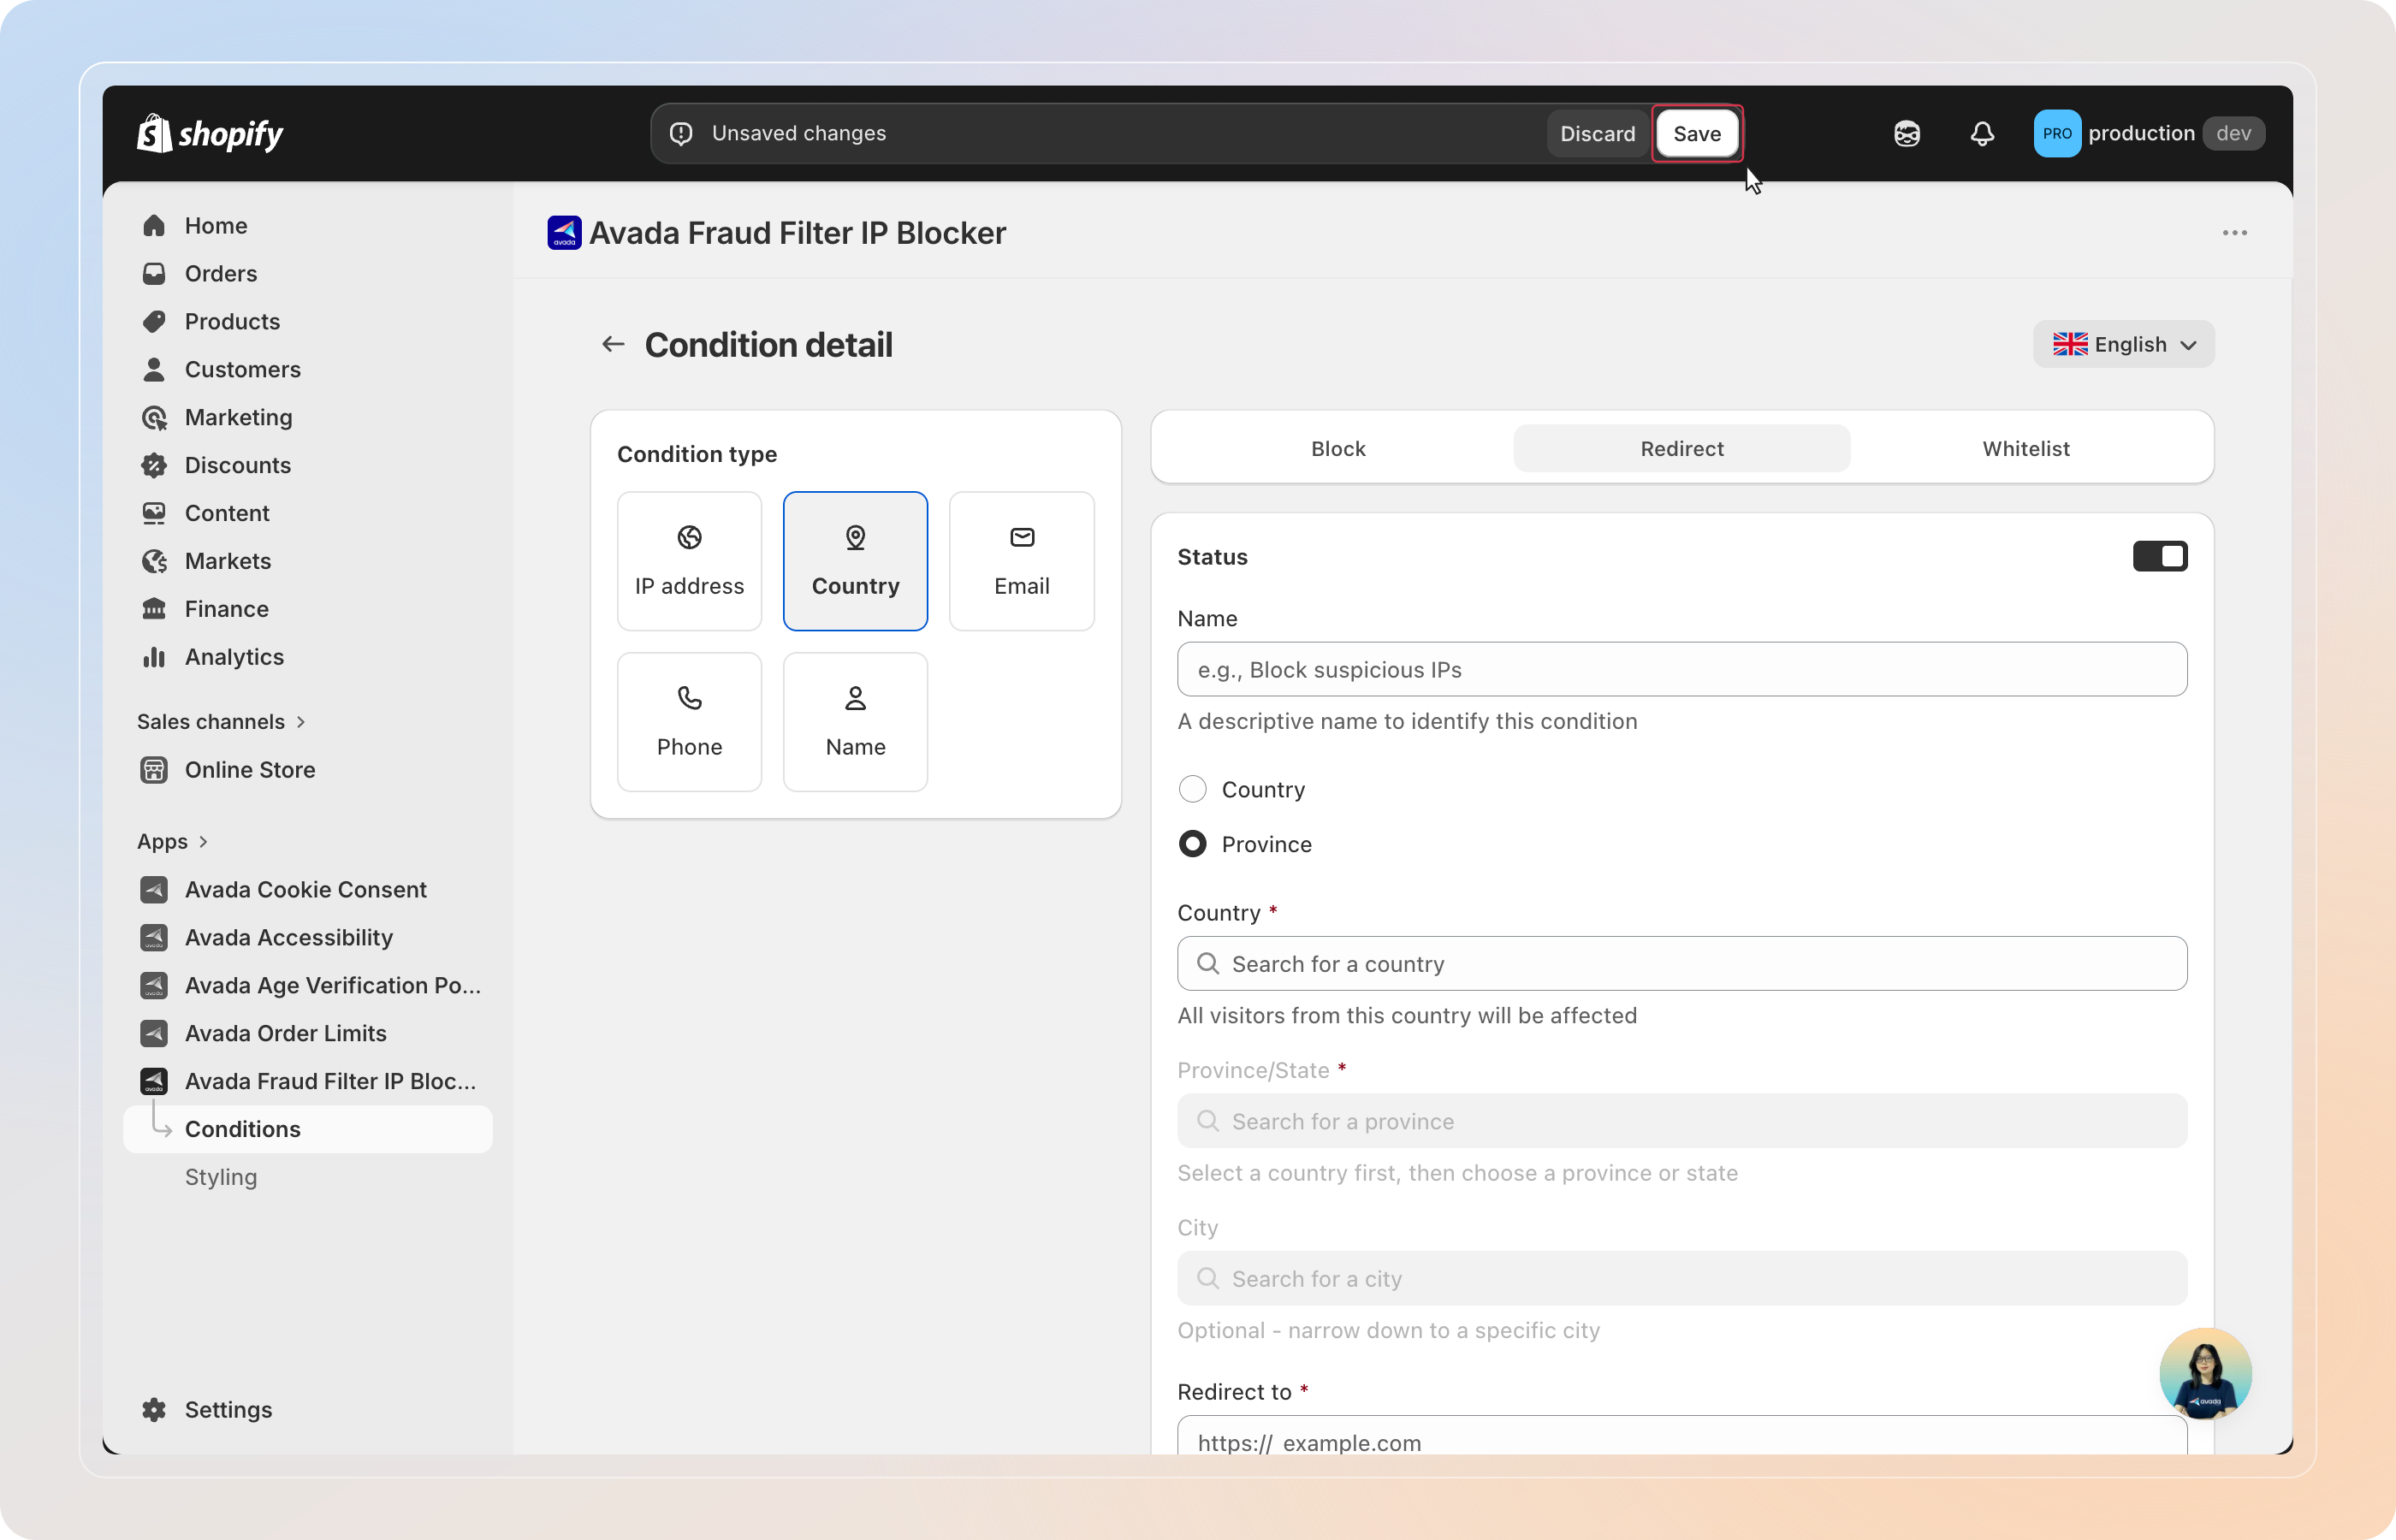
Choose a Condition Type
In the Condition type panel on the left, select the type of visitor data to match:
| Type | What it matches | Block level |
|---|---|---|
| IP address | A specific IP, IP prefix, or IP range | Storefront — blocks all store access |
| Country | A country, state/province, or city | Storefront — blocks all store access |
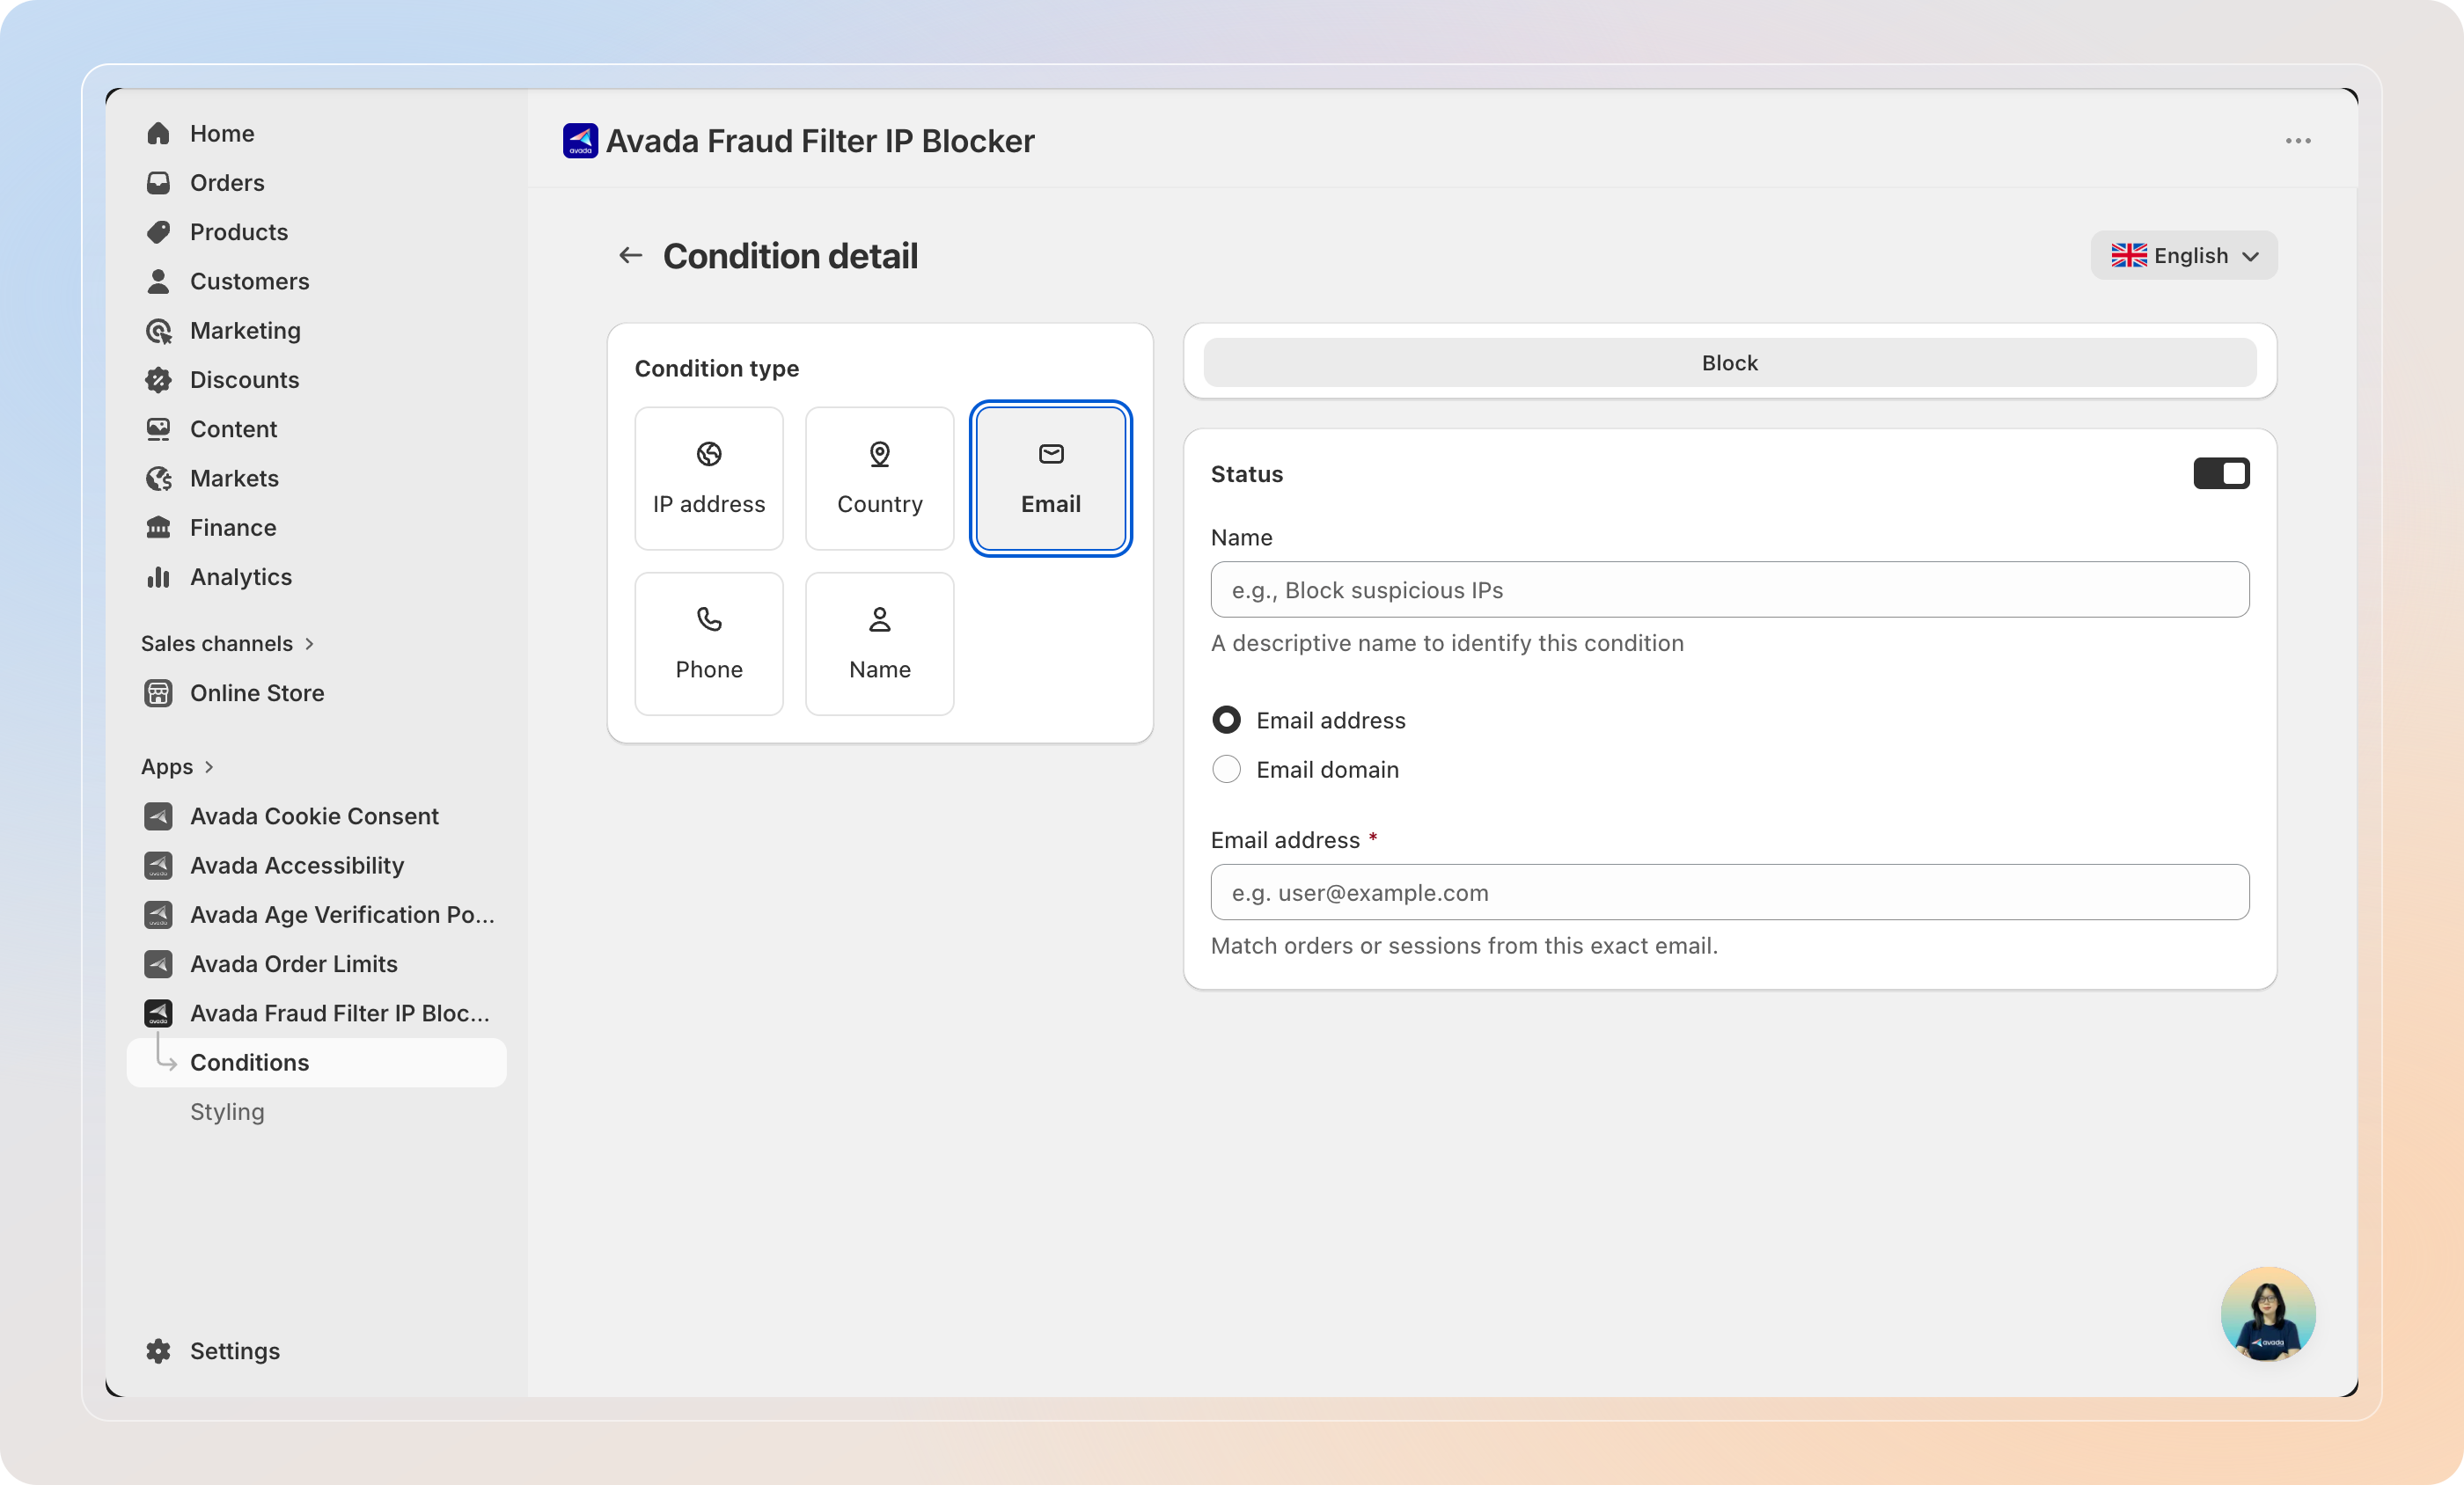
| A customer's email address at checkout | Checkout only — blocks purchase | |
| Phone | A customer's phone number at checkout | Checkout only — blocks purchase |
| Name | A customer's name at checkout | Checkout only — blocks purchase |
Email, Phone, and Name conditions apply at checkout only. For storefront-level blocking, use IP address or Country.
IP address
- IP Address — enter a single IPv4 or IPv6 address (e.g.,
192.168.1.1) - IP Starts with — enter a prefix to block all IPs beginning with that string (e.g.,
192.168.) - IP Range — enter a start and end IP to block an entire subnet
Country
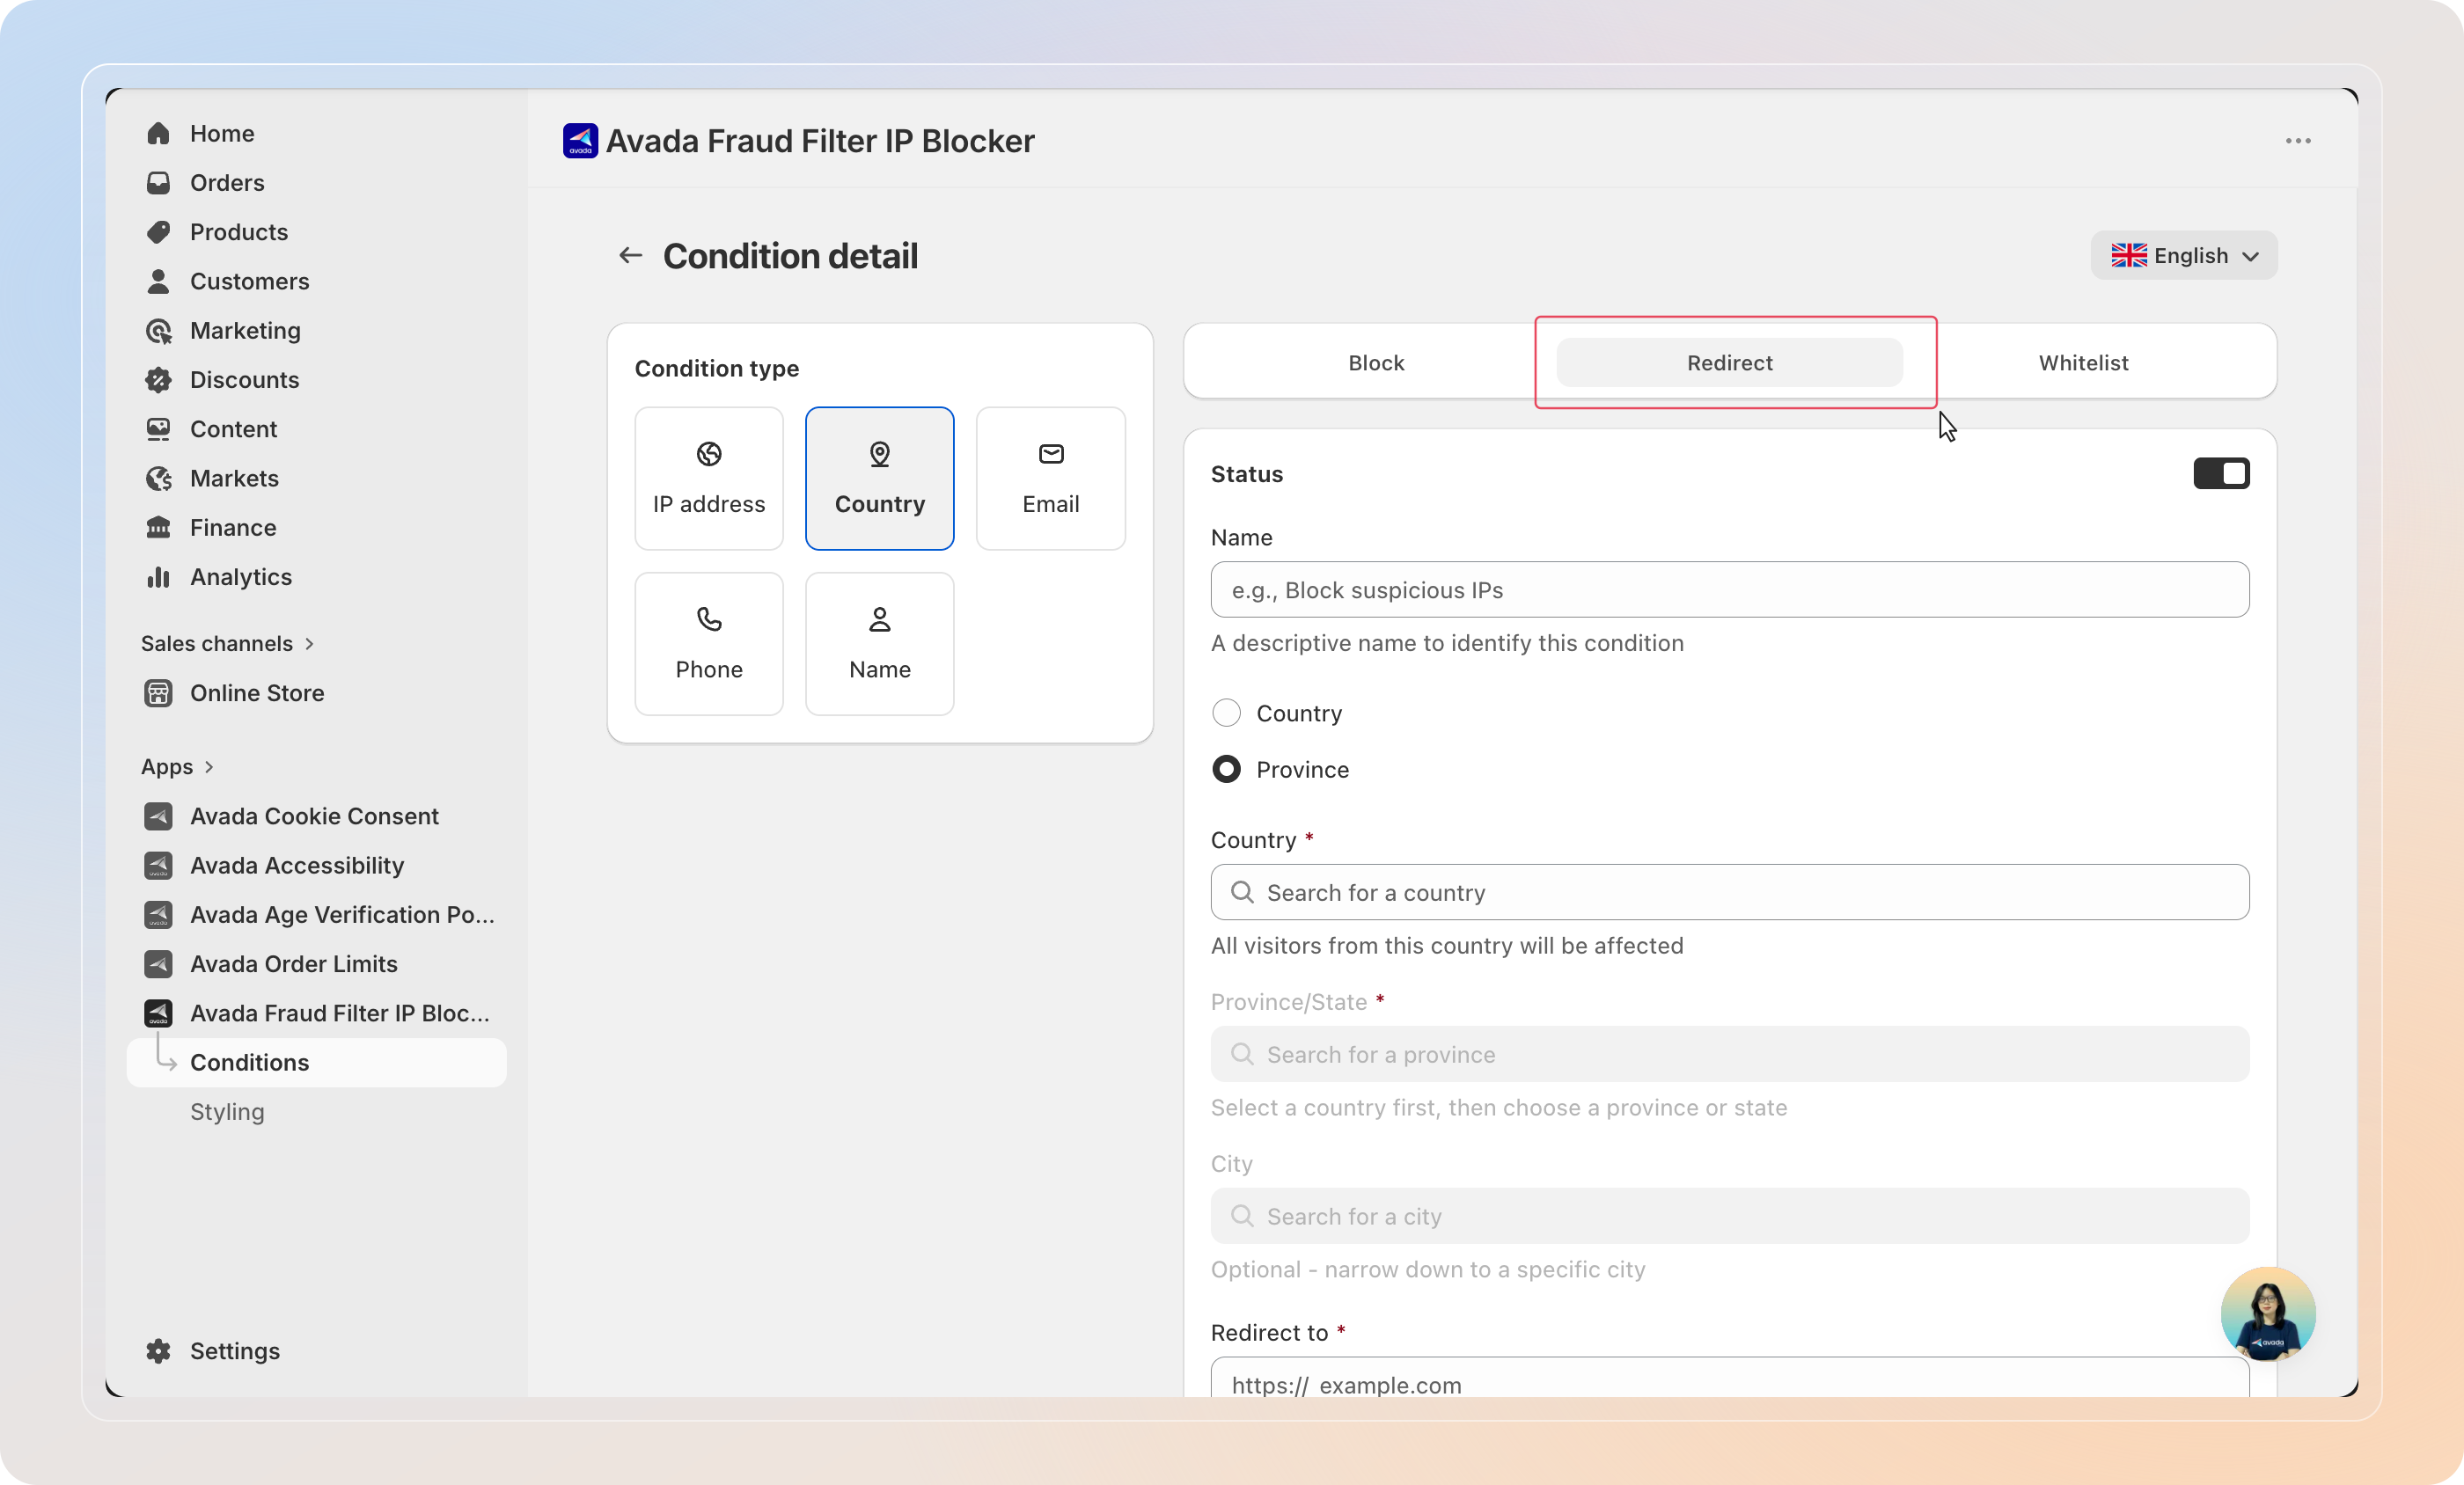
Select Country to block all visitors from a specific country, or Province to narrow it to a state/province and optionally a city.
Block customers at checkout by exact email address or by email domain (e.g., block all @domain.com addresses).
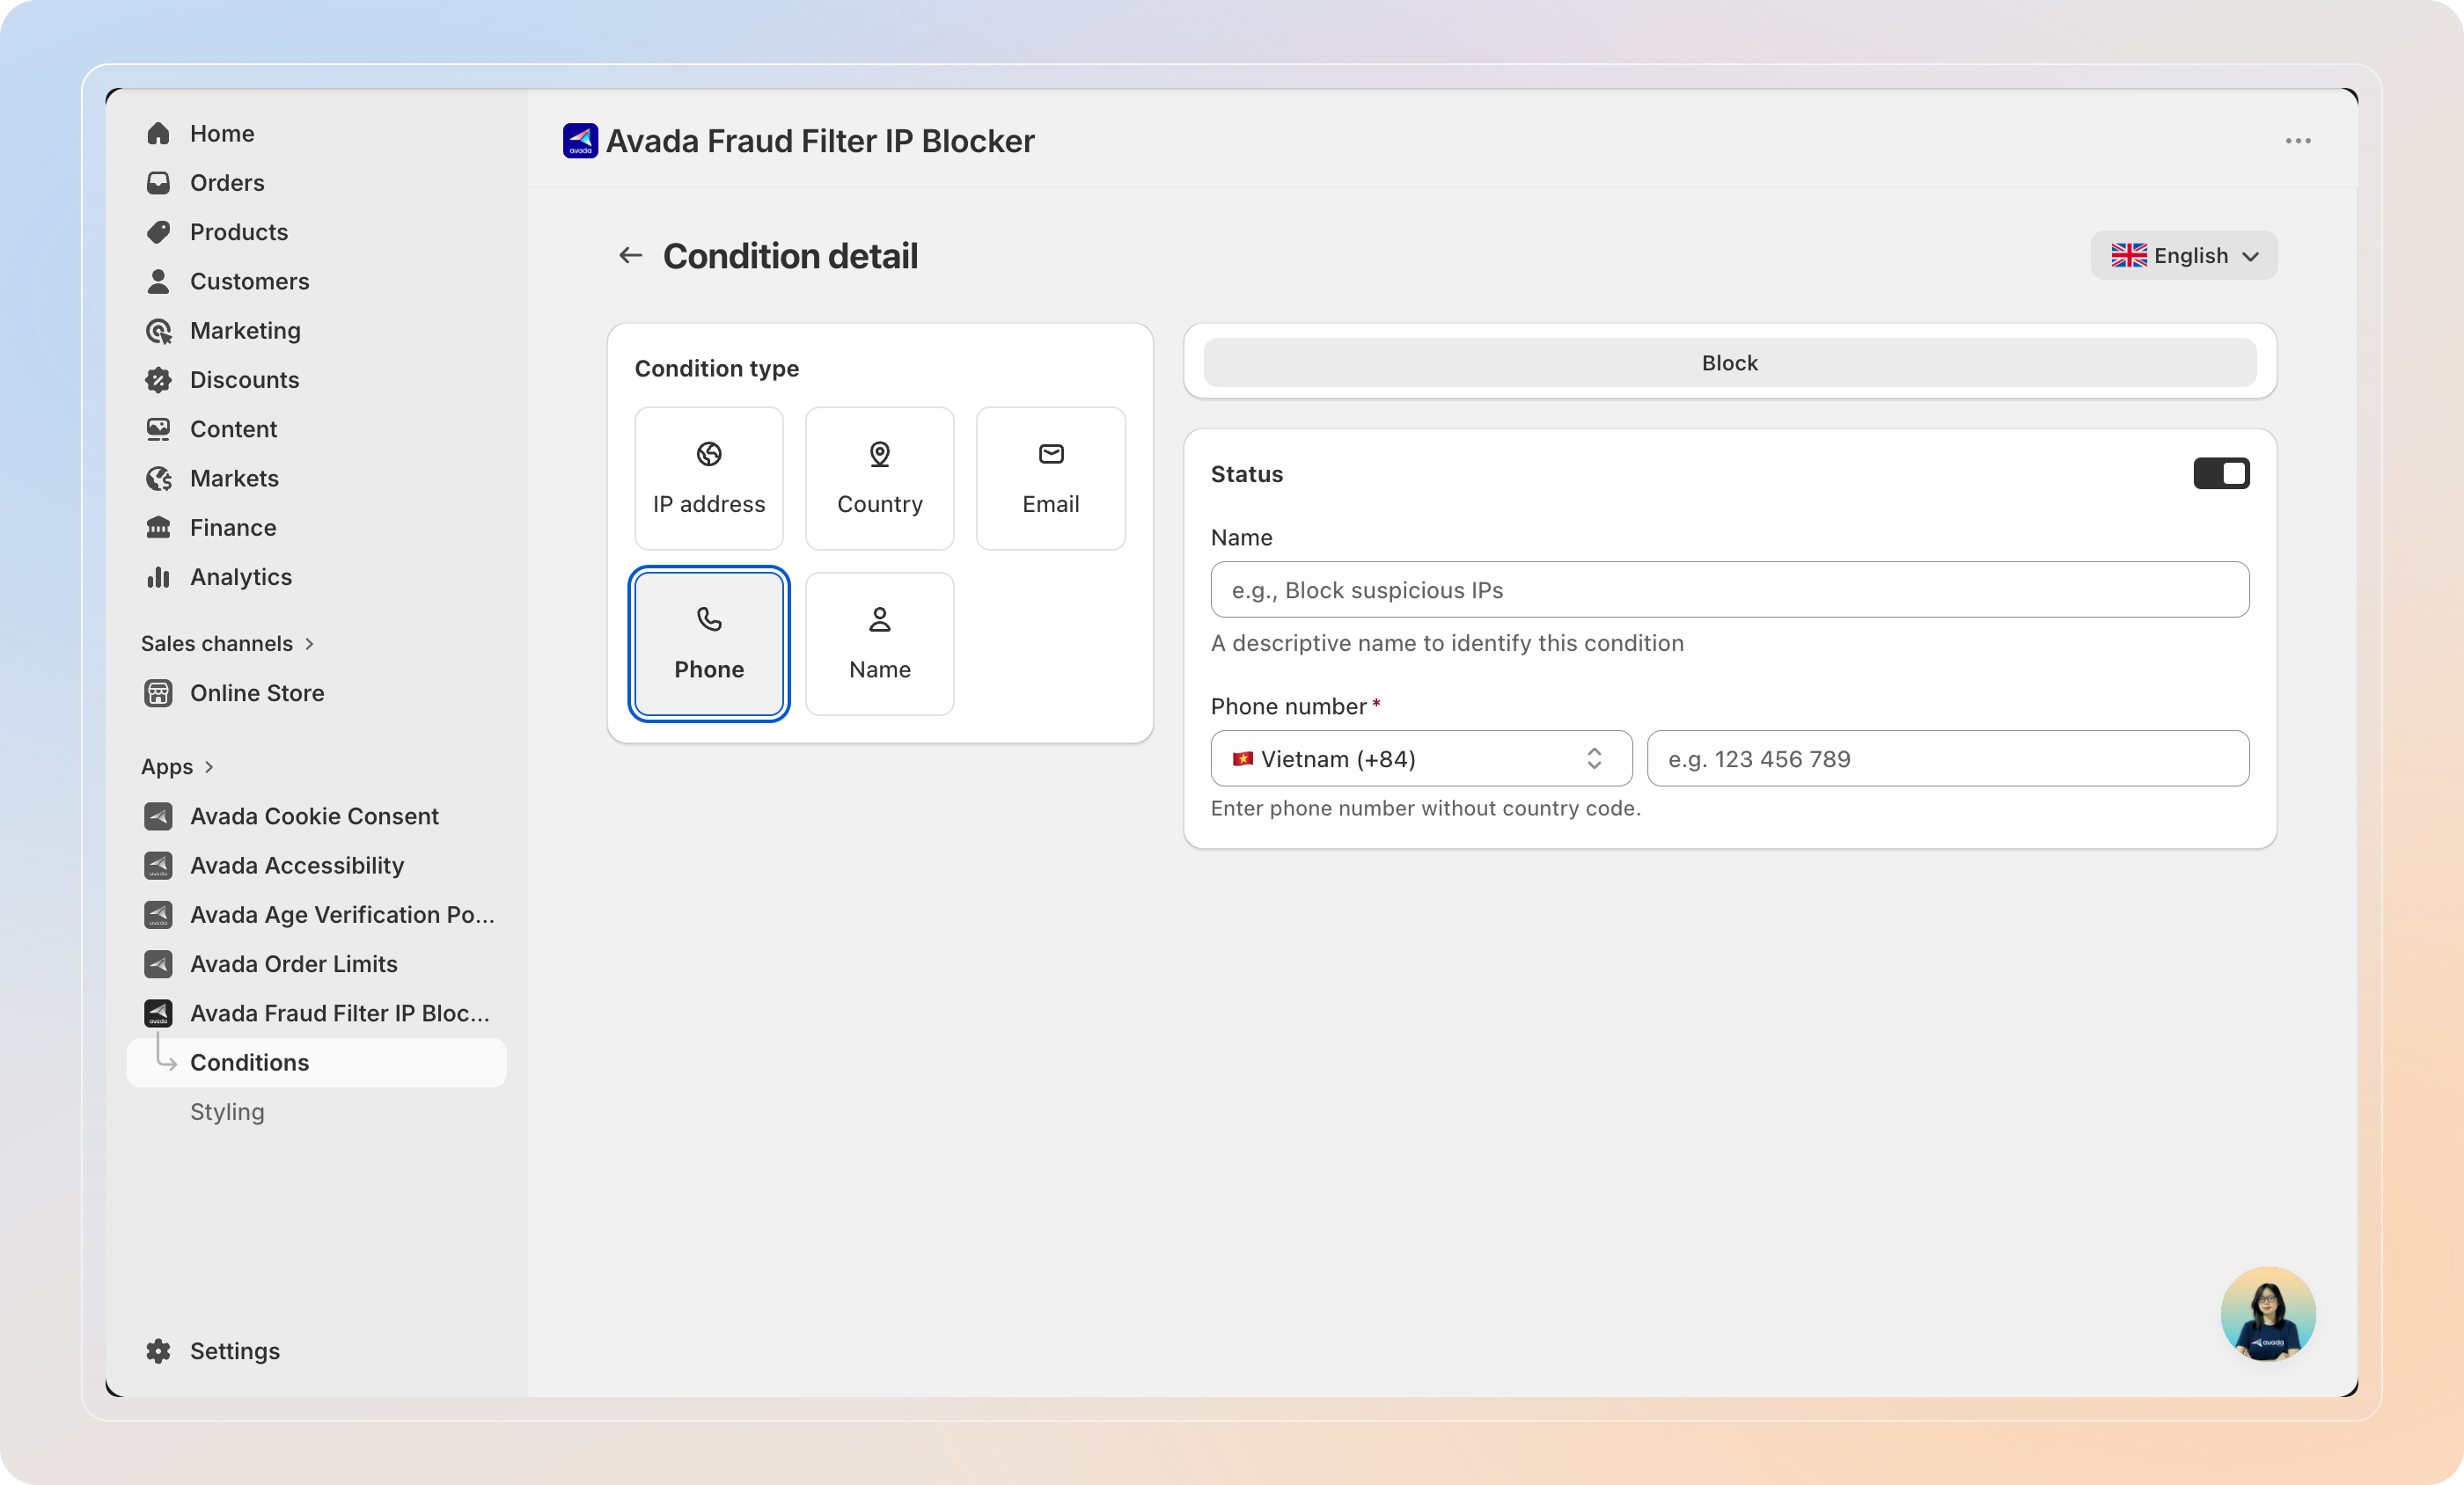
Phone
Block customers at checkout by phone number. Select the country code and enter the number to block.
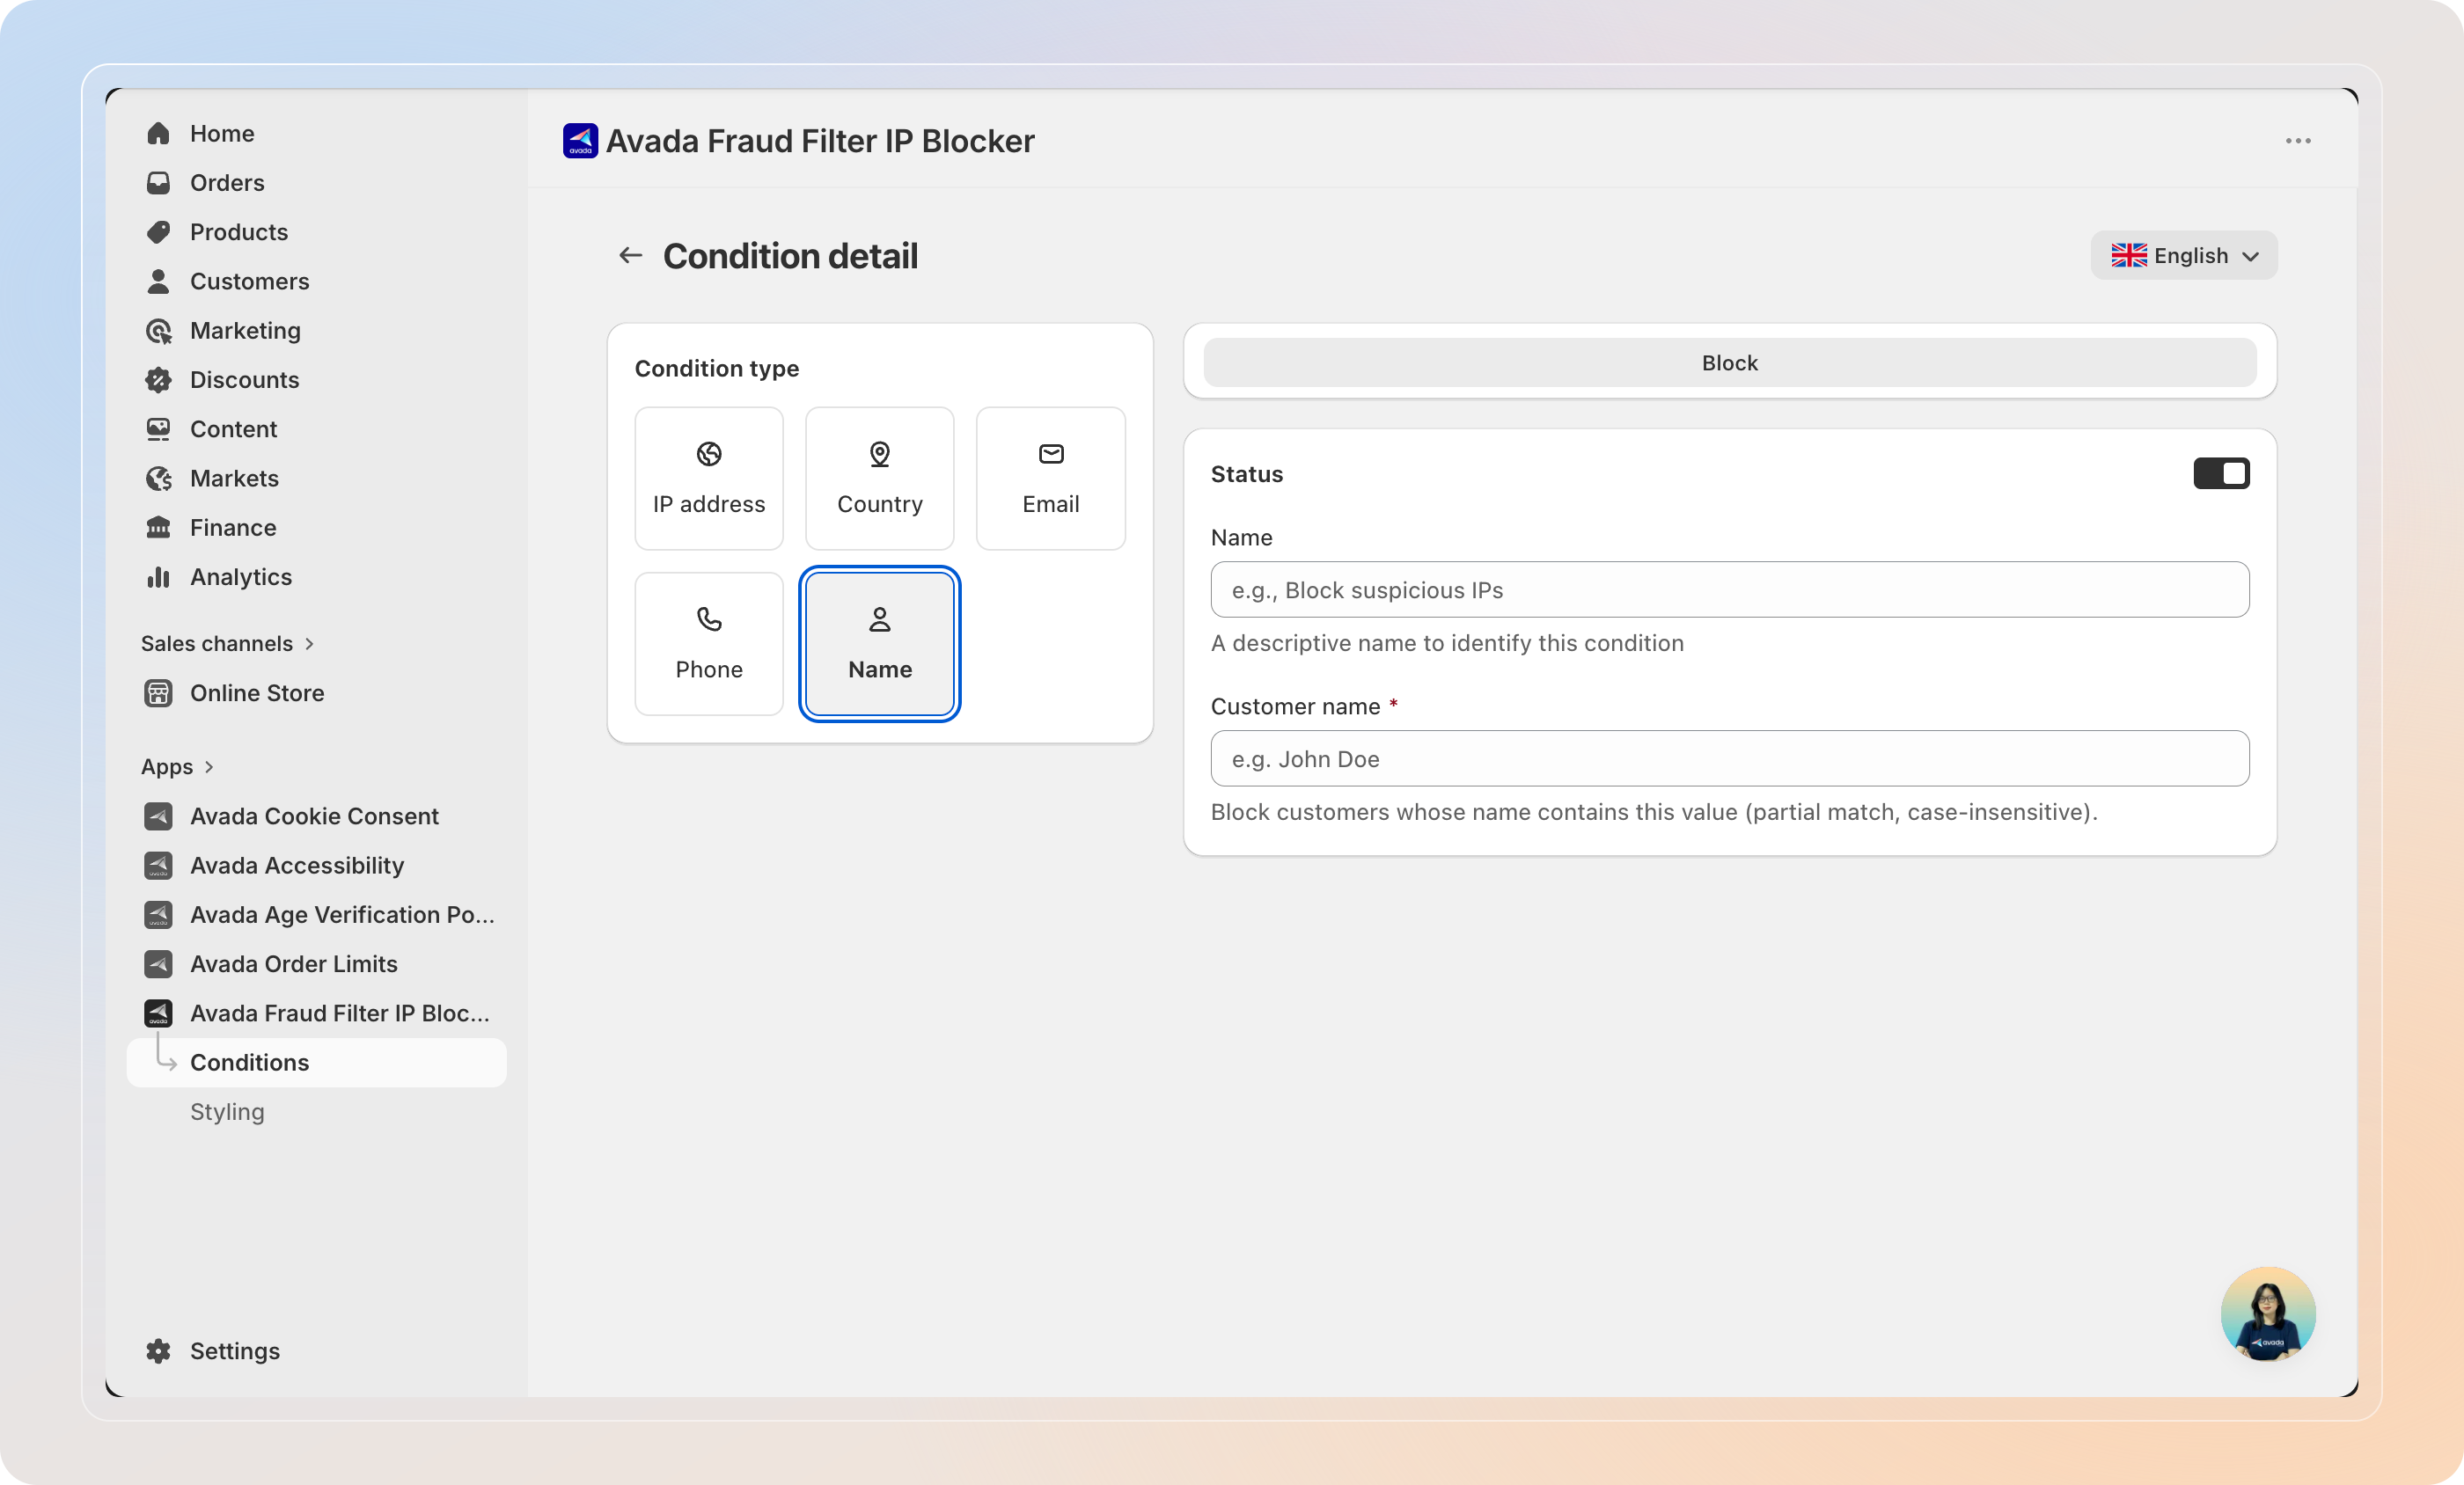
Name
Block customers at checkout by name. The match is partial and case-insensitive — blocking "John Doe" will match any name containing that value.
Choose an Action
At the top right of the form, select the action tab:
| Action | What happens |
|---|---|
| Block | The visitor sees a block page and cannot proceed |
| Redirect | The visitor is immediately sent to a URL you specify |
| Whitelist | The visitor bypasses all blocking conditions — use this for trusted IPs |
If you select Redirect, enter the destination URL in the Redirect to field (e.g., https://example.com).
Tip: Use Redirect to send blocked visitors to a custom page explaining why access is restricted, rather than showing a generic block screen.
Save the Condition
Optionally, enter a descriptive Name (e.g., Block suspicious IPs or Redirect California traffic) to help you identify the condition in the list.
The Status toggle is on by default — leave it on to apply the condition immediately.
Click Save in the top bar.
Manage Your Conditions
From the Conditions list you can update or remove any condition:
- Click a condition name to open and edit it.
- To delete one or more conditions, tick their checkboxes and click Delete.
- To pause a condition temporarily, open it and toggle Status off or do it at condition table instead.
Tips
- Filter by type — use the tabs at the top of the Conditions list to quickly find the condition you need.
- Whitelist before you block — create a Whitelist condition for trusted IPs first. Whitelist conditions always take priority.
- Combine conditions — pair a Country block with an IP whitelist to block a region while keeping known trusted addresses.
- Avoid locking yourself out — if you enter an IP matching your own, the app shows a warning before saving.
And there you have it! You've successfully created a condition to block or redirect visitors. The condition applies to all incoming traffic in real time.
If you have any questions or run into any issues, don't hesitate to reach out. We're here to help!