MCP Server
Who can use this feature?
This feature is currently in review — contact the Blocko support team to request access.
ℹ️ Info
This feature is available for All Users but requires CLAUDE PRO & ABOVE
What is Blocko AI?
Blocko MCP Server lets you connect your store directly to Claude (claude.ai), giving Claude access to Blocko's section-building tools. Once connected, you can create, edit, and publish Shopify sections through natural conversation in Claude — no manual coding required.
Try it in action
MCP connector
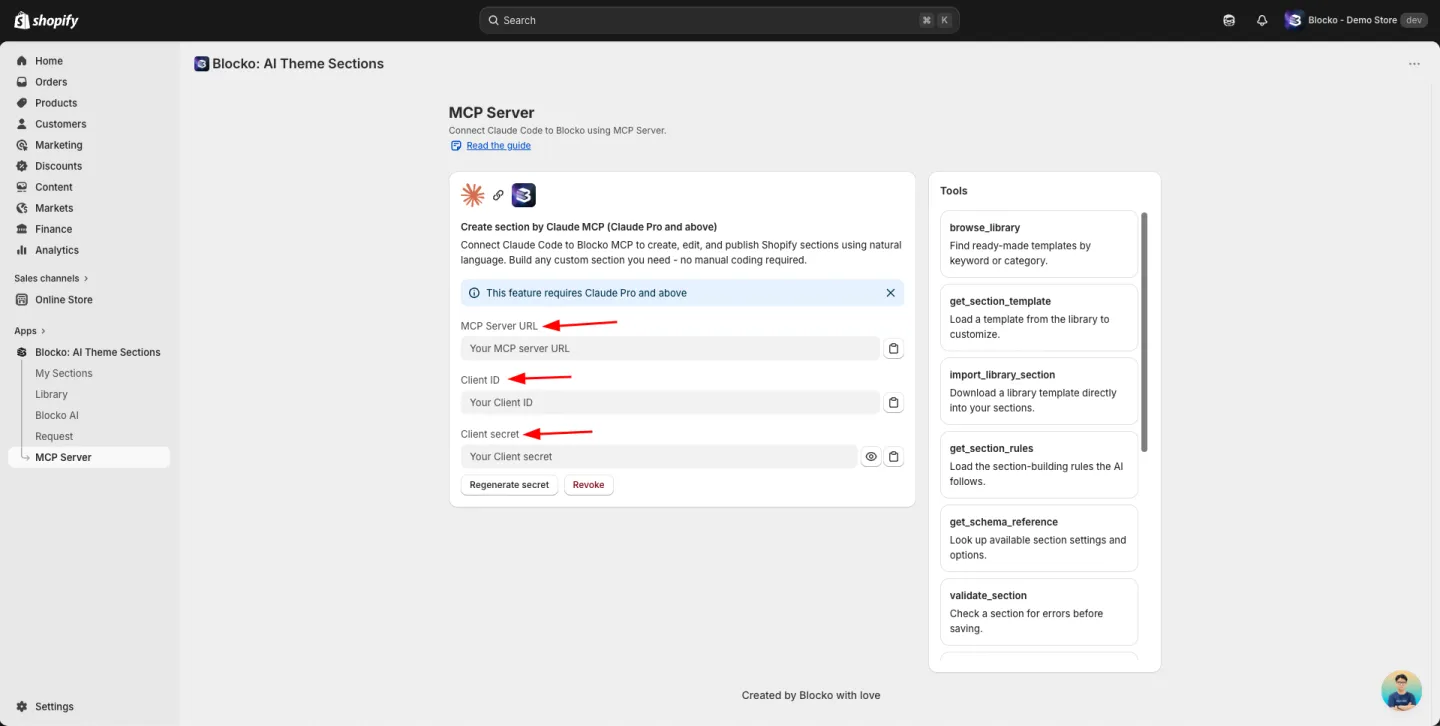
Get your MCP credentials from Blocko
- Open the Blocko app in your Shopify admin.
- Navigate to the MCP Server page.
- You will see your connection credentials:
- MCP Server URL — the endpoint Claude will connect to.
- Client ID — your store's Shopify domain (e.g.,
yourstore.myshopify.com). - Client secret — a generated secret key. Click the copy icon next to each field to copy it.
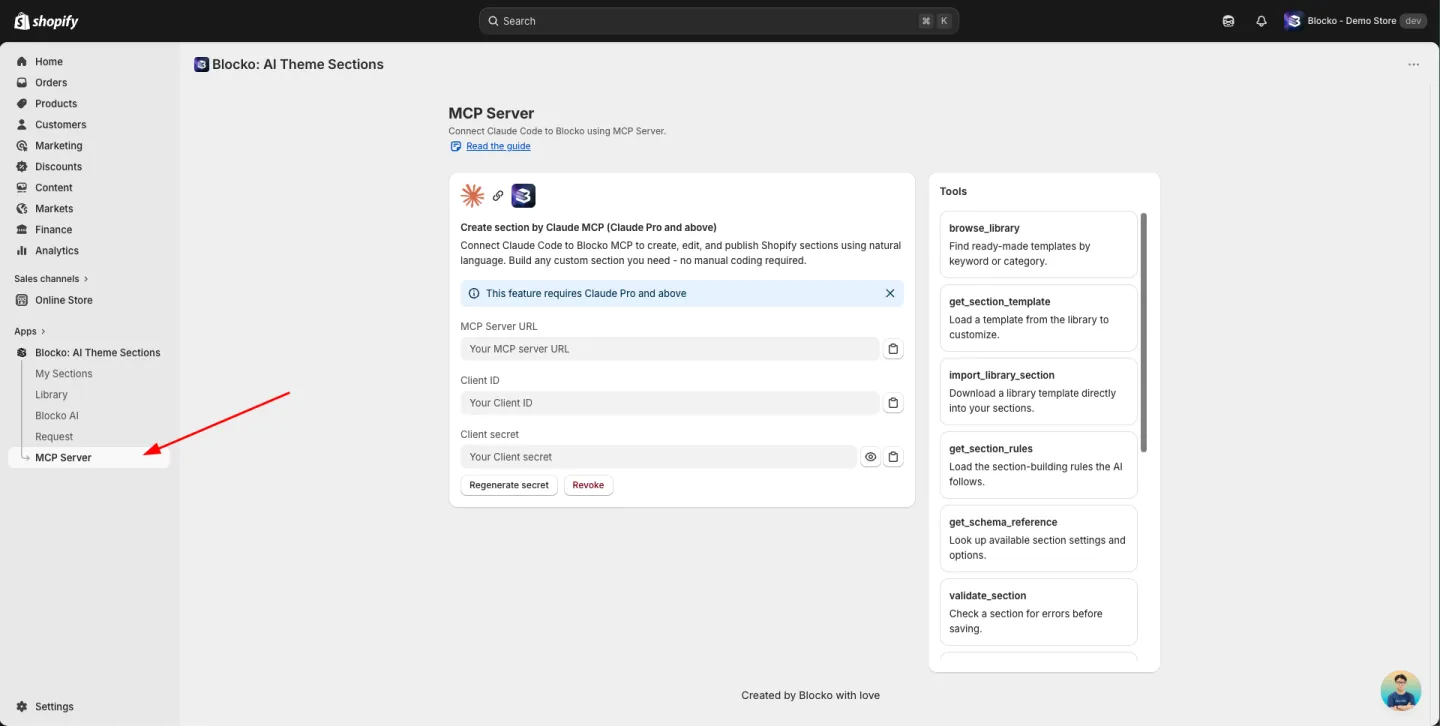
Keep this page open — you will need these three values in the next steps.
Tip: If you ever need to reset your credentials, click Regenerate secret to create a new client secret. The old secret will stop working immediately. Click Revoke to disconnect all active sessions.
Open Connectors in Claude
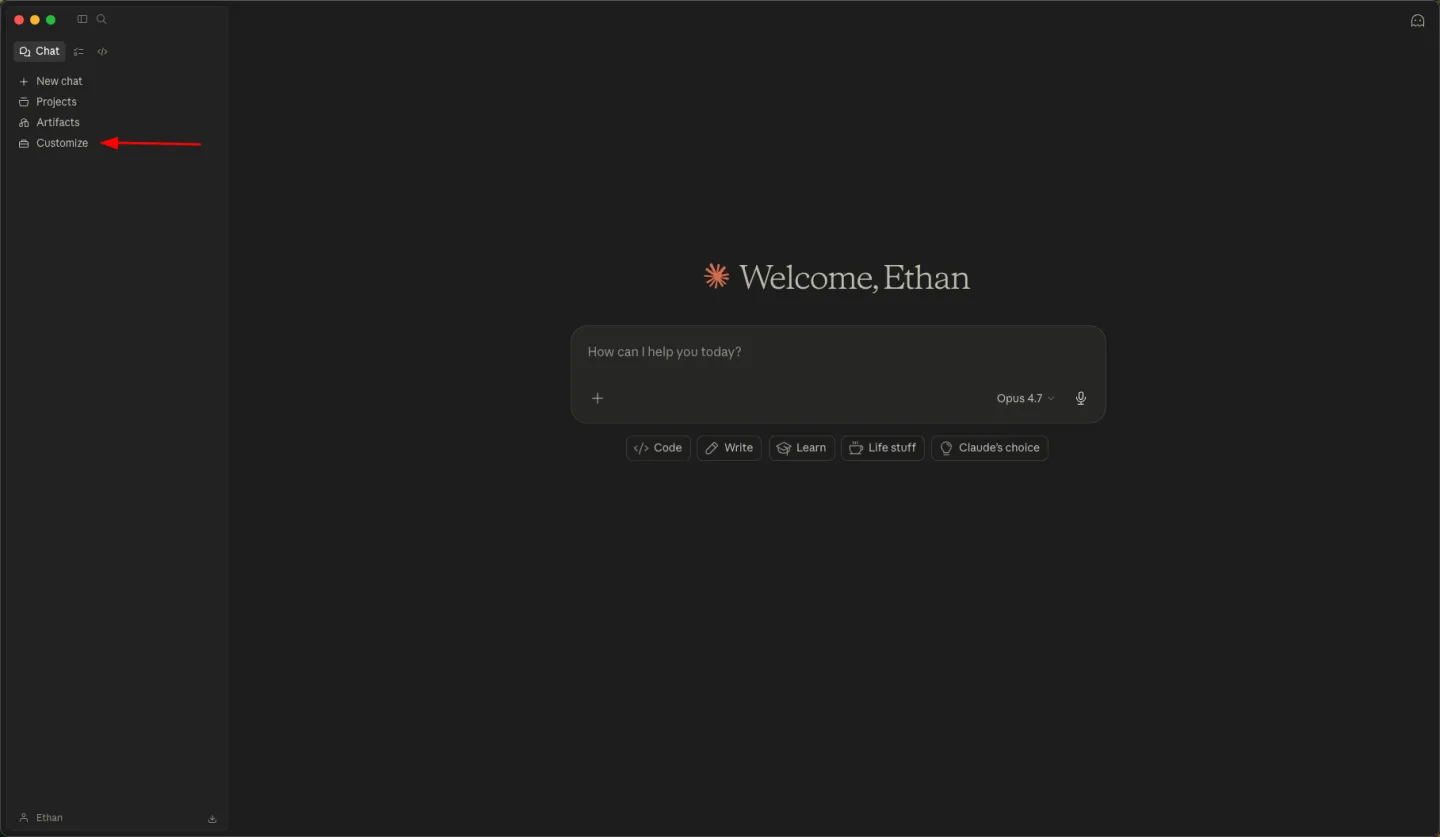
- Go to claude.ai (opens in a new tab) (opens in a new tab) and sign in.
- Click Customize in the bottom-left corner of the sidebar.
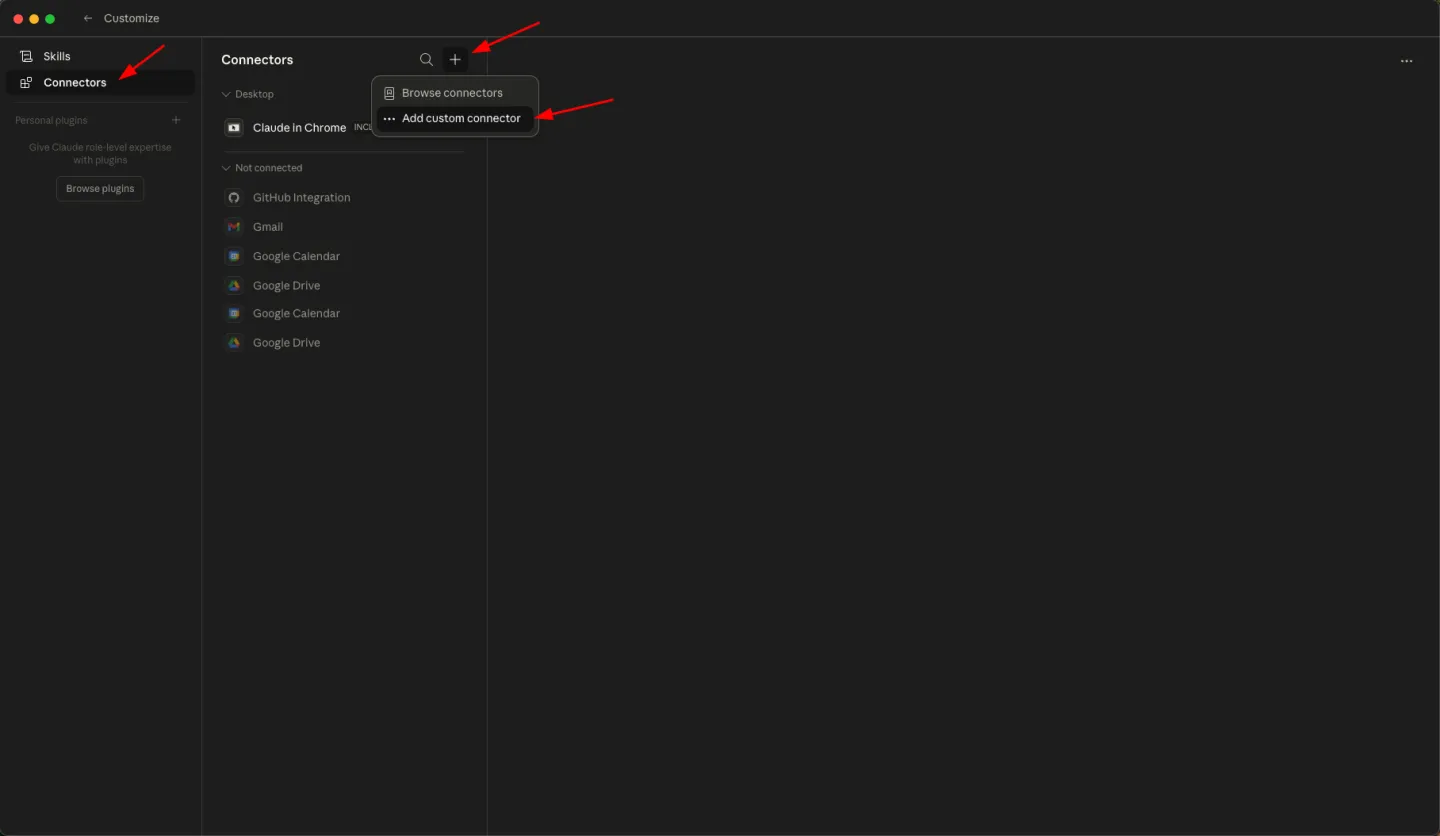
- In the Customize panel, click Connectors in the left menu.
- Click the + button at the top of the Connectors list and select Add custom connector from the dropdown.
Add the Blocko connector
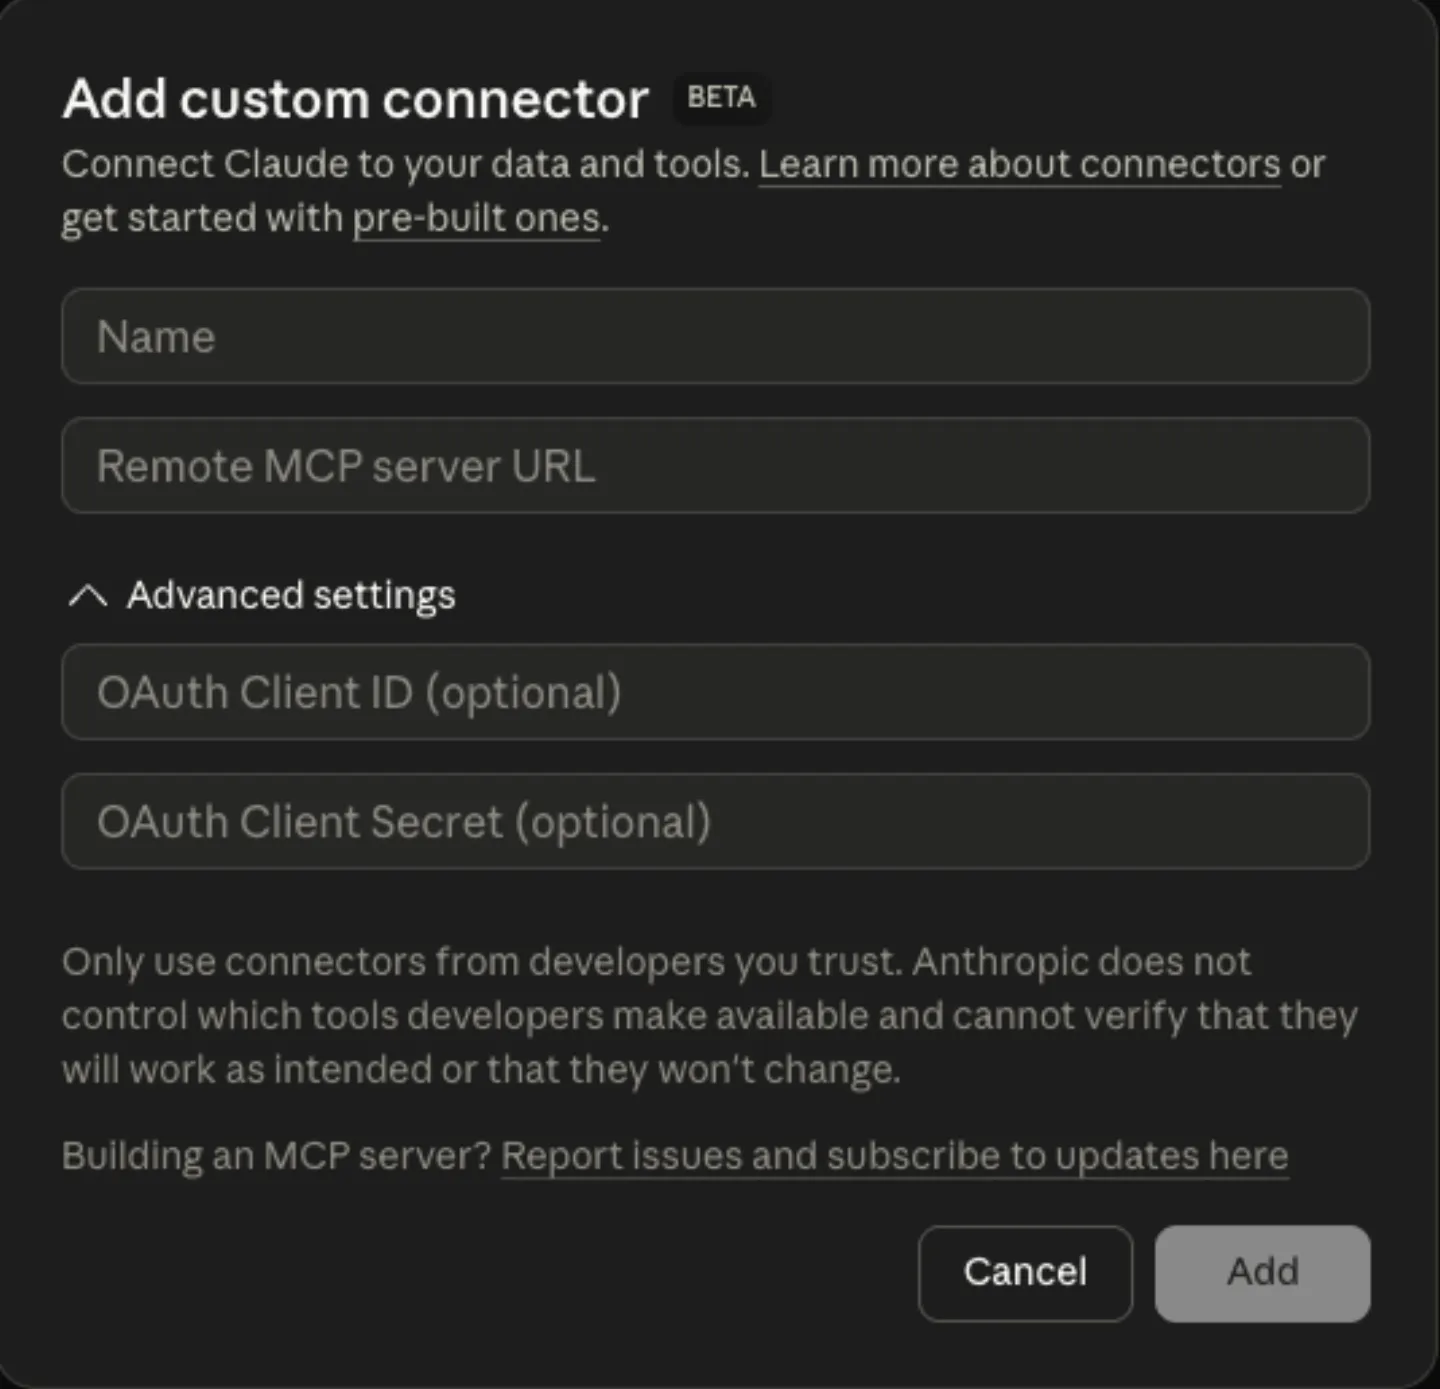
A modal titled "Add custom connector" appears. Fill in the fields:
- Name — enter a name you will recognize (e.g., "Blocko" or your store name).
- Remote MCP server URL — paste the MCP Server URL you copied from Blocko.
- OAuth Client ID — paste the Client ID from Blocko.
- OAuth Client Secret — paste the Client secret from Blocko.
Add Blocko MCP information here
Connect to Blocko
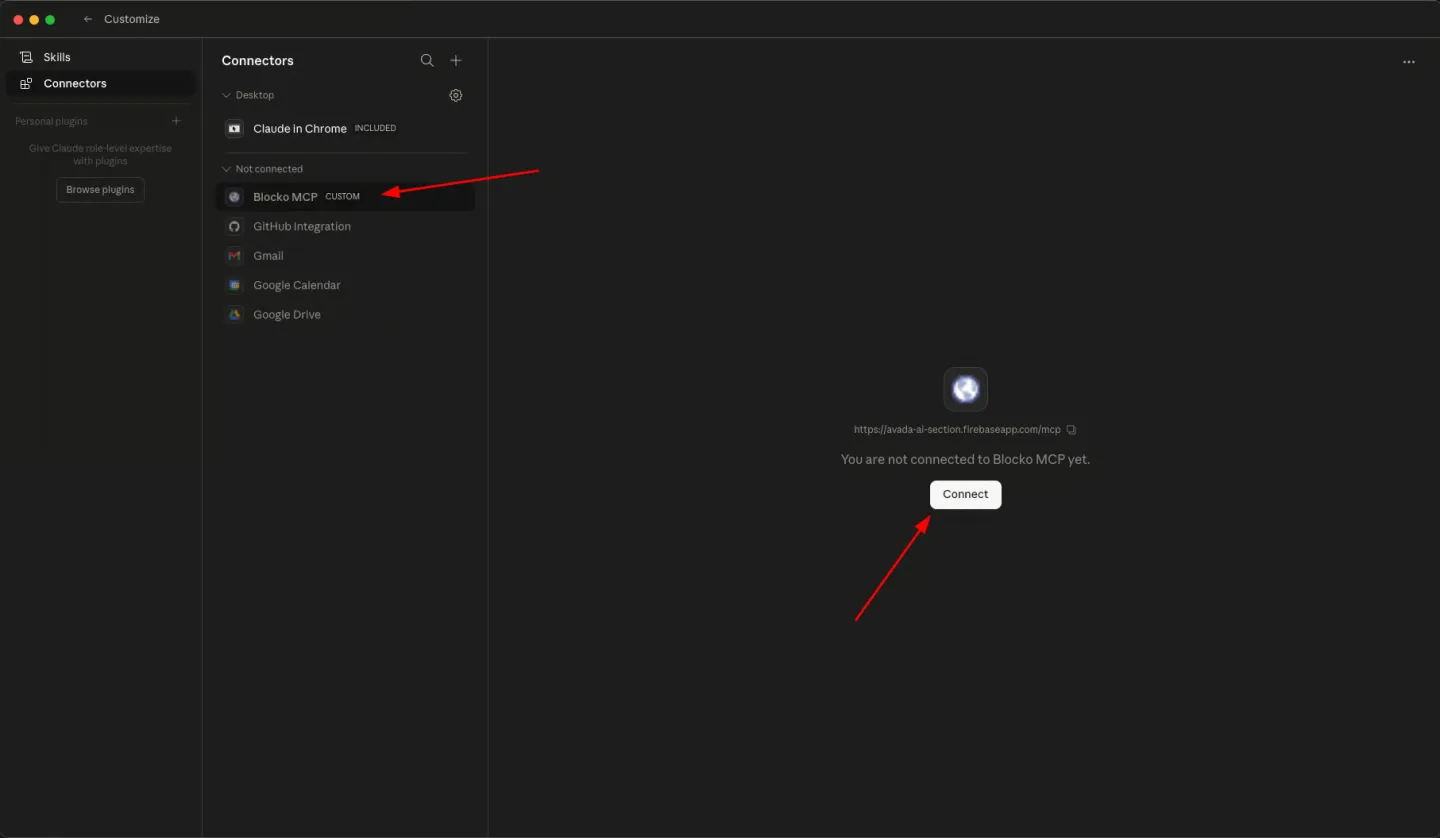
After adding the connector, it appears in your Connectors list under "Not connected".
- Click the connector name you just created.
- On the right panel, you will see "You are not connected to [name] yet."
- Click the Connect button.
- An OAuth authorization window opens. Follow the prompts to authorize the connection.
Once authorized, the status changes to connected and the Disconnect button appears in the top-right corner.
Enable tool permissions
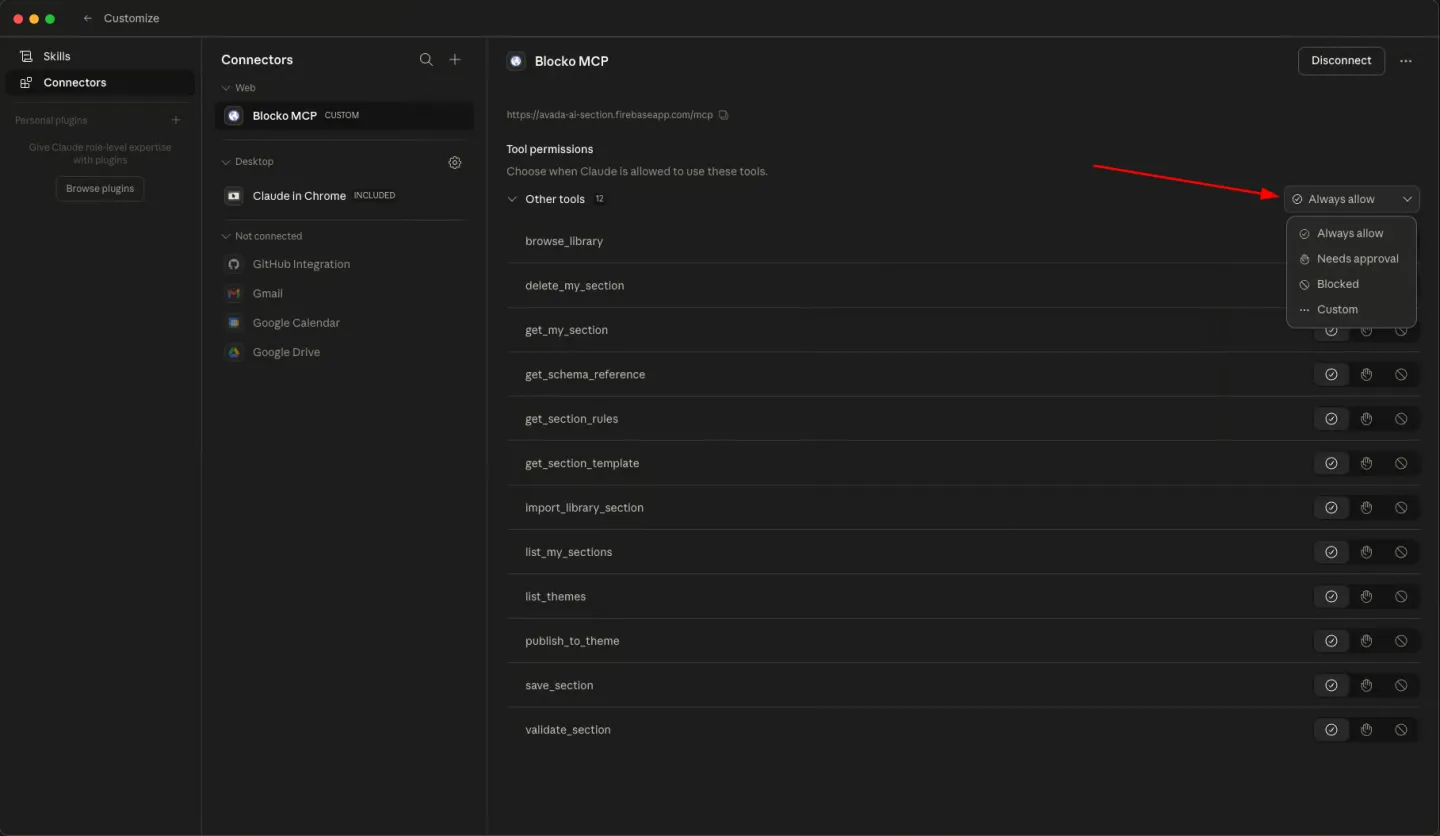
After connecting, Claude shows the Tool permissions panel with all available Blocko tools. By default, tools may be set to Blocked.
- Find the Blocked dropdown in the top-right corner of the tools list.
- Click it and change the permission to allow Claude to use Blocko's tools.
Enable the connector in chat
Now go back to the Claude chat to make sure the connector is active.
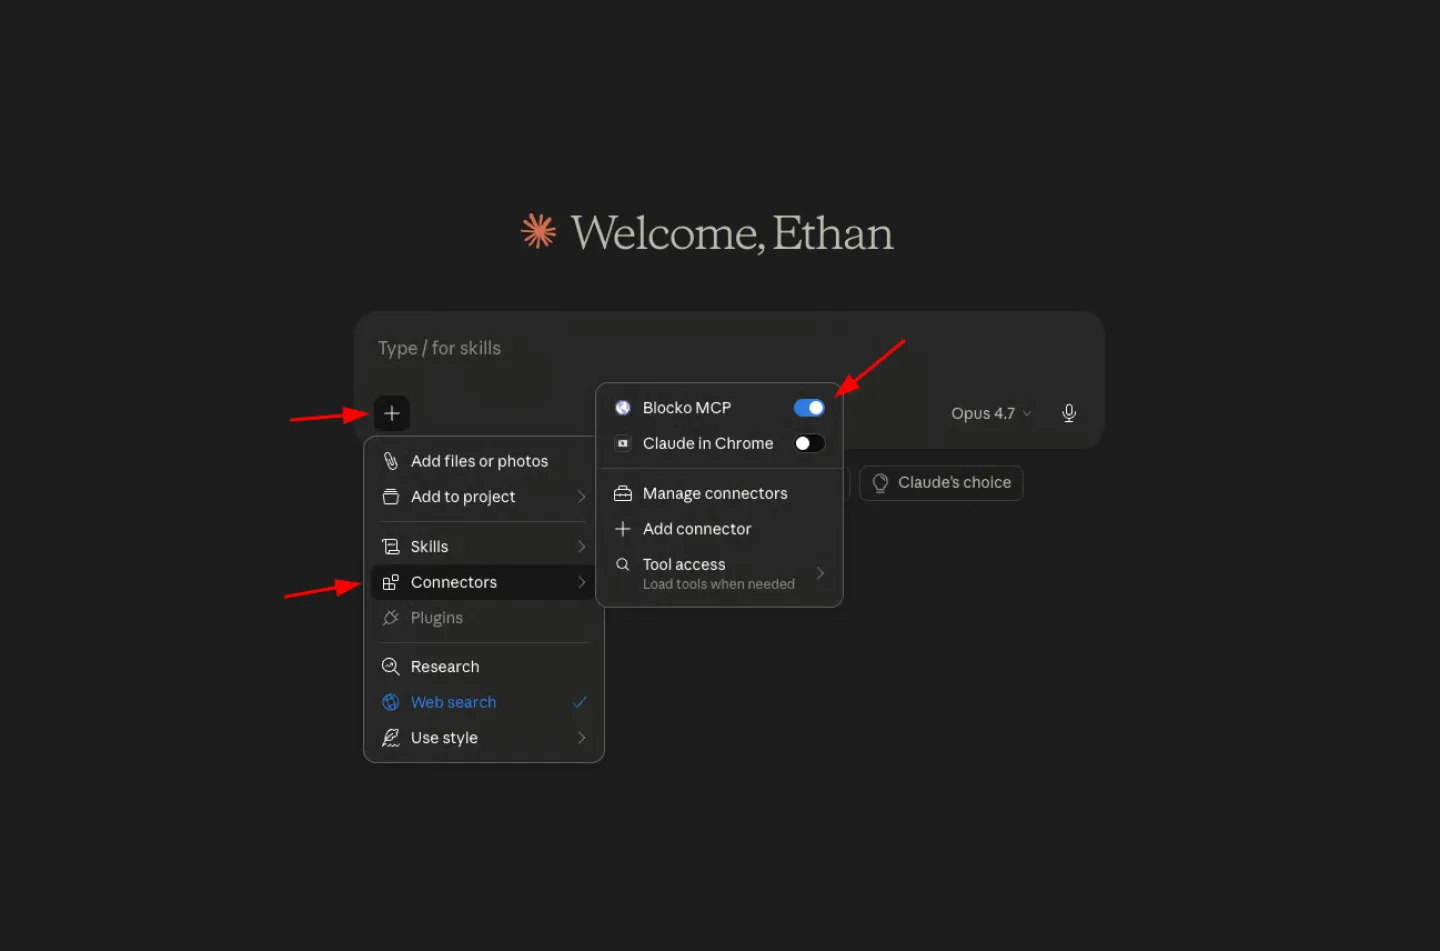
- In the chat input area, click the + icon on the left side.
- Hover over Connectors in the menu.
- In the submenu, find your Blocko connector and make sure the toggle is turned on (blue).
You are now ready to use Blocko tools in Claude.
ℹ️ Info
Best practice: Create a dedicated project
- For the best results, create a separate Project in Claude for your store and add store-specific context to the project instructions. This way, every conversation in that project automatically knows your brand - you don't have to repeat yourself each time.
- The quality of the section depends on how detailed your description is. Include style preferences, colors, layout, and content for the best results.