Set Up the Age Verification Banner
The age verification banner is a popup that asks visitors to confirm their age before they can browse your store. This guide walks you through creating one, targeting the right visitors, and matching it to your brand.
Requires: Free plan
Prerequisites
- The app is installed and the app embed is enabled. See the Quick start guide if you haven't done this yet.
Every change you make in the editor is reflected instantly in the Preview panel on the right. You can switch the preview between desktop and mobile at any time.
Open the Campaigns page
Open Avada Age Verification and go to the Campaigns page. This is where you create, edit, and toggle every campaign on or off.
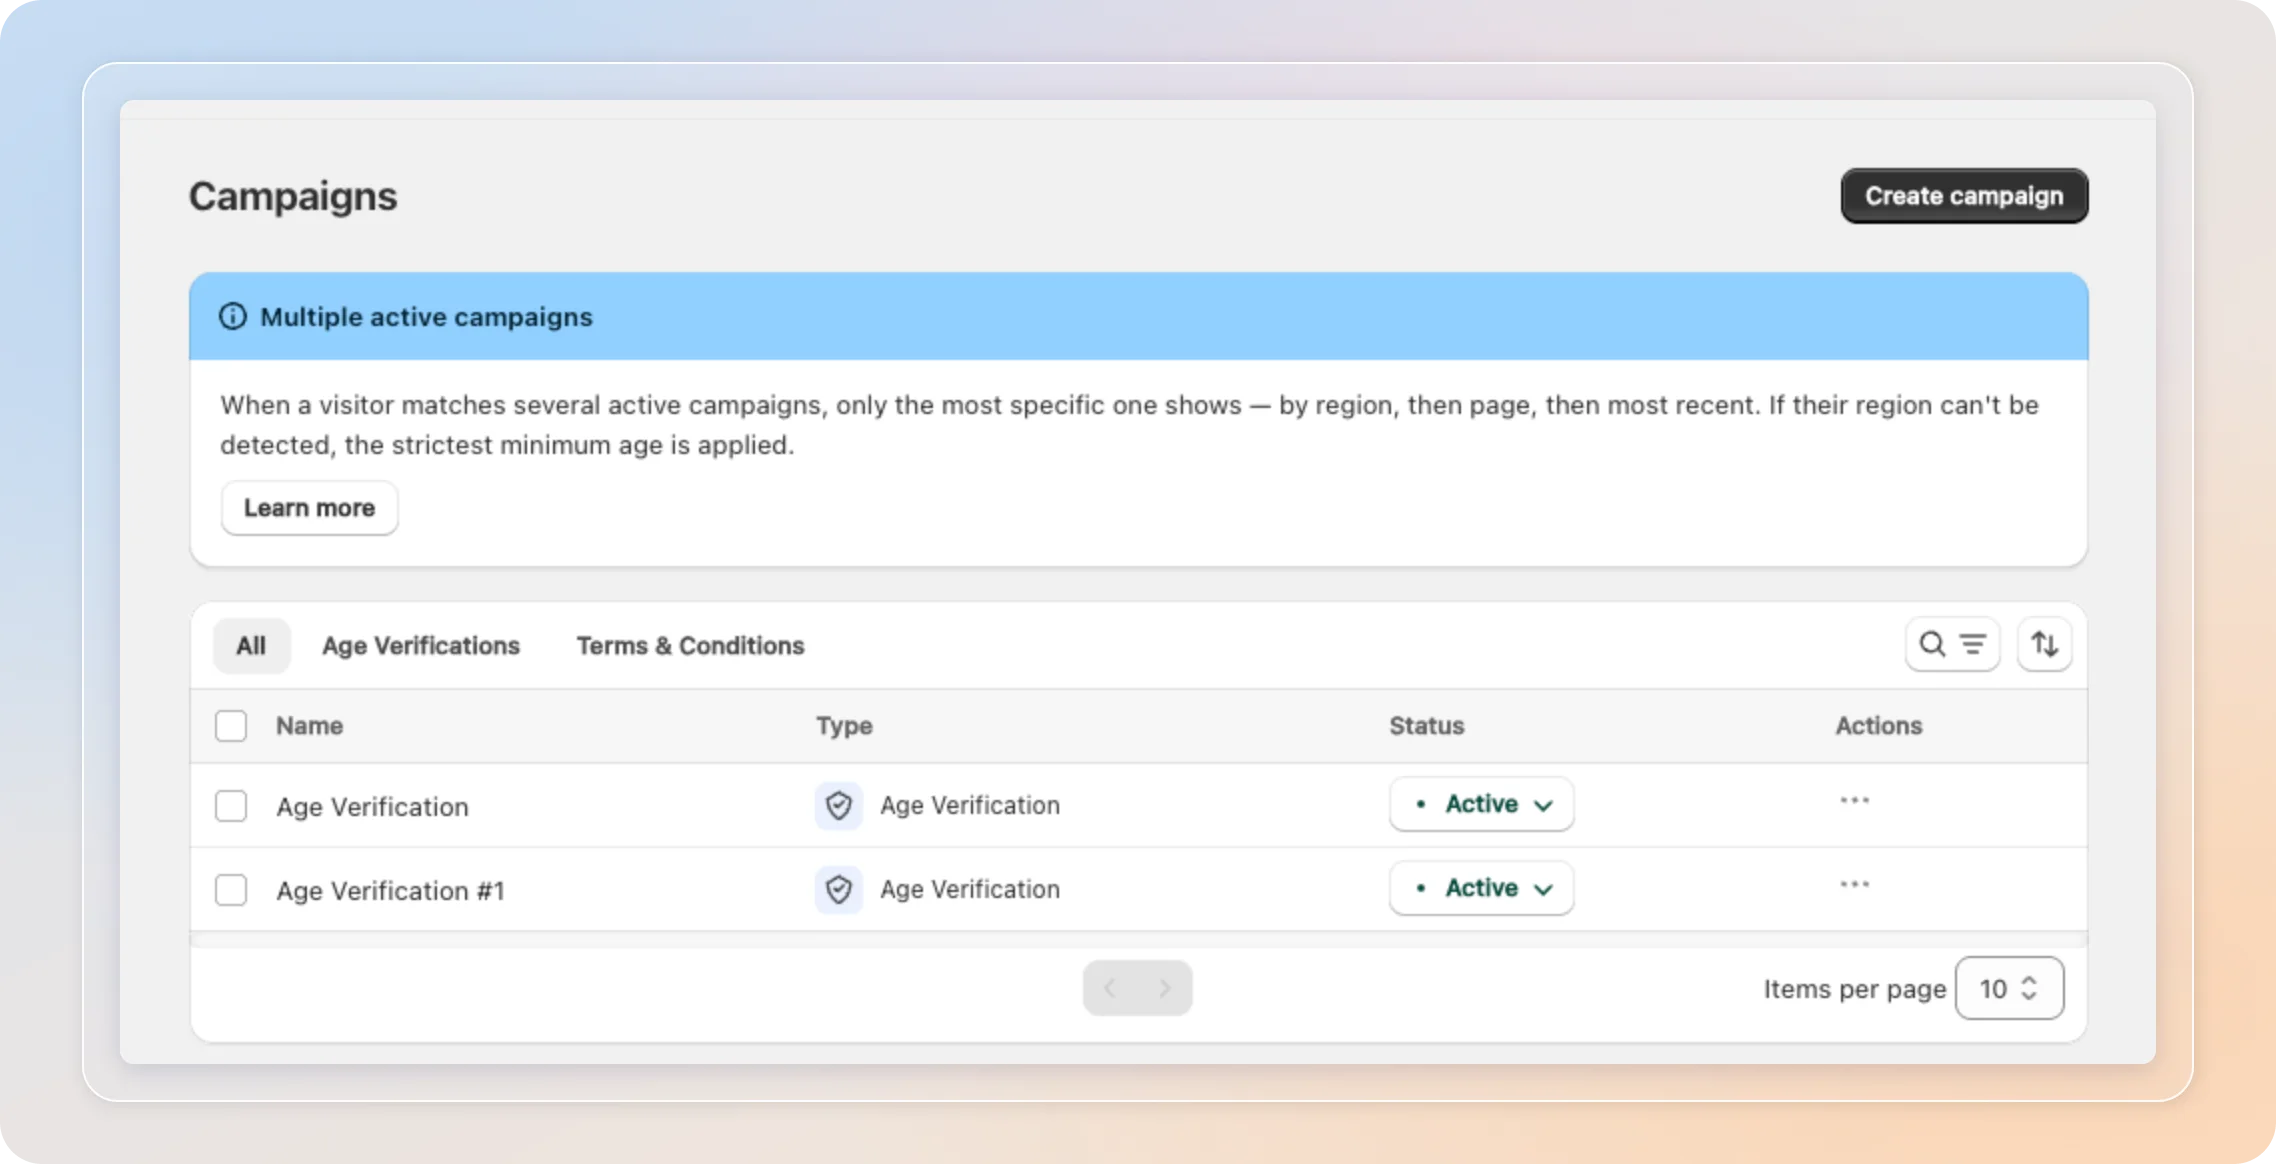
Create an age verification campaign
Click Create campaign, then select the Age Verification template.
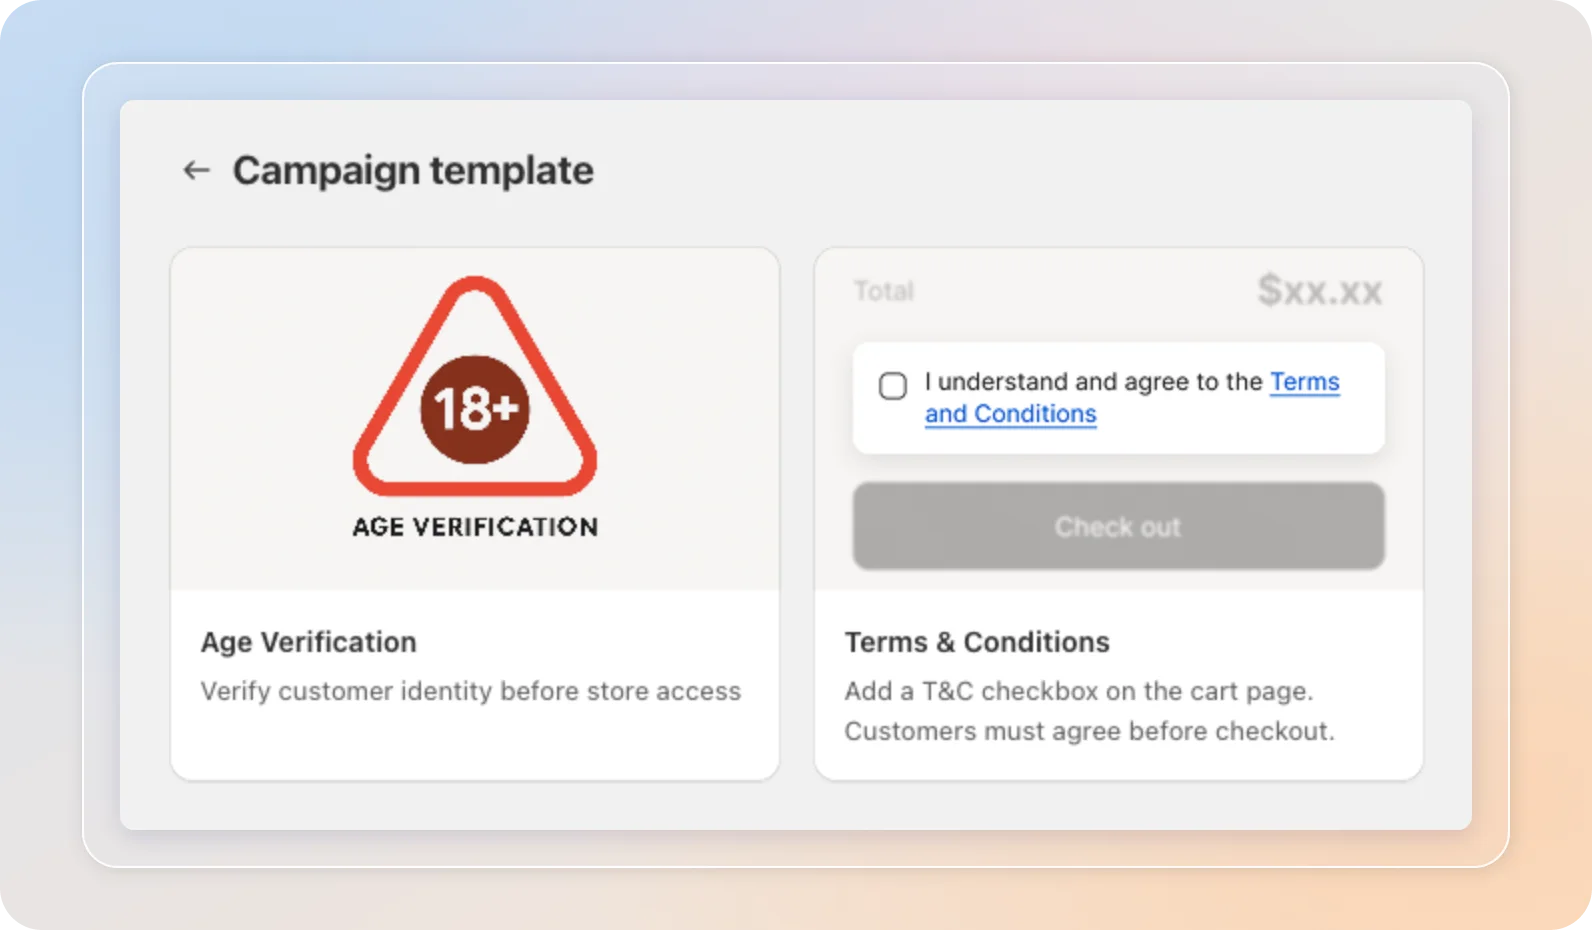
The editor opens on the General tab.
Set the age and verification method
In the Pop-up Info and Age requirement sections, name your campaign and choose how age is checked.
- Campaign name - An internal name to find this campaign in your list.
- Verify age - The minimum required age (e.g., 18 or 21).
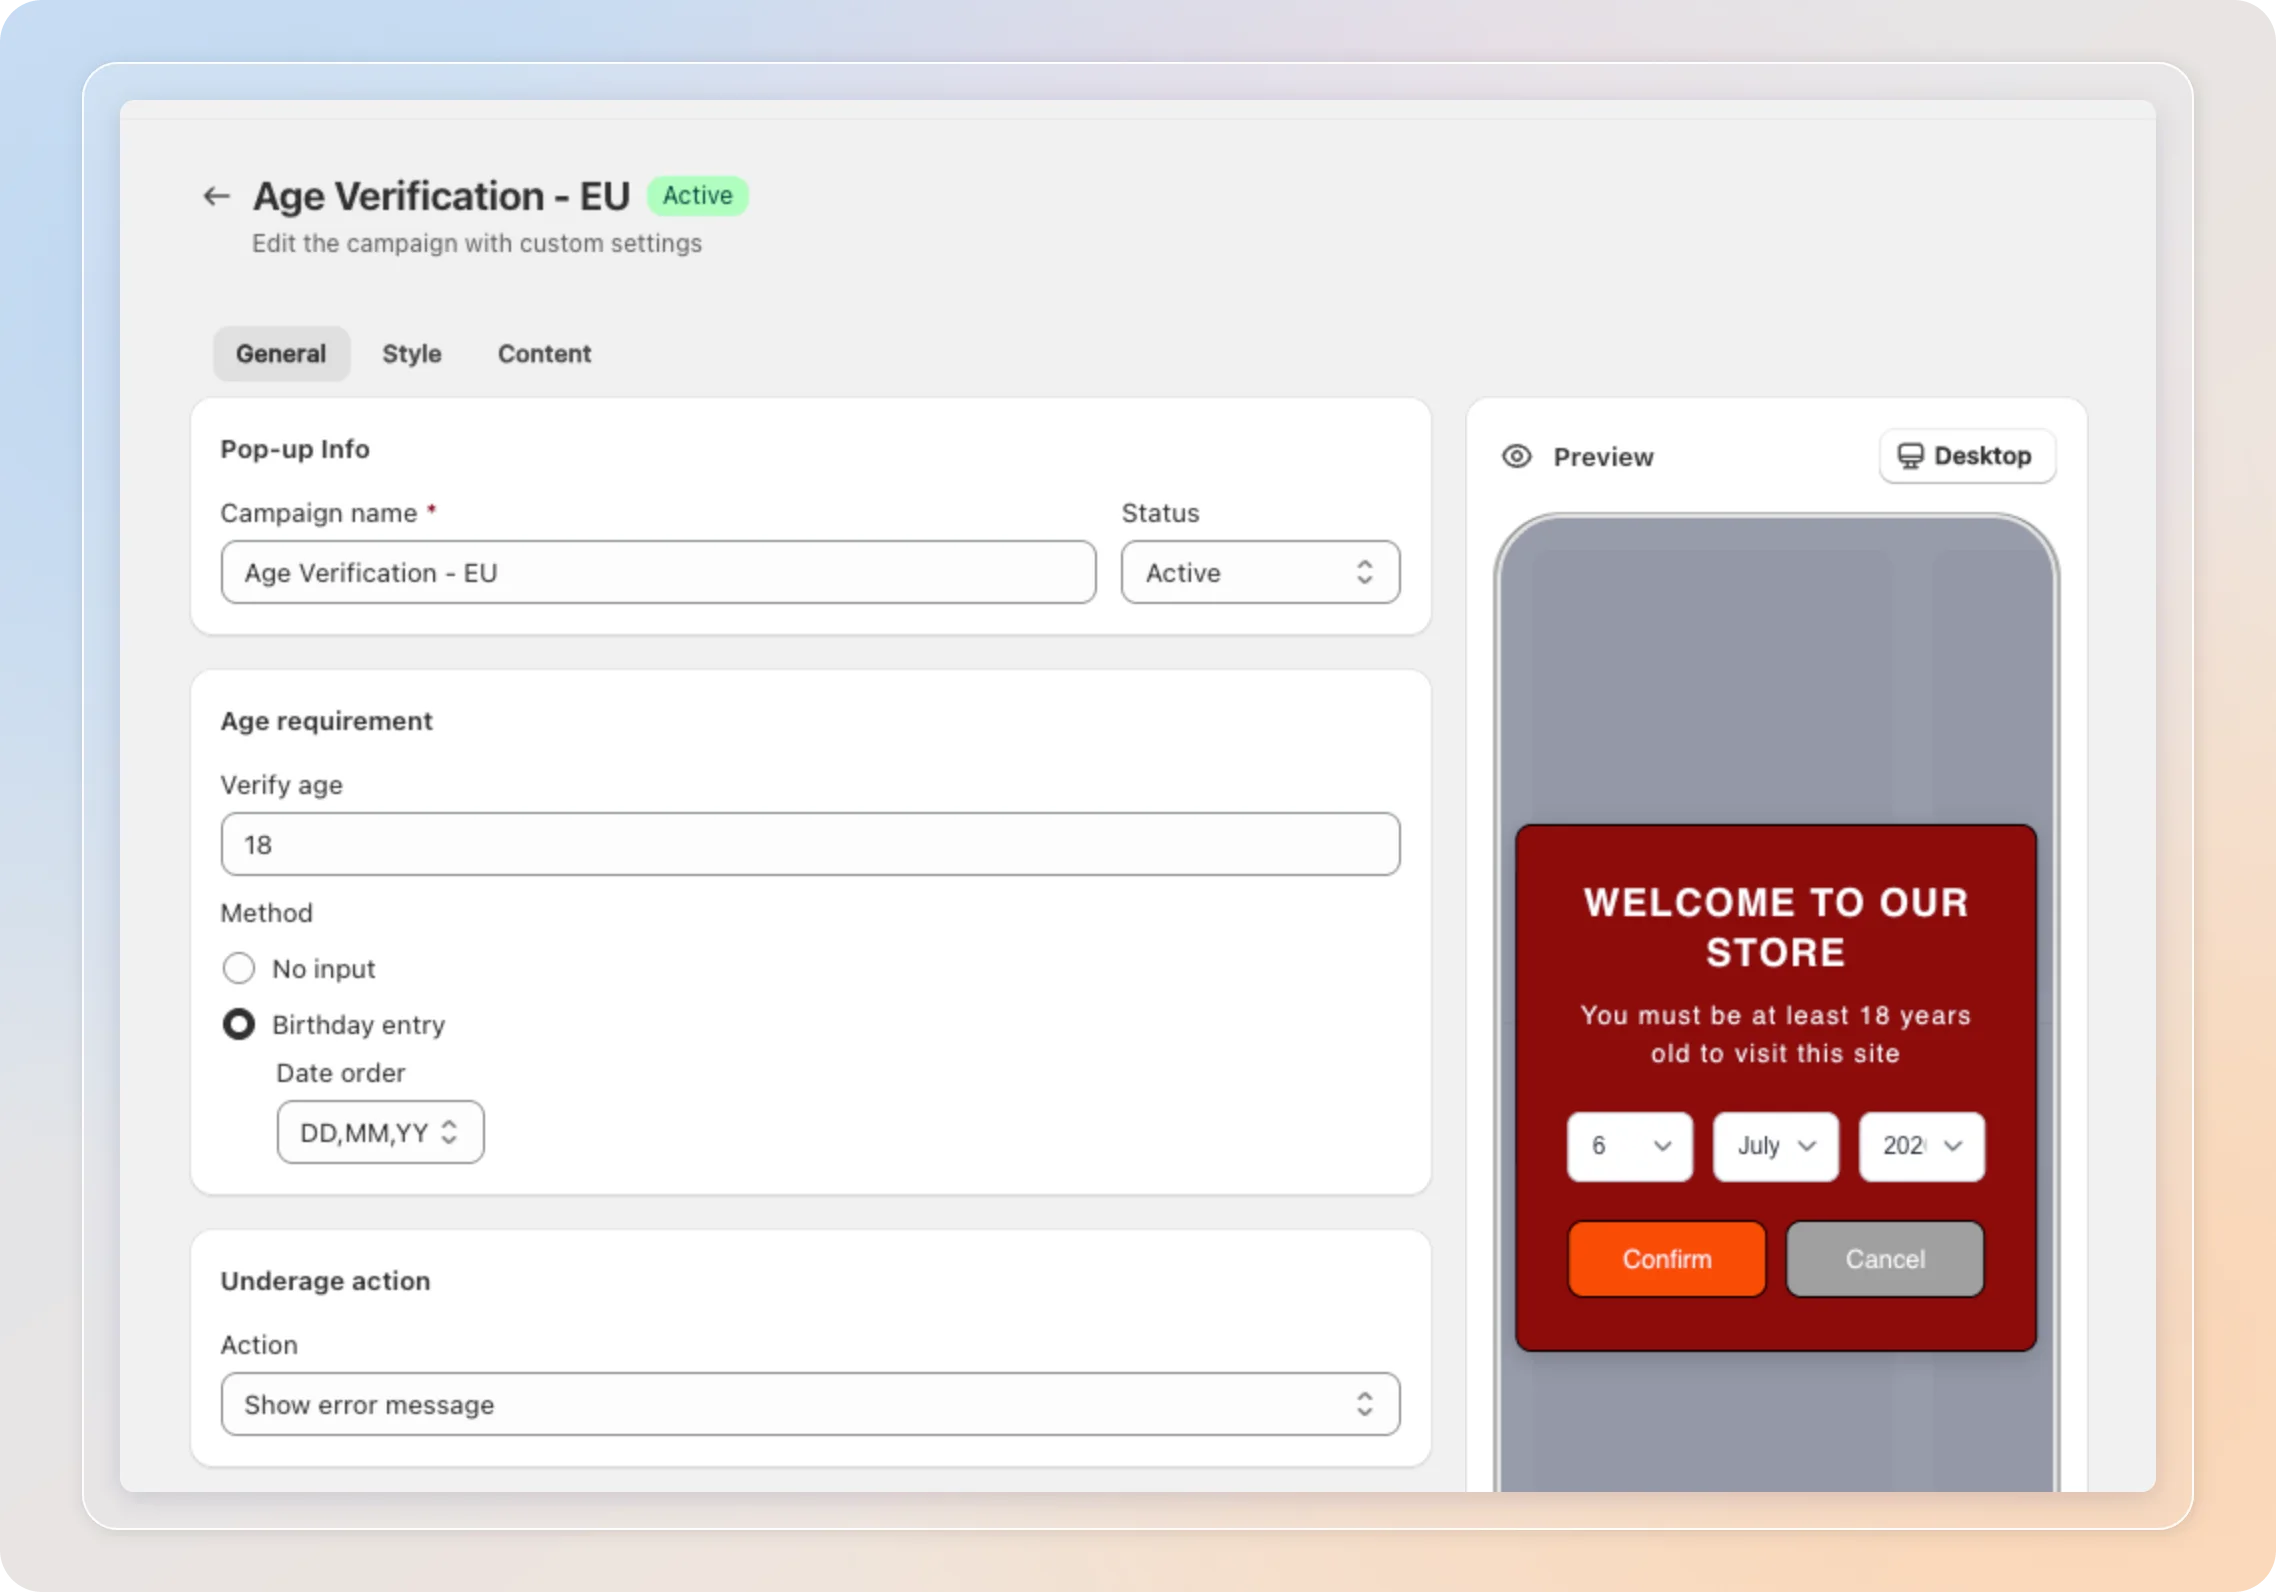
Pick a Method:
| Method | Best for |
|---|---|
| No input | One-click confirmation. Fastest option, least friction. |
| Birthday entry | Customers enter their date of birth. Stricter validation. |
If you choose Birthday entry, a Date order setting appears so you can match the format your customers expect (MM/DD/YY, DD/MM/YY, or YY/MM/DD).
Decide the underage action
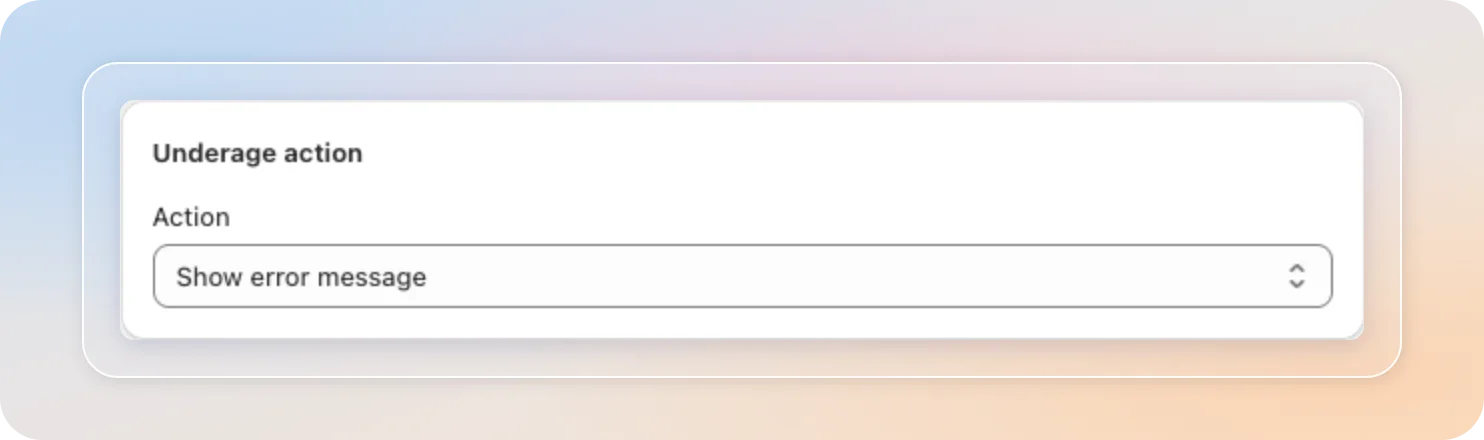
In the Underage action card, choose what happens when a customer fails verification.
| Action | What it does |
|---|---|
| Show error message | Displays your error text (set on the Content tab) inside the popup. |
| Redirect to a URL | Sends the visitor to a URL you specify. |
Choose which pages show the popup
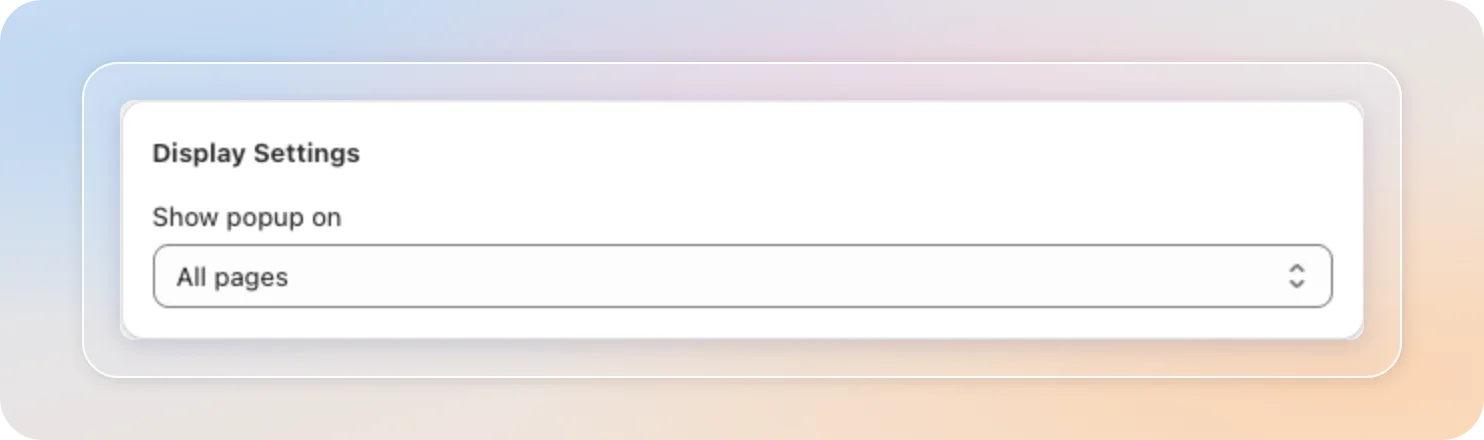
In Display Settings, use Show popup on to control where the banner appears.
| Option | Where the popup shows |
|---|---|
| All pages | Every page of your store. |
| Specific pages only | Only the page types you tick (Homepage, Product, Collection, Other). |
| All pages except... | Everywhere except the page types you tick. |
Choose which countries see the popup
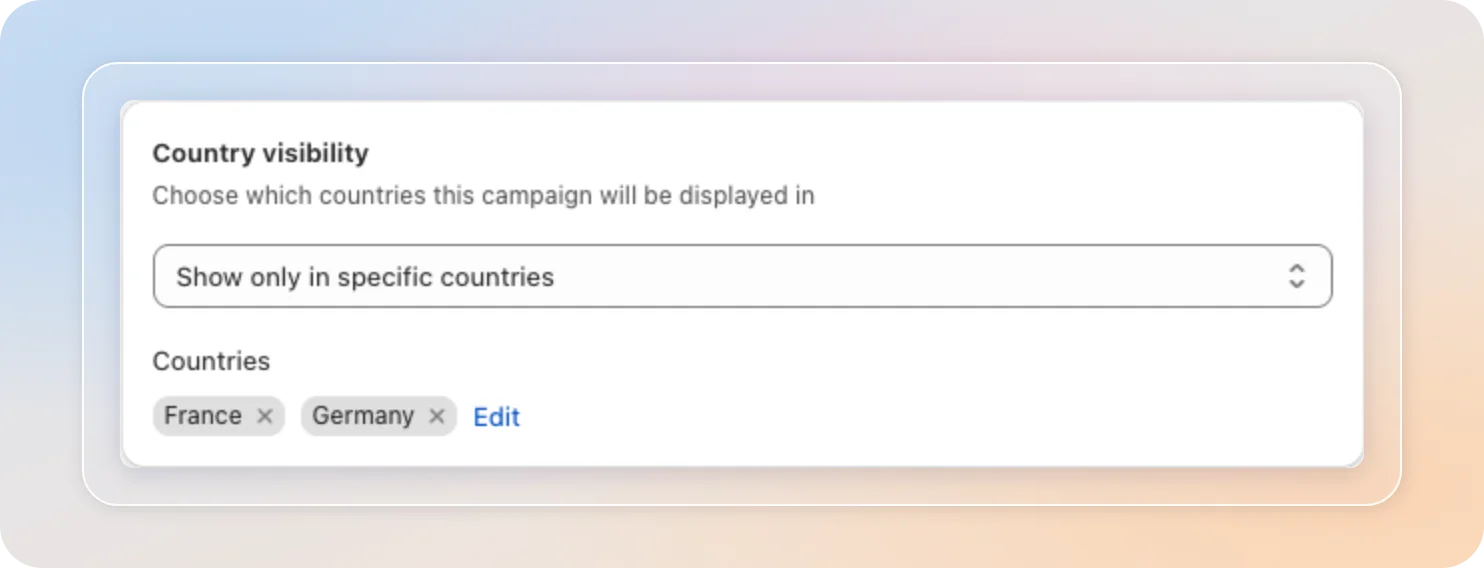
In Country visibility, decide which countries the banner targets.
| Option | Who sees the popup |
|---|---|
| All countries | Every visitor, regardless of location. |
| Show only in specific countries | Only visitors from the countries you add. |
| Hide in specific countries | Everyone except visitors from the countries you add. |
For the last two options, click Edit to pick the countries.
Running several campaigns with different targeting? See Multiple Active Campaigns to learn which one wins when more than one matches a visitor.
Style the popup
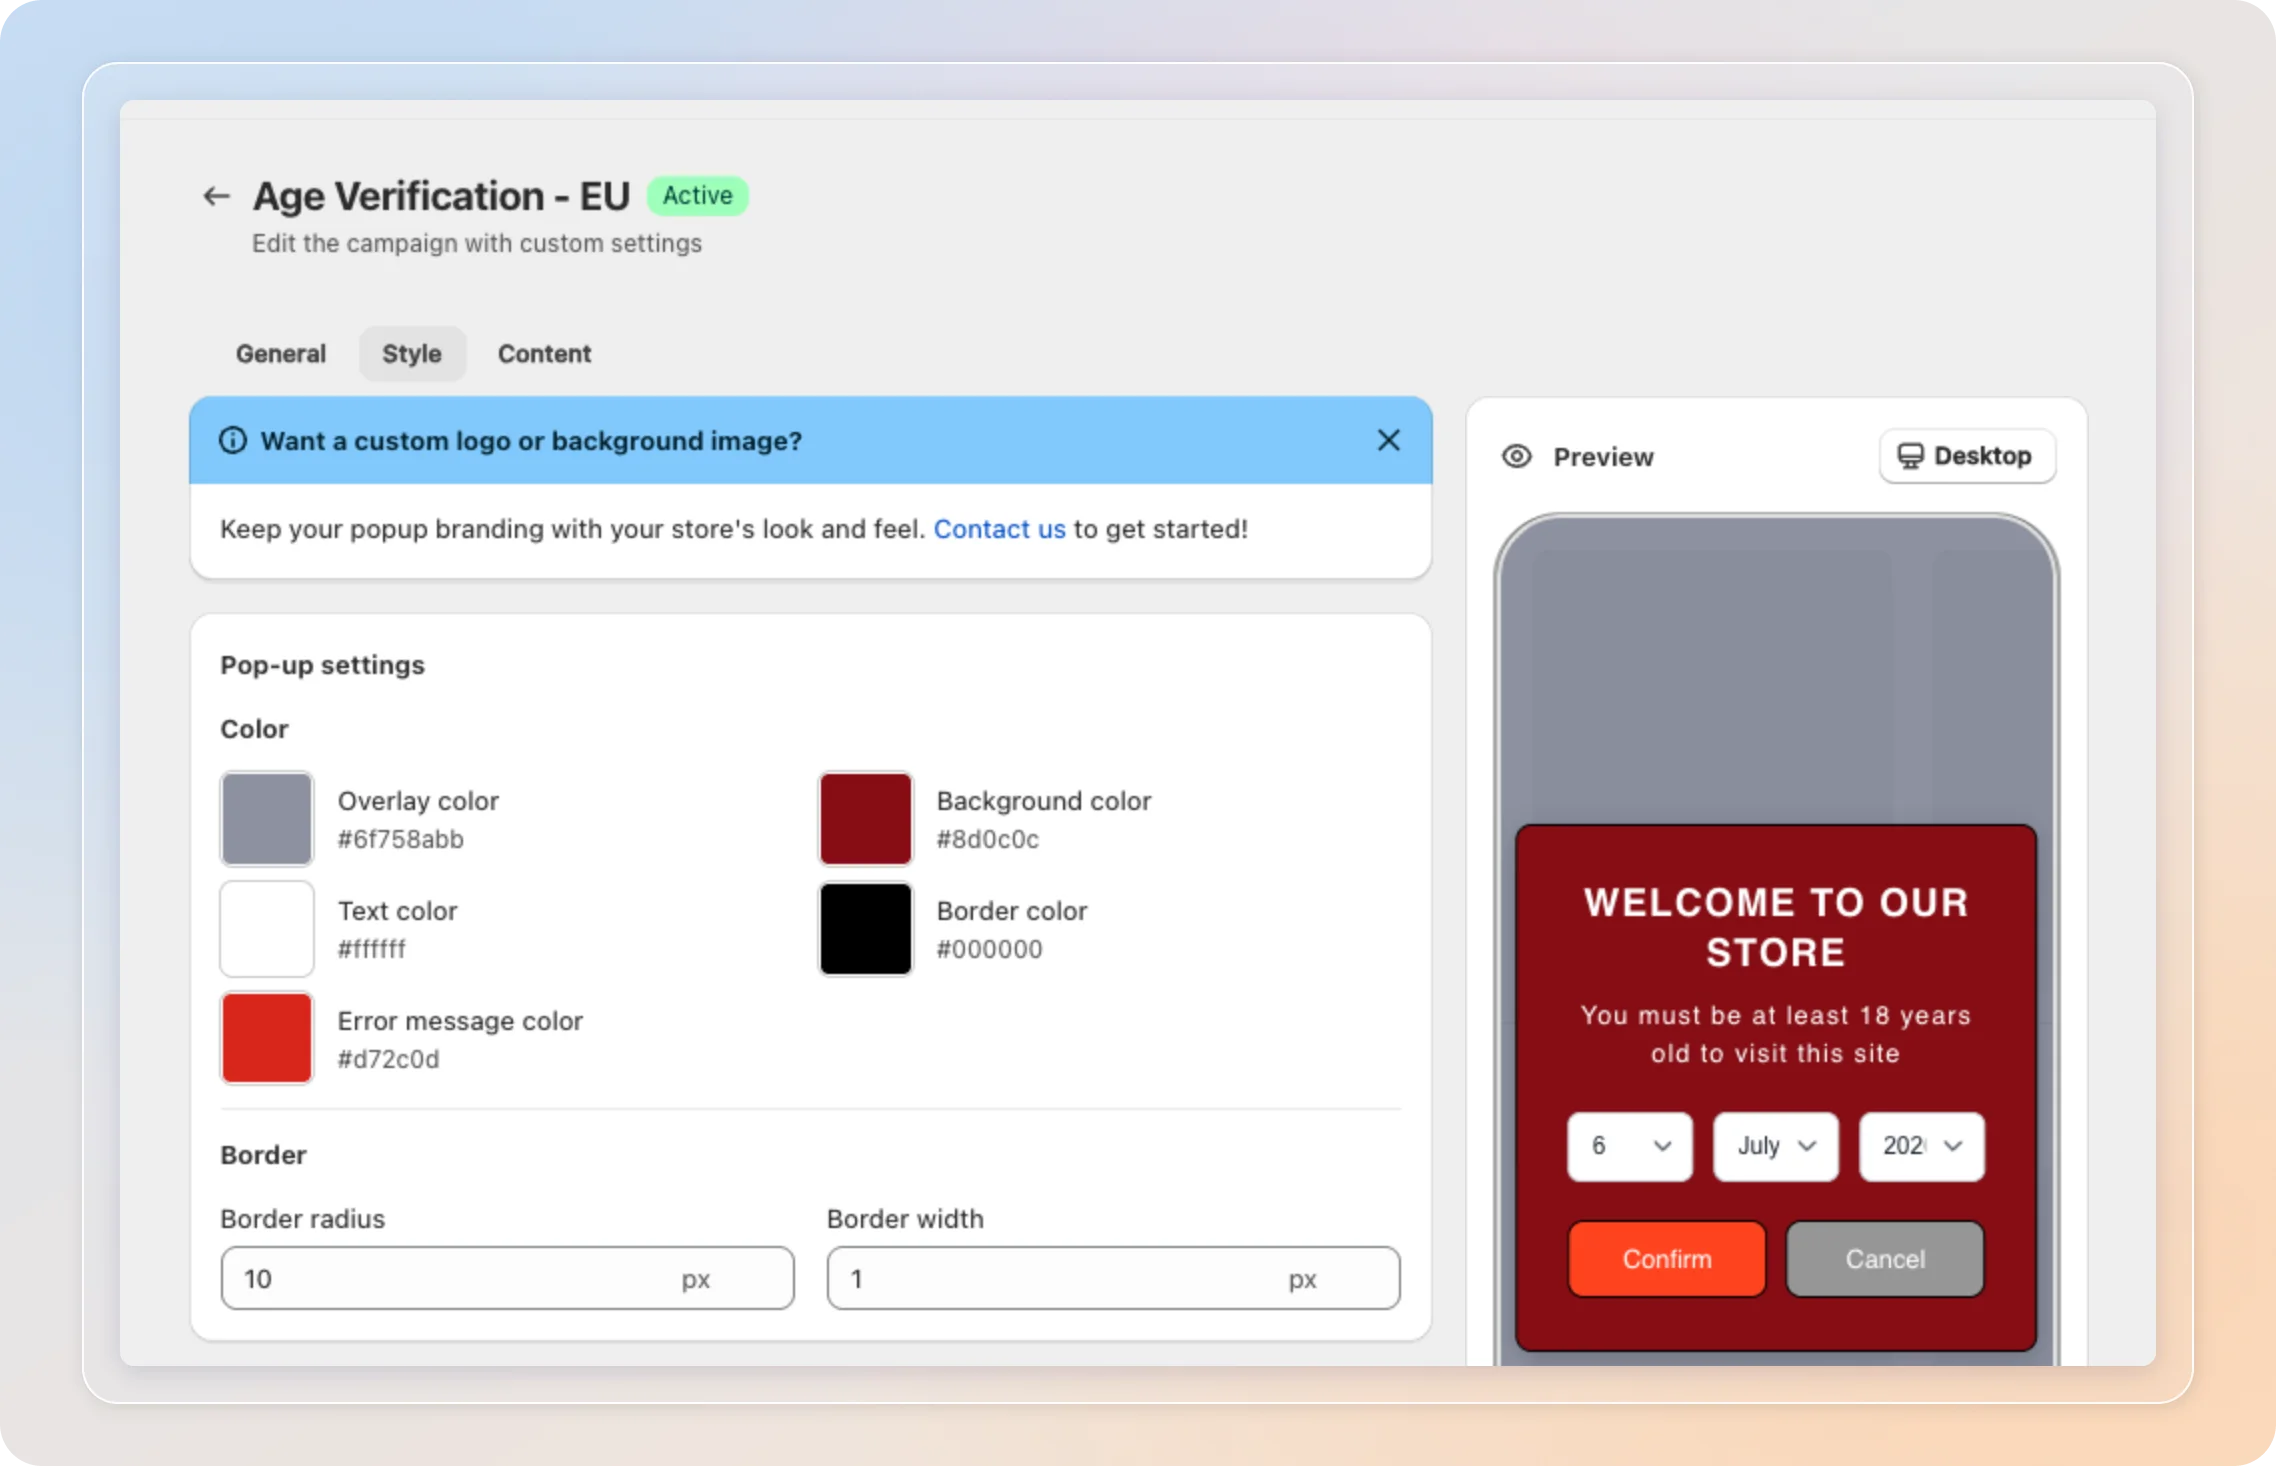
Open the Style tab. In Pop-up settings, set the colors and borders that match your brand.
| Setting | Controls |
|---|---|
| Overlay / Background / Text / Border / Error color | The popup's colors |
| Border radius / width | Corner roundness and border thickness |
Style the buttons
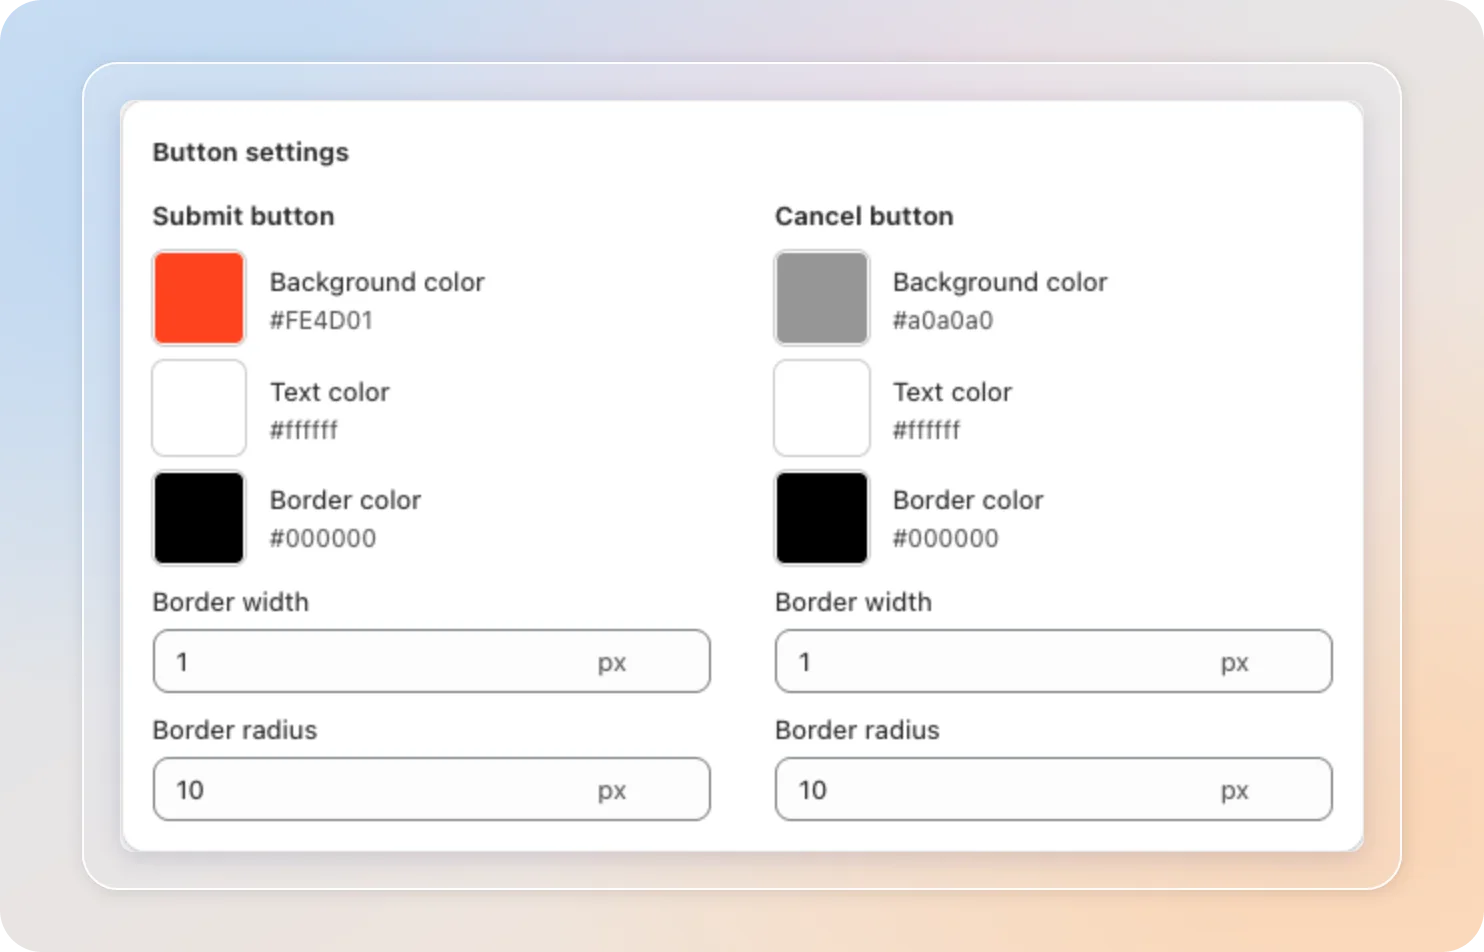
In Button settings, style the Submit and Cancel buttons independently - background color, text color, border color, border width, and border radius.
Need a custom logo or background image on your popup? Contact our support team via in-app live chat and we'll help you set it up.
Set the display language
Open the Content tab. In Display language, choose how the app picks a language for each visitor.
- Detect language - By the customer's browser, their IP location, or your store language.
- Default language - Used when the visitor's language has no active translation.
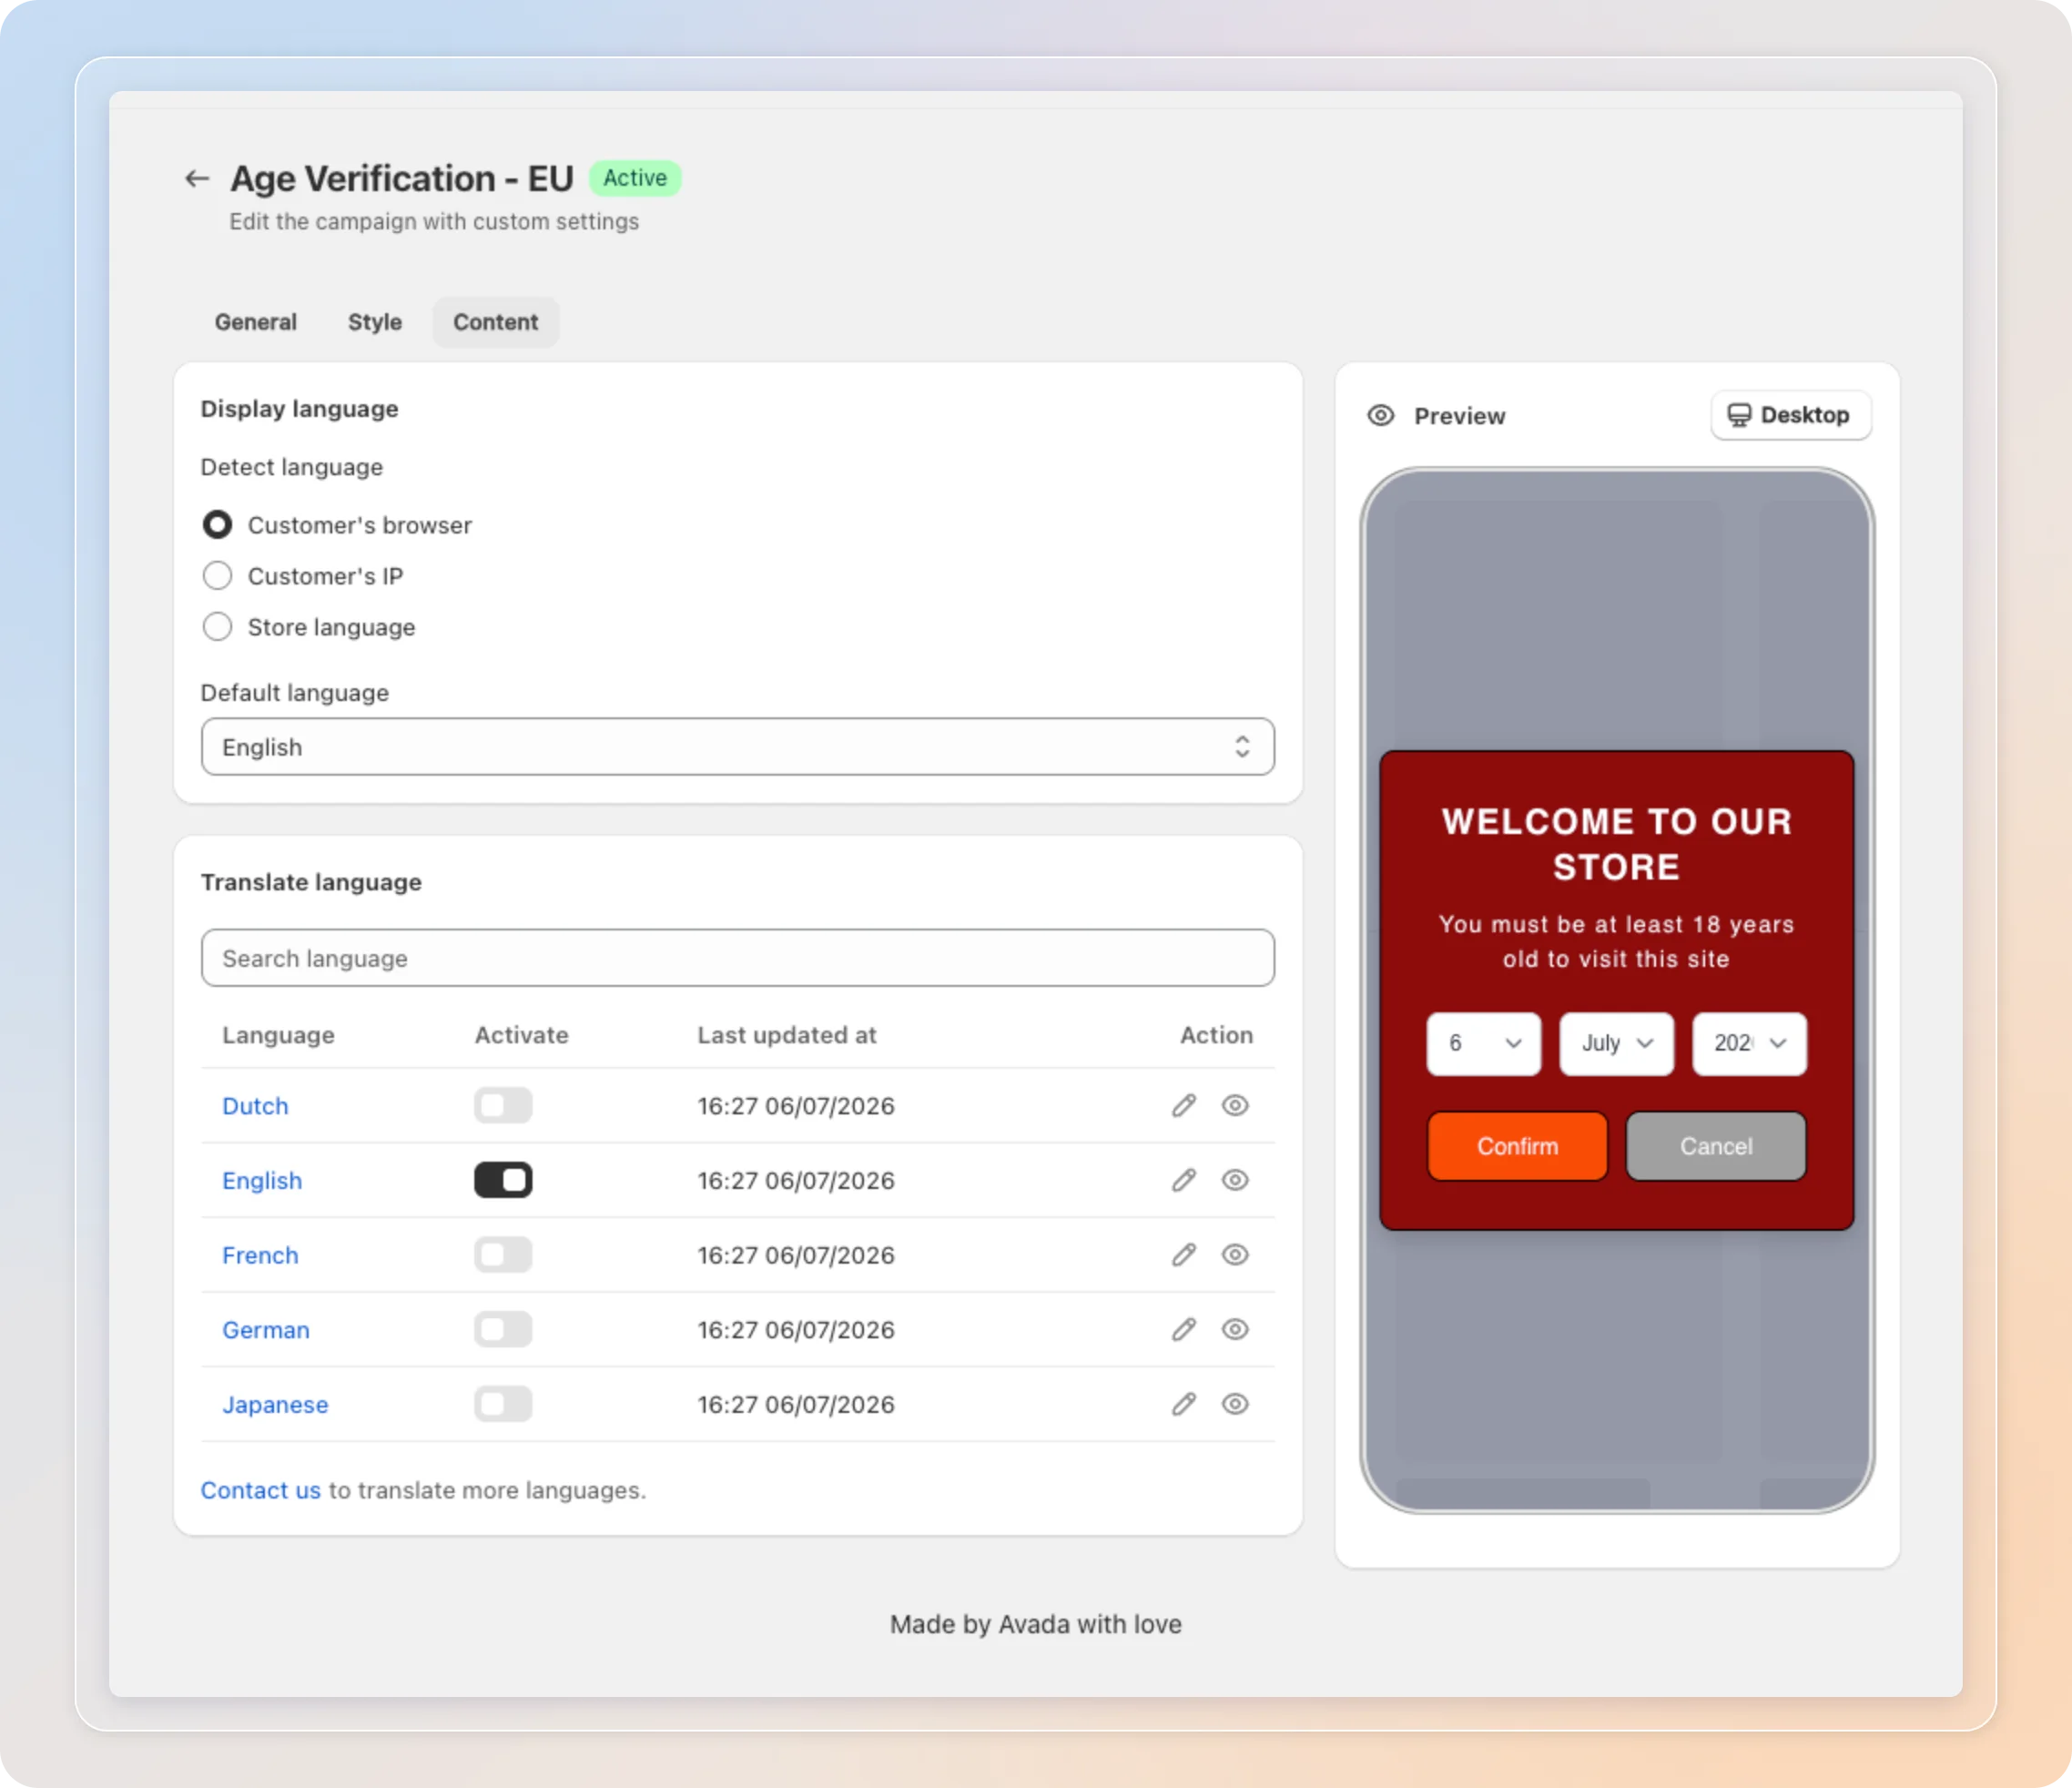
Edit the popup text per language
In the Translate language table, toggle Activate for a language, then click the edit icon to open its text editor.
Each language has five fields: Heading, Sub-heading, Error message, Confirm button, and Cancel button.
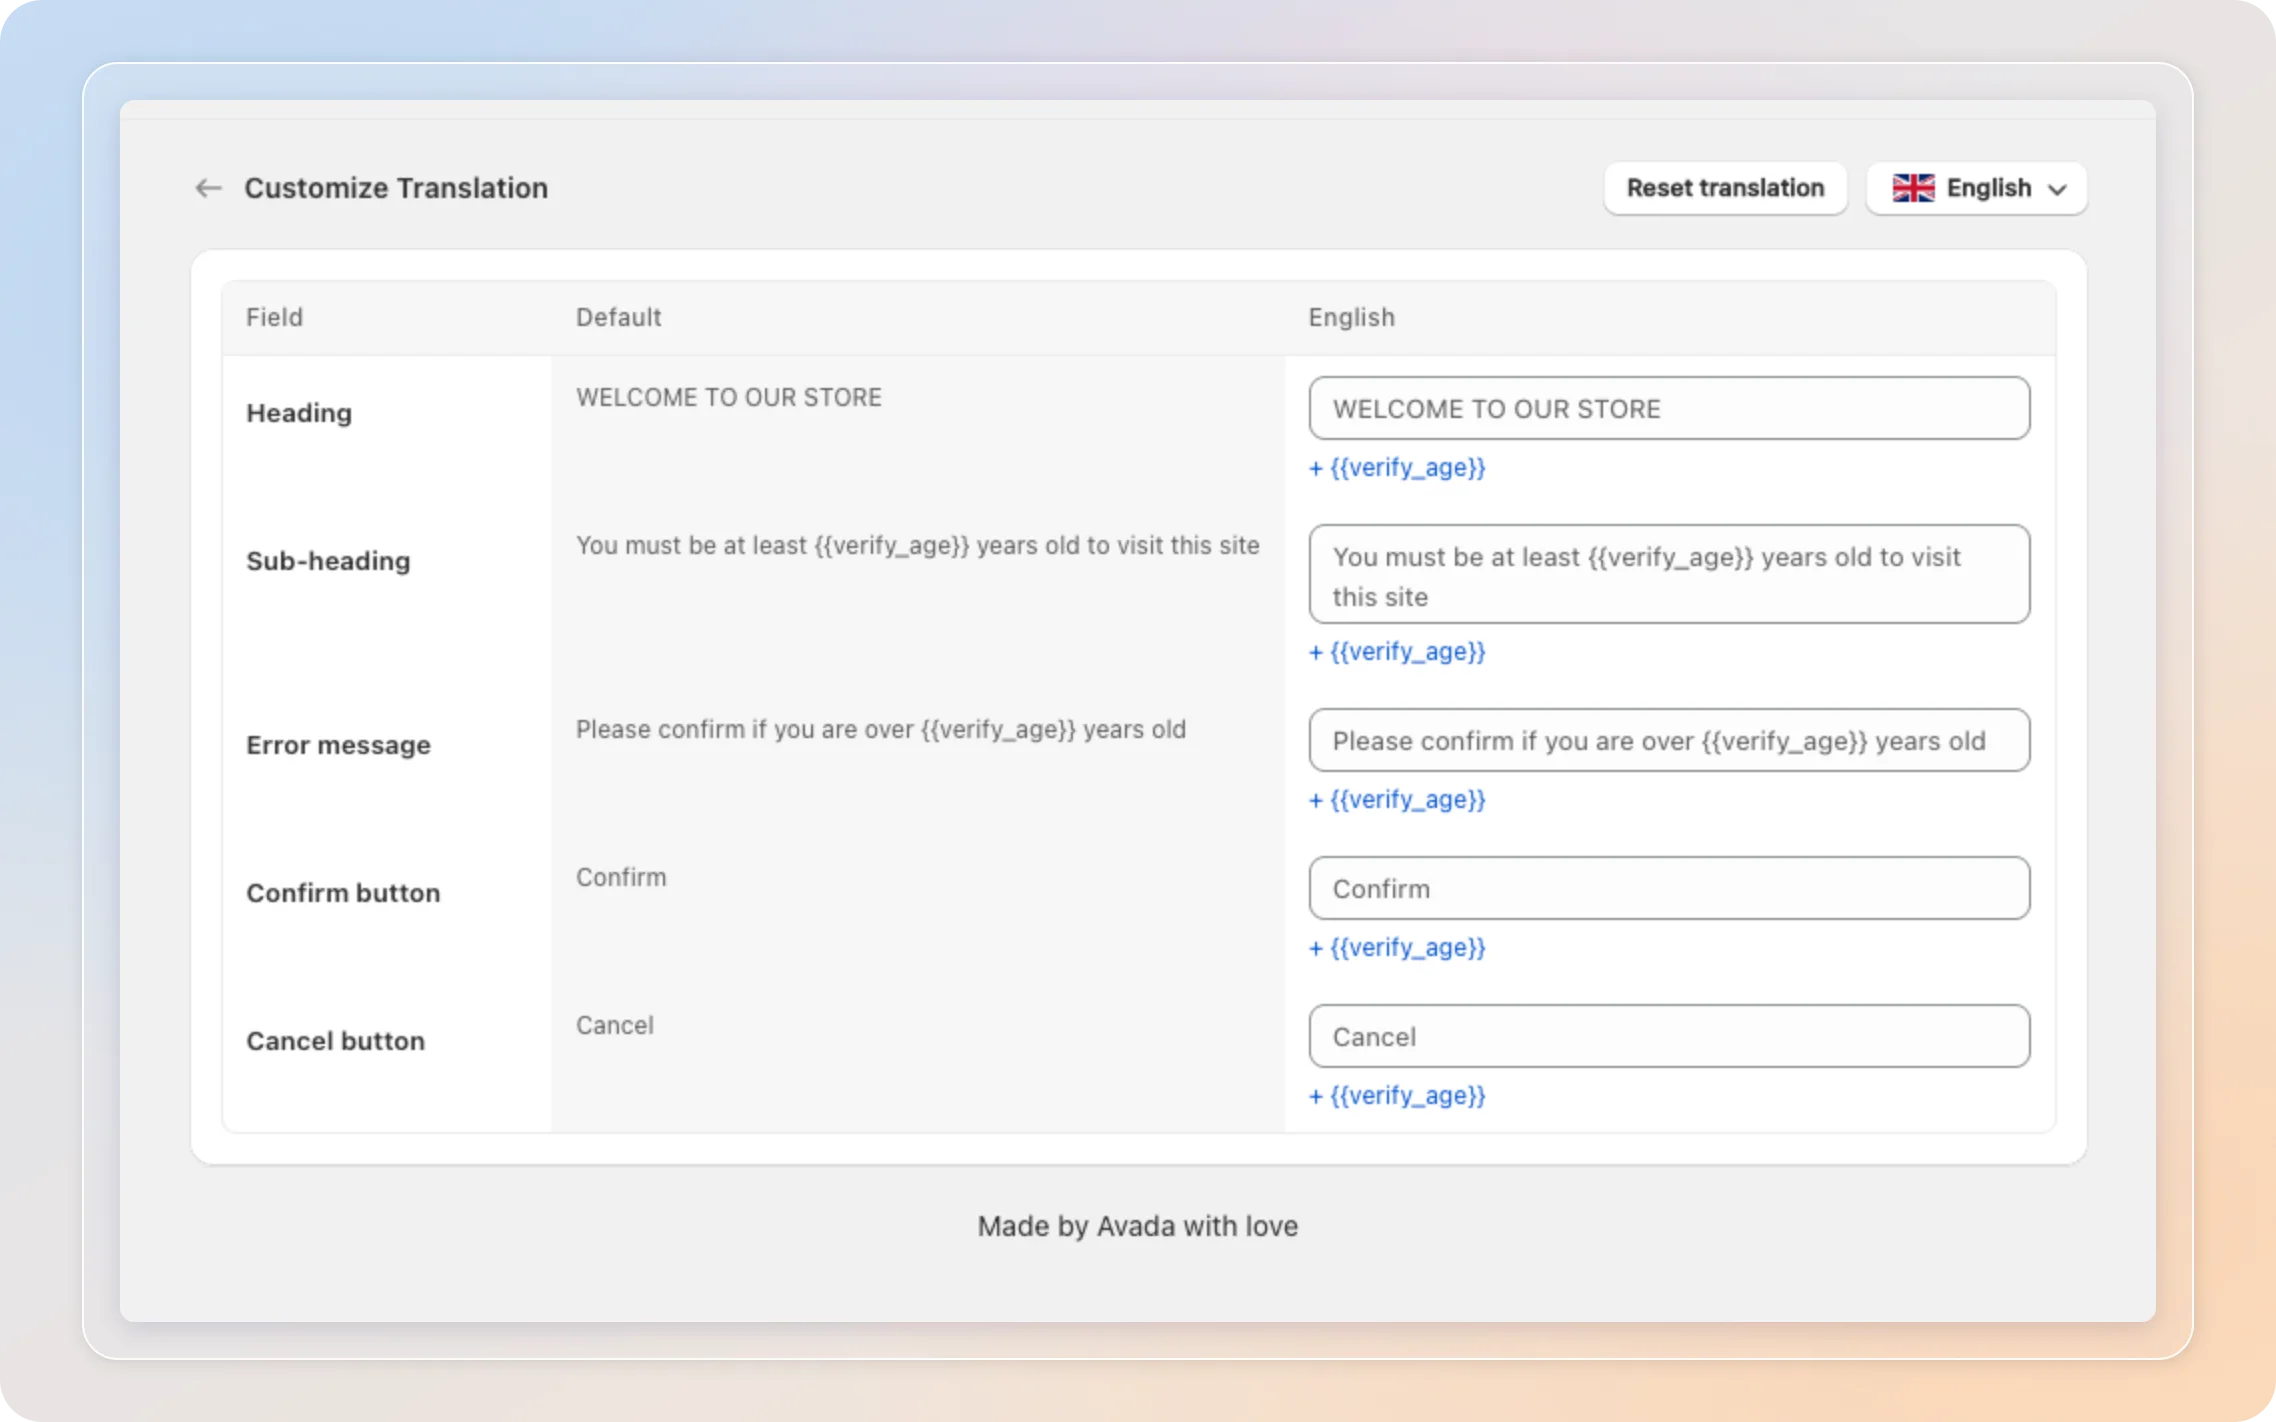
Use the + {{verify_age}} button next to a field to insert the age from the General tab - it updates automatically if you change the age later.
Save and test
- Click Save and make sure the campaign status is Active on the Campaigns page.
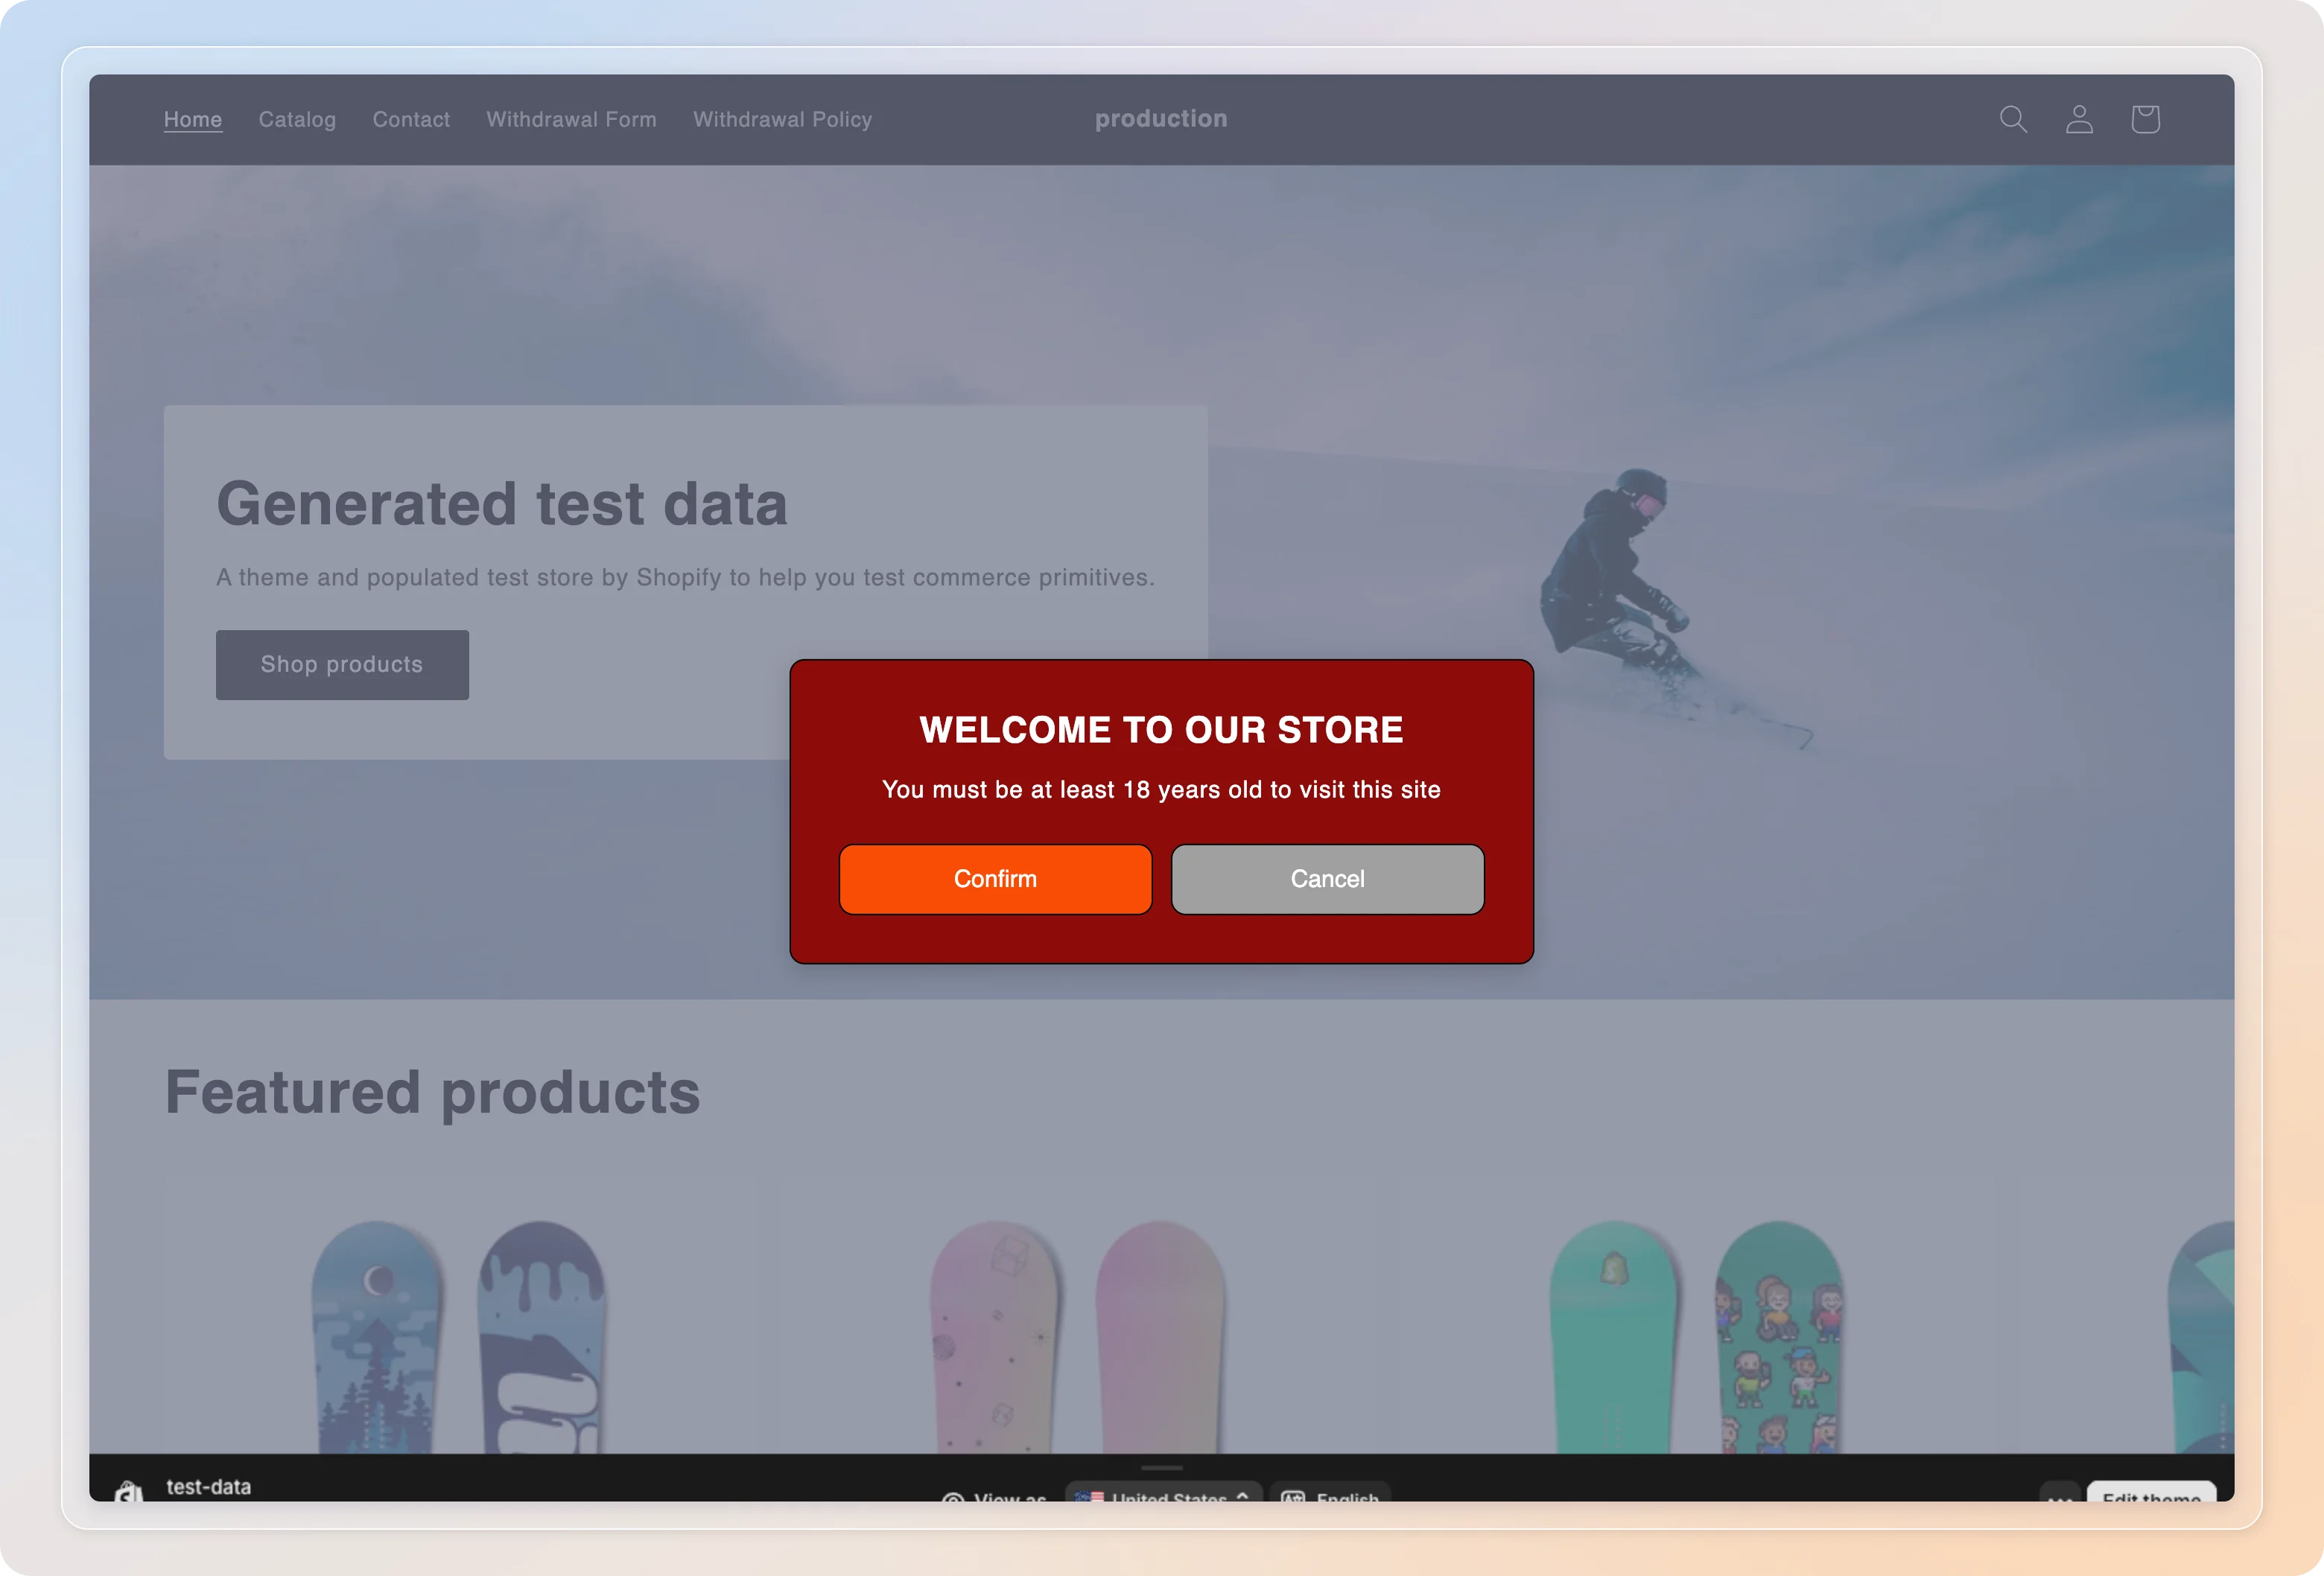
- Open your store in an incognito window to confirm the popup shows, Confirm grants access, and Cancel blocks it.
Tips
- Choose No input for better conversion, or Birthday entry for stricter compliance.
- Keep one general campaign (all pages, all countries) as a fallback, and add targeted campaigns on top for specific regions.
- Always test in an incognito window - the popup remembers verified visitors, so a normal window may not show it again.
Related Articles
And there you have it! You've successfully set up your age verification banner. Your store now checks visitor age exactly where and how you want it to.
If you have any questions or run into any issues, don't hesitate to reach out. We're here to help!