Widget Trigger Style: Floating Button vs Inline Text
The widget trigger is the element visitors click to open the accessibility widget. Avada Accessibility offers two trigger modes: Floating Button and Inline Text.
Comparison
| Feature | Floating Button (Mode A) | Inline Text (Mode B) |
|---|---|---|
| Placement | Fixed position on the screen, always visible | Embedded within your page content using a CSS selector |
| Visibility | Always visible regardless of scroll position | Only visible where the selector element exists |
| Best for | Most stores; ensures discoverability | Stores that want the trigger integrated into their layout |
| Customization | Position, icon, size | CSS selector, localization text |
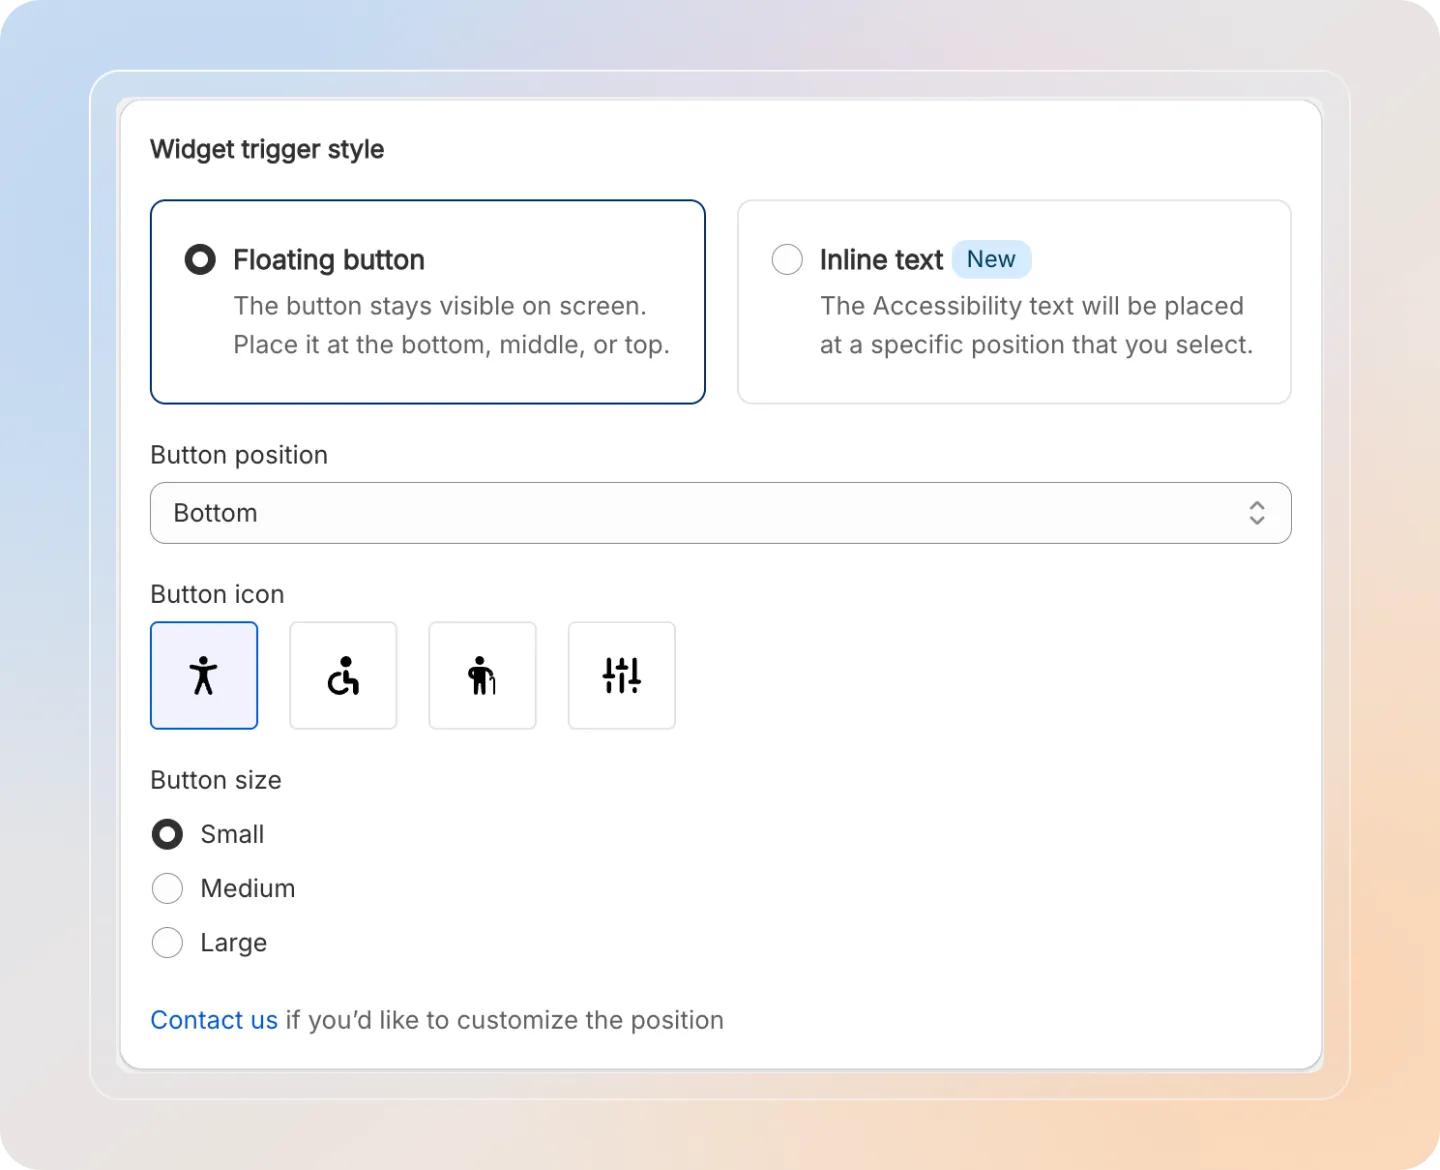
Mode A: Floating Button
The floating button is a fixed-position icon that stays visible as visitors scroll your store.
Position
| Option | Description |
|---|---|
| Bottom | Button appears at the bottom of the screen (left or right). |
| Middle | Button appears at the middle of the screen (left or right). |
| Top | Button appears at the top of the screen (left or right). |
Icon Choices
Choose from four icon styles for the floating button:
- Standard accessibility icon (wheelchair)
- Universal accessibility icon
- Eye icon (visual focus)
- Custom icon
Sizes
| Size | Description |
|---|---|
| Small | Compact button, minimal screen space. |
| Medium | Default size, balanced visibility. |
| Large | Larger button for maximum visibility. |
The floating button is recommended for most stores as it ensures the accessibility widget is always discoverable by visitors.
Mode B: Inline Text
Inline text mode embeds the widget trigger directly into your page content using a CSS selector.
Configuration
| Setting | Description |
|---|---|
| CSS Selector | Enter the CSS selector of the element where the trigger text should appear (e.g., #accessibility-trigger or .footer-accessibility). |
| Smart Selector | Use the Smart Selector tool to visually pick an element on your storefront without writing CSS. |
| Localization | Customize the trigger text for different languages. |
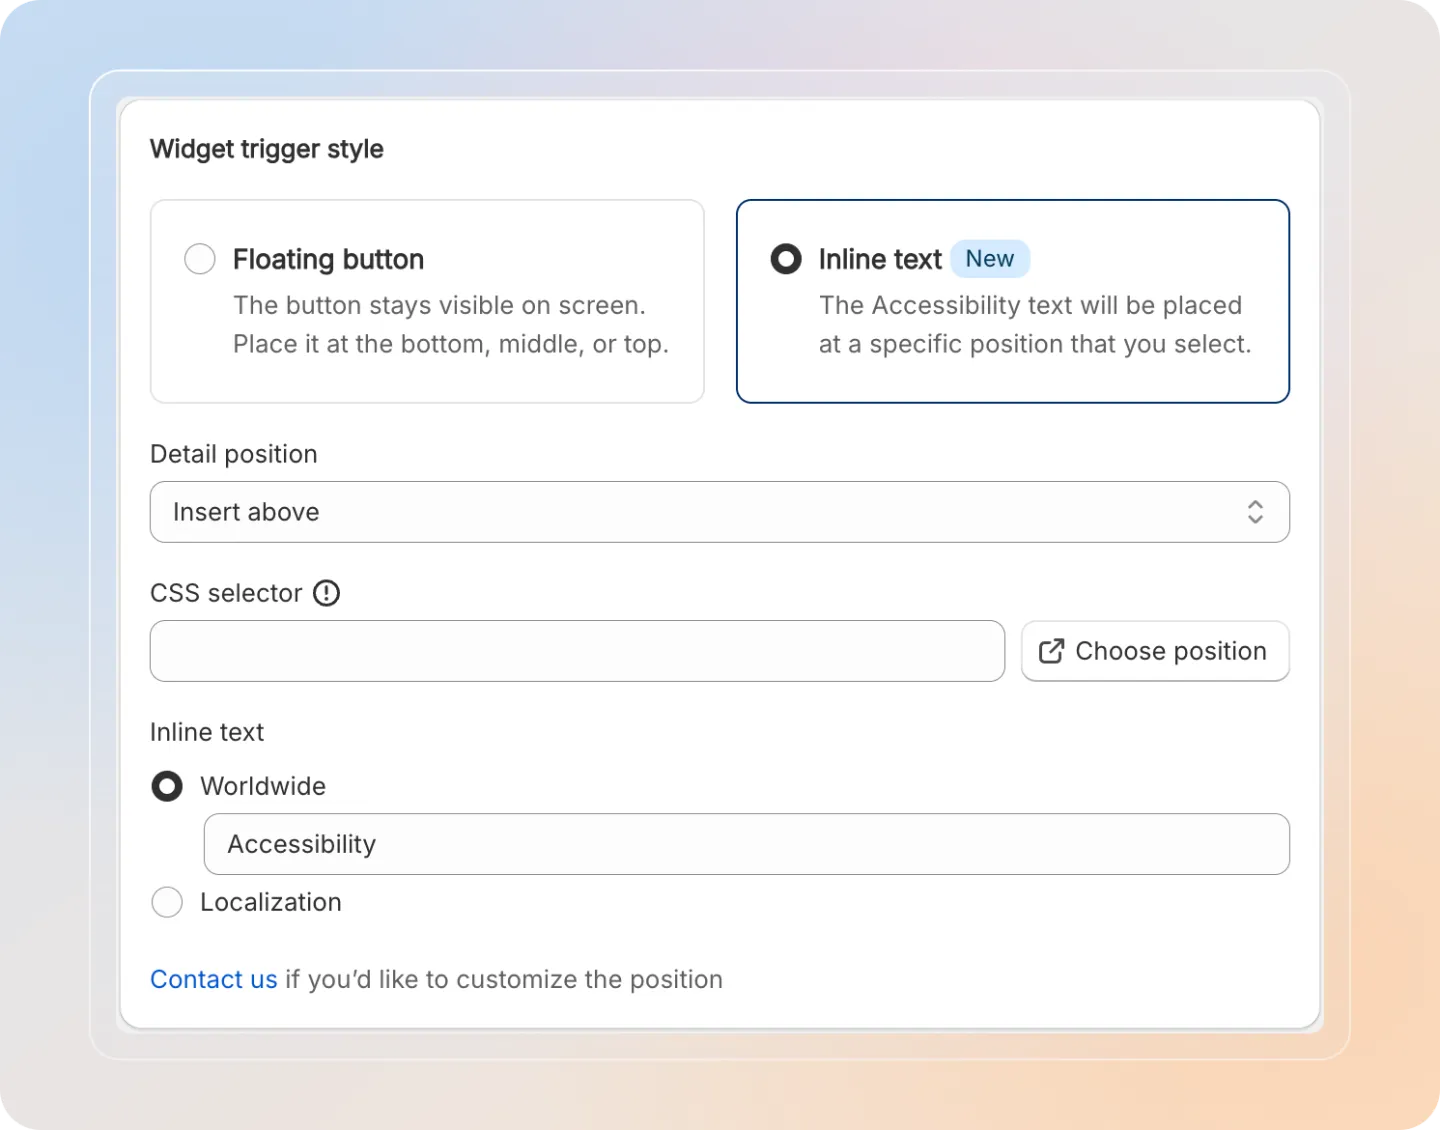
⚠️
When using Inline Text mode, make sure the CSS selector exists on all pages where you want the trigger to appear. If the selector is not found, the trigger will not be displayed on that page.
Tips
- Use a selector that exists in your theme's header or footer to ensure the trigger appears on every page.
- The Smart Selector is the easiest way to pick the right element -- click Smart Selector, then click the element on your live store.
- You can combine both modes if needed: enable the floating button for general access and add an inline text trigger in your footer for additional visibility.