Connect ChatGPT or Claude to Avada Order Limits
AI Access opens a door between Avada Order Limits and an AI assistant you choose, such as Claude or ChatGPT.
Once it is set up, you can ask about your own order limit rules instead of opening the app, and you can let the assistant change those rules for you.
You decide two things when you turn it on: which groups of data the assistant may work with, and whether it may only look, or also change things.
Prerequisites
- Avada Order Limits installed on your store.
- A Claude or ChatGPT account on a plan that supports custom connectors. See the table below.
| Assistant | What you need | Limit to know |
|---|---|---|
| Claude | A paid plan is recommended | The Free plan allows only one custom connector in total. Each Avada app needs its own connector. |
| ChatGPT | Developer mode, available on Pro, Plus, Business, Enterprise and Education | The Free plan has no Developer mode, so it cannot be connected. |
Step 1: Open AI Access
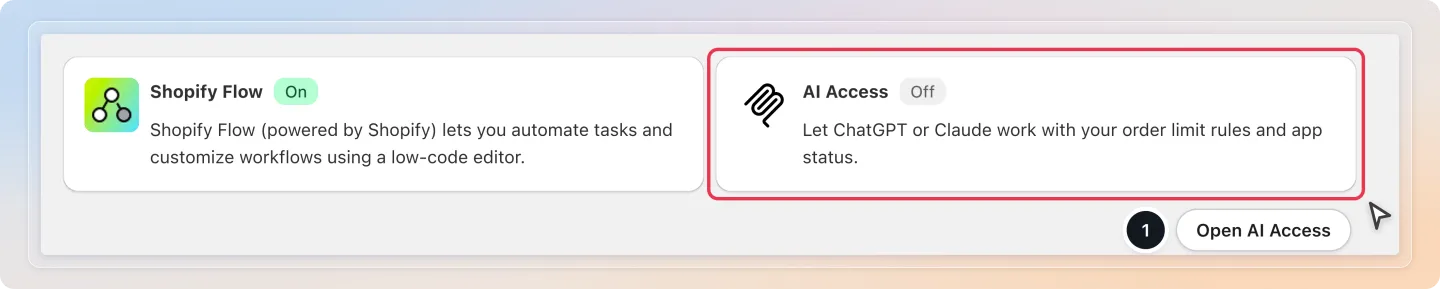
In your Shopify admin, open Avada Order Limits and select Integrations in the app menu, then select the AI Access card. The badge on the card tells you whether AI Access is already On or Off.
Step 2: Read what is shared
Step 1 on the page explains what leaves the app and what never leaves it. Select Show what is shared and never shared to open both lists.
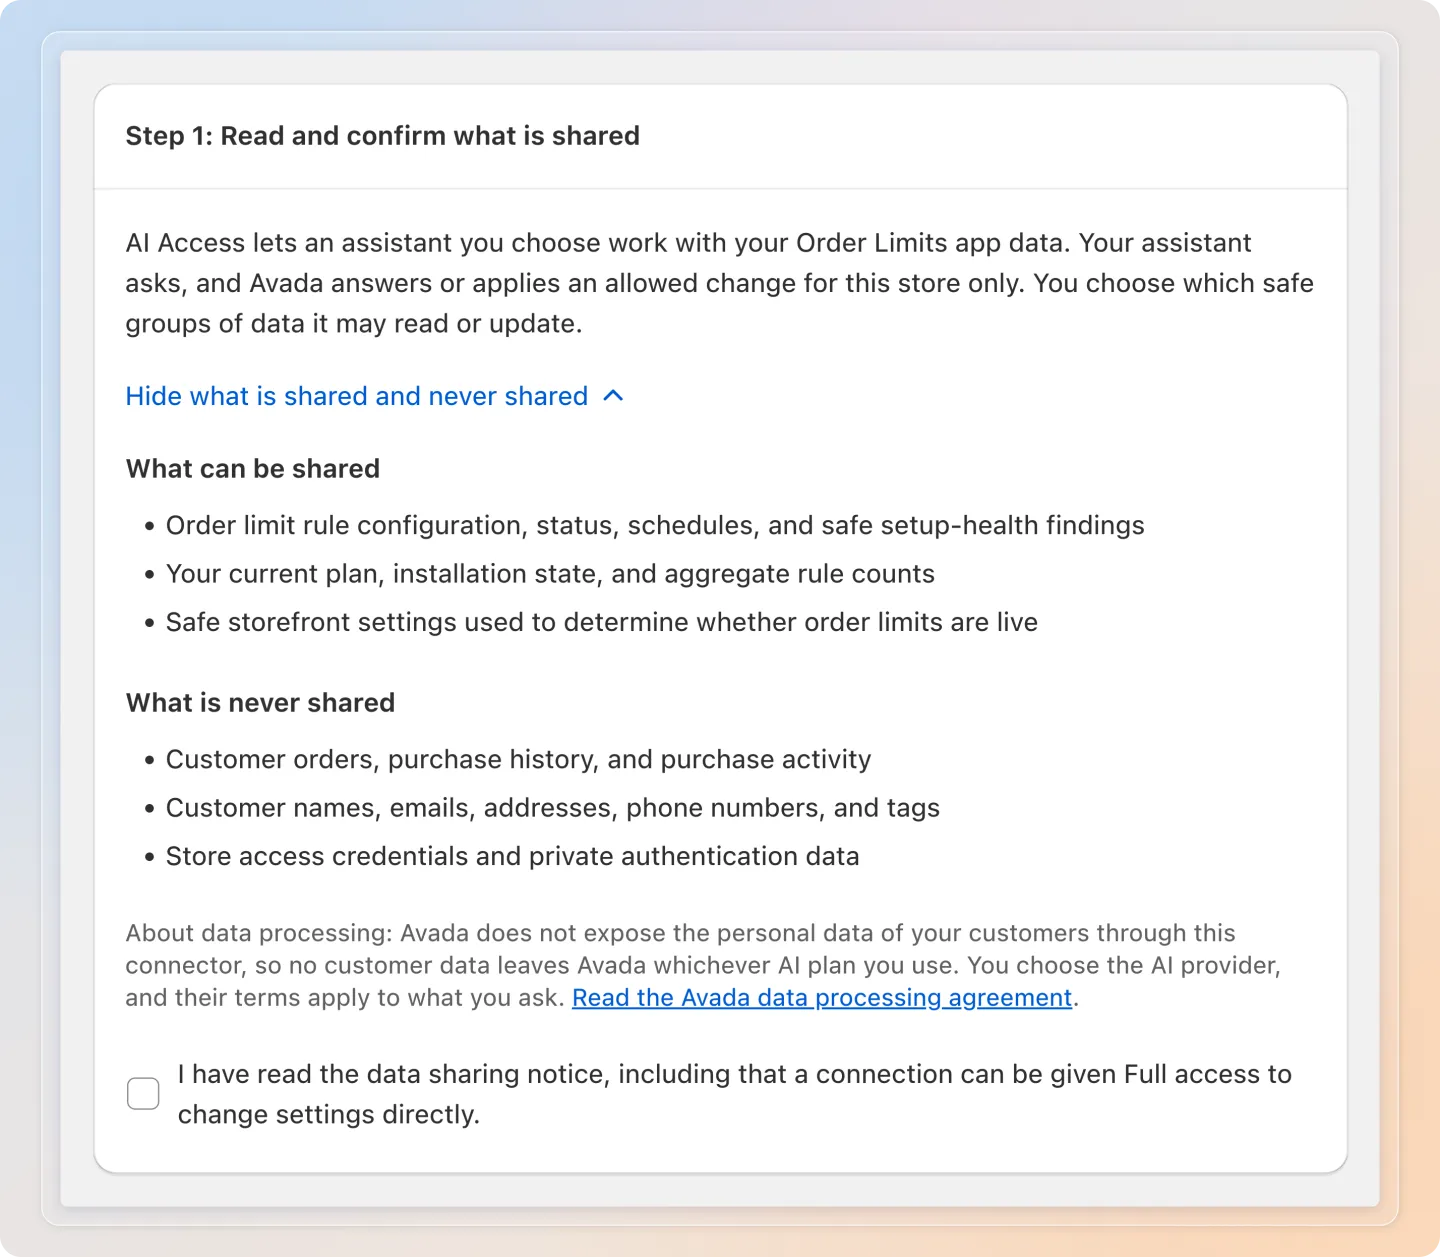
For Avada Order Limits:
| Can be shared | Never shared |
|---|---|
| Order limit rule configuration, status, schedules, and safe setup-health findings | Customer orders, purchase history, and purchase activity |
| Your current plan, installation state, and aggregate rule counts | Customer names, emails, addresses, phone numbers, and tags |
| Safe storefront settings used to determine whether order limits are live | Store access credentials and private authentication data |
The blocked list is enforced inside the app. There is no setting, no plan and no way of phrasing a question that opens it, and giving a connection full access does not open it either.
Tick I have read the data sharing notice to continue. The button in Step 2 stays disabled until you do.
Step 3: Turn on AI Access
Select Turn on. A window opens where you choose what your assistant may do.
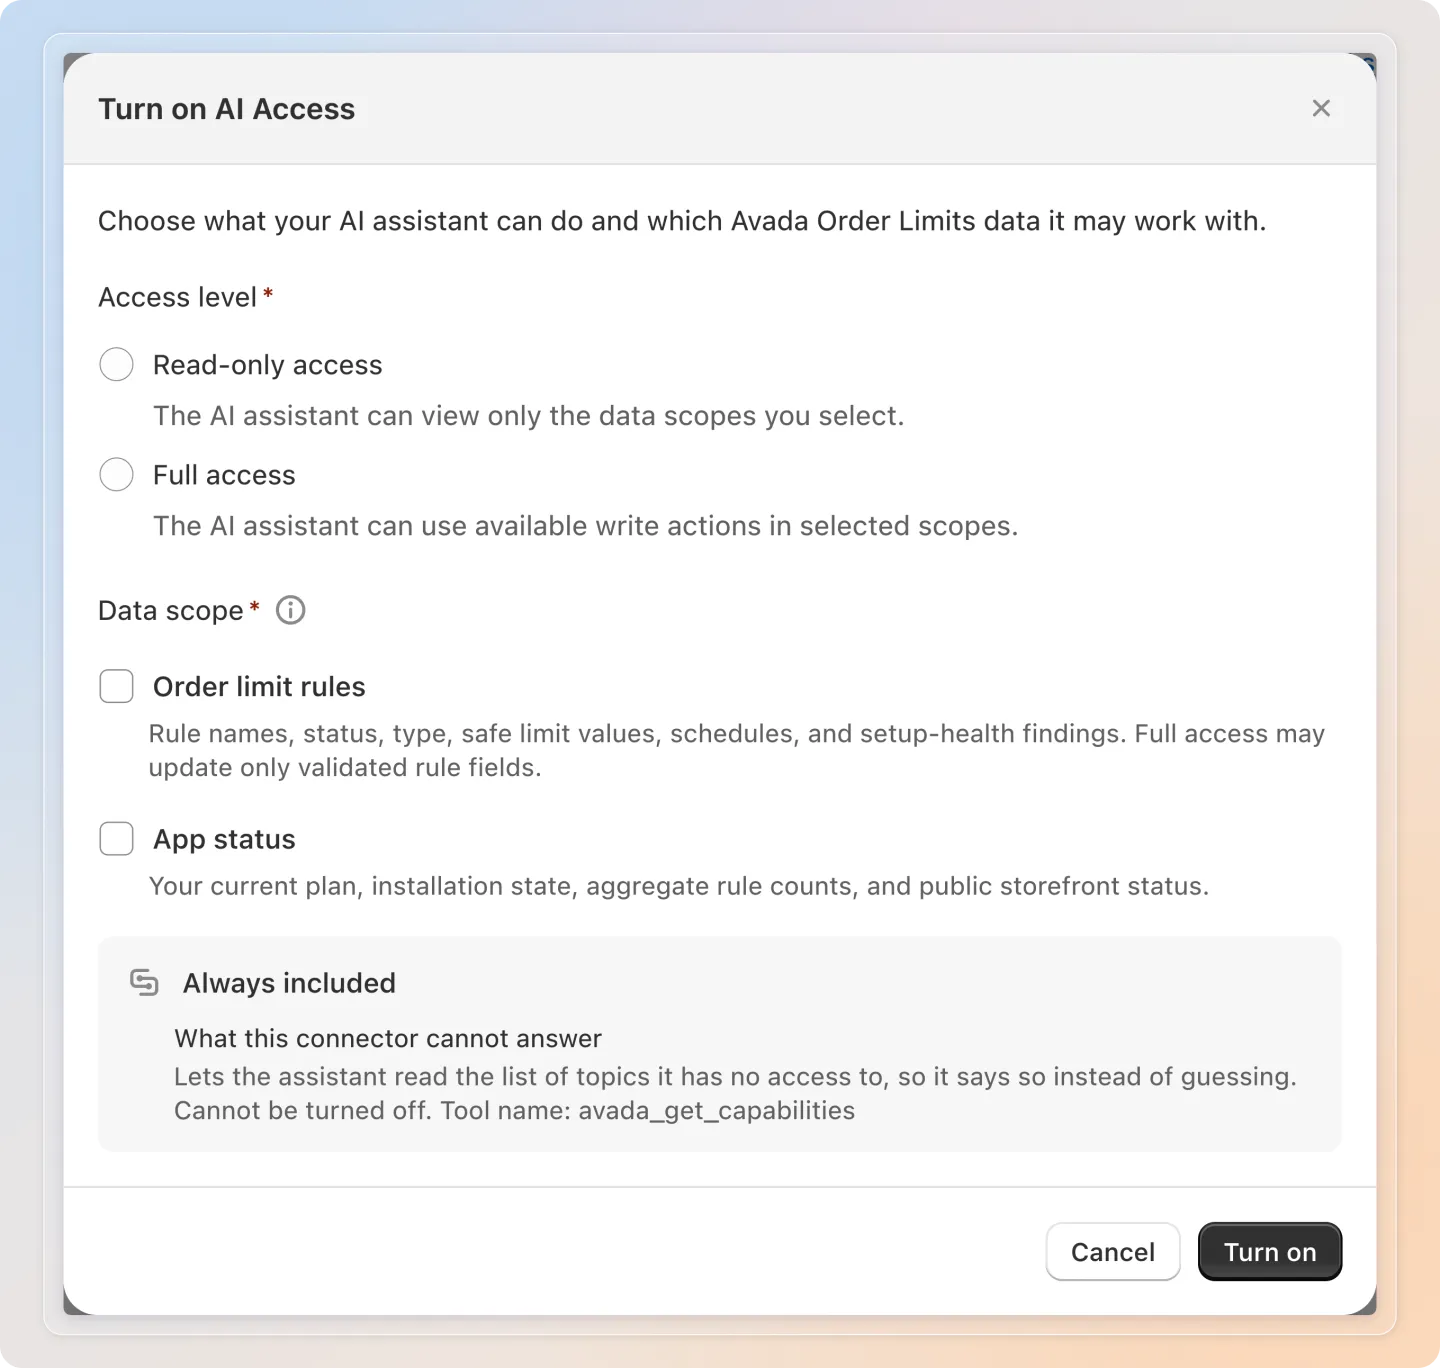
Access level: nothing is selected in advance, so this is always a deliberate choice.
| Access level | What the assistant can do |
|---|---|
| Read-only access | View the data groups you tick. It cannot change anything in the app. |
| Full access | View those groups and change the rule fields listed below. Changes take effect immediately. |
Data scope: tick at least one group. This is what the assistant may work with.
| Data group | What it covers |
|---|---|
| Order limit rules | Rule names, status, type, safe limit values, schedules, and setup-health findings. Full access may update only validated rule fields. |
| App status | Your current plan, installation state, aggregate rule counts, and public storefront status. |
Always included. Whatever you tick, the connection can also read the list of topics it has no access to. That way your assistant tells you a question is outside what this connection opened, instead of guessing an answer. This part cannot be turned off.
App status is read-only. Full access does not apply to it. Whatever access level you choose, the assistant can read this group and never write to it.
Full access has no approval step. The assistant does not send you a suggestion to review. It calls the app and the rule changes at that moment. Revoking the connection later stops further changes, but the rules it already changed keep their new values until you change them back yourself.
Select Turn on. AI Access is on and your connection is created in one action.
Step 4: Copy your server URL
Select Open in Step 3 of the page to open your connection.
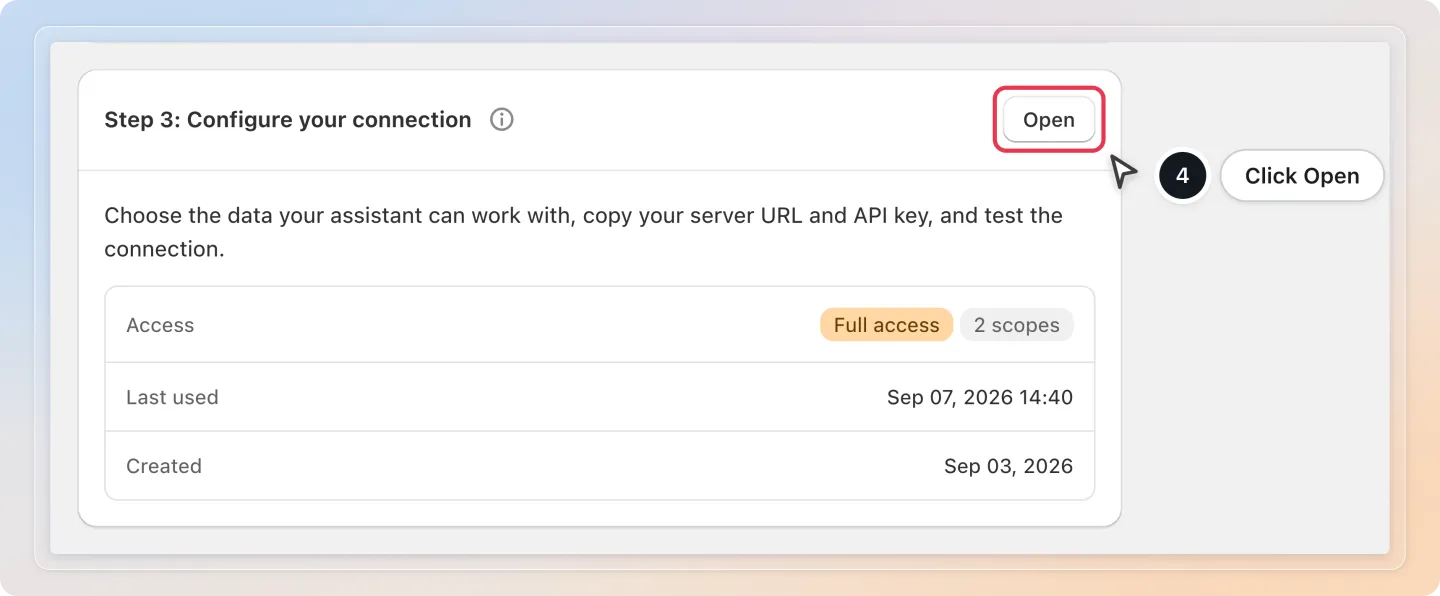
Under Step 2: Copy your connection details, select the copy button next to Server URL.
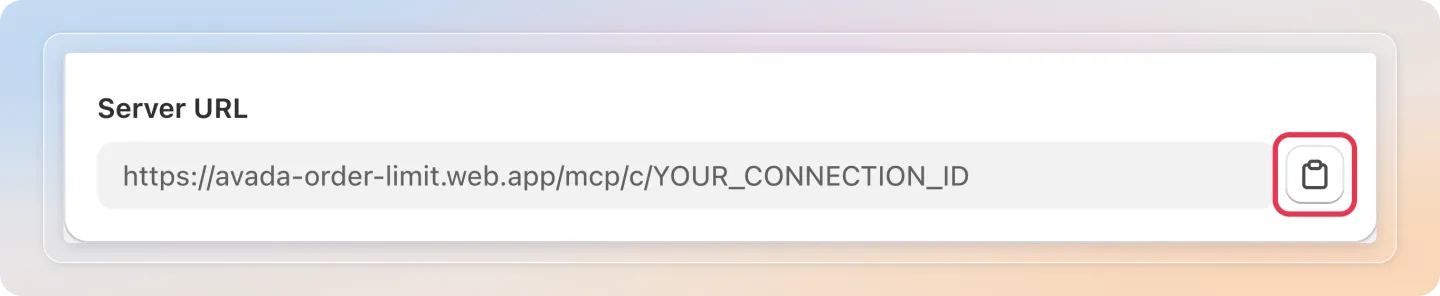
This URL belongs to this connection in this app. Avada Order Limits has its own URL, and so does every other Avada app.
Step 5: Generate an API key
You only need this for the command line and desktop clients. Claude and ChatGPT on the web ask you to approve access instead, so they do not use a key.
Select Generate API key, then use the eye button to reveal it and the copy button to copy it.
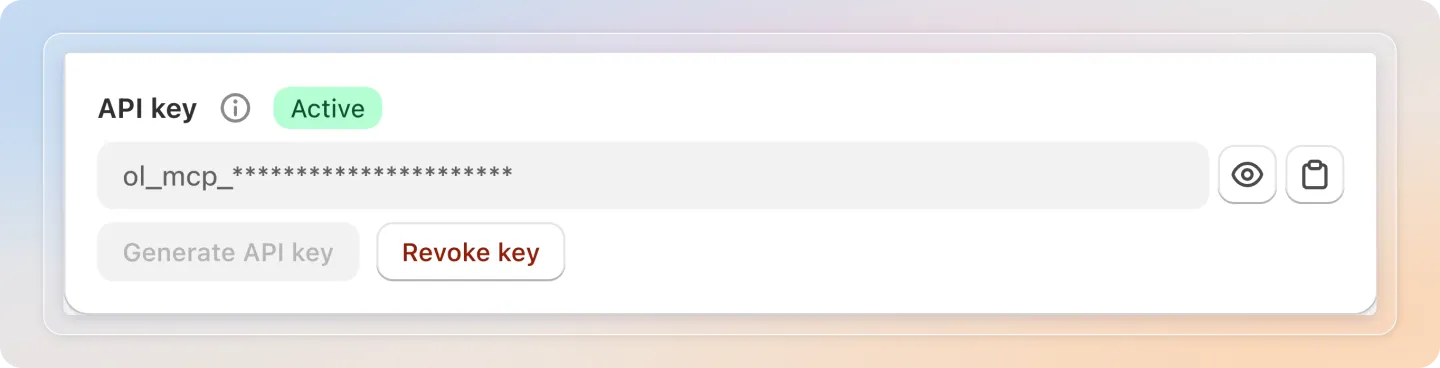
Treat the key like a password. Anyone who has it can reach the data groups you opened, at the access level you chose.
Step 6: Connect your assistant
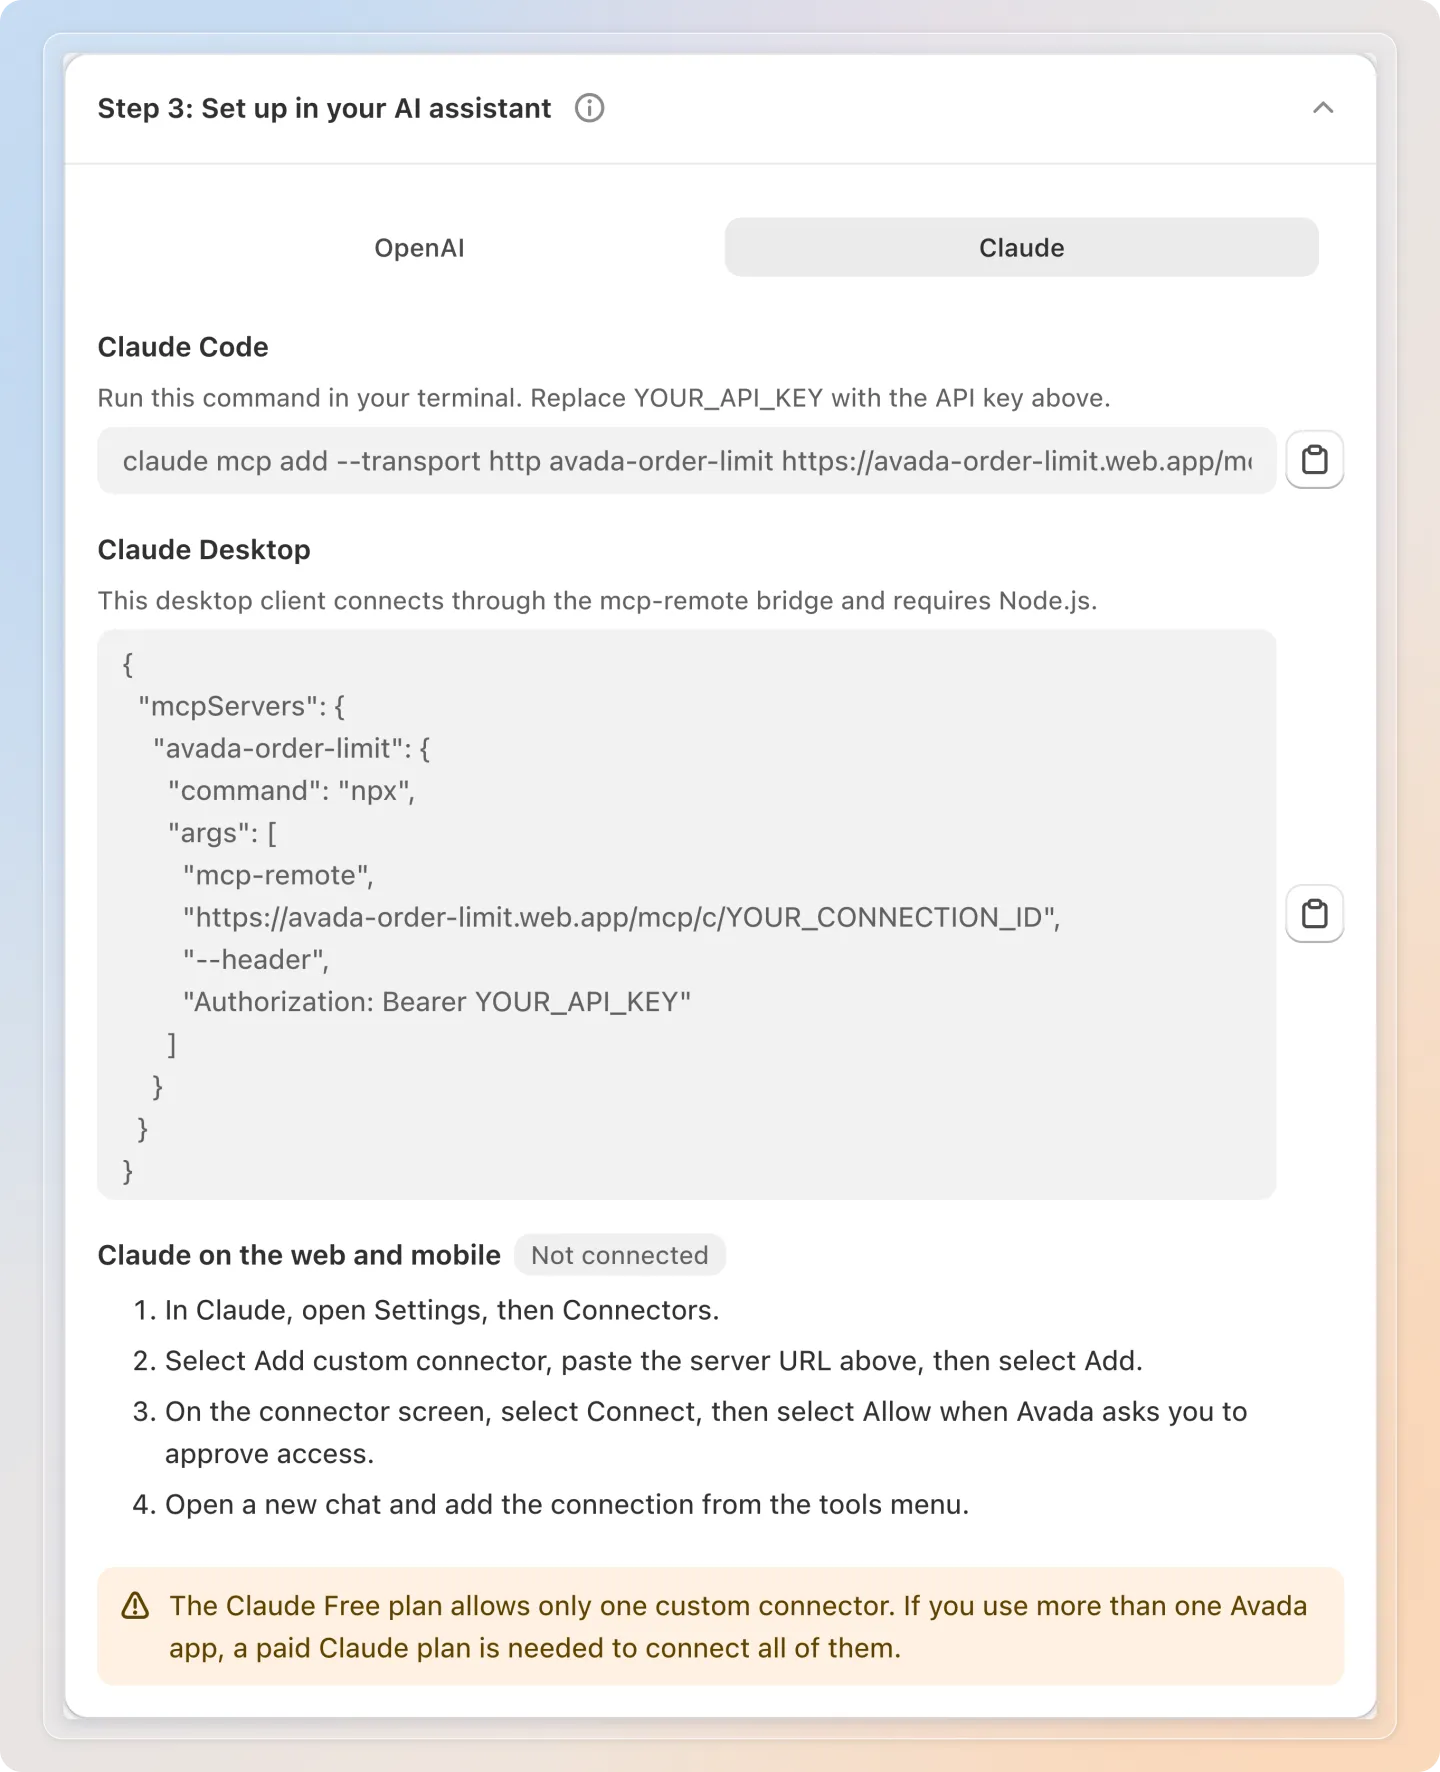
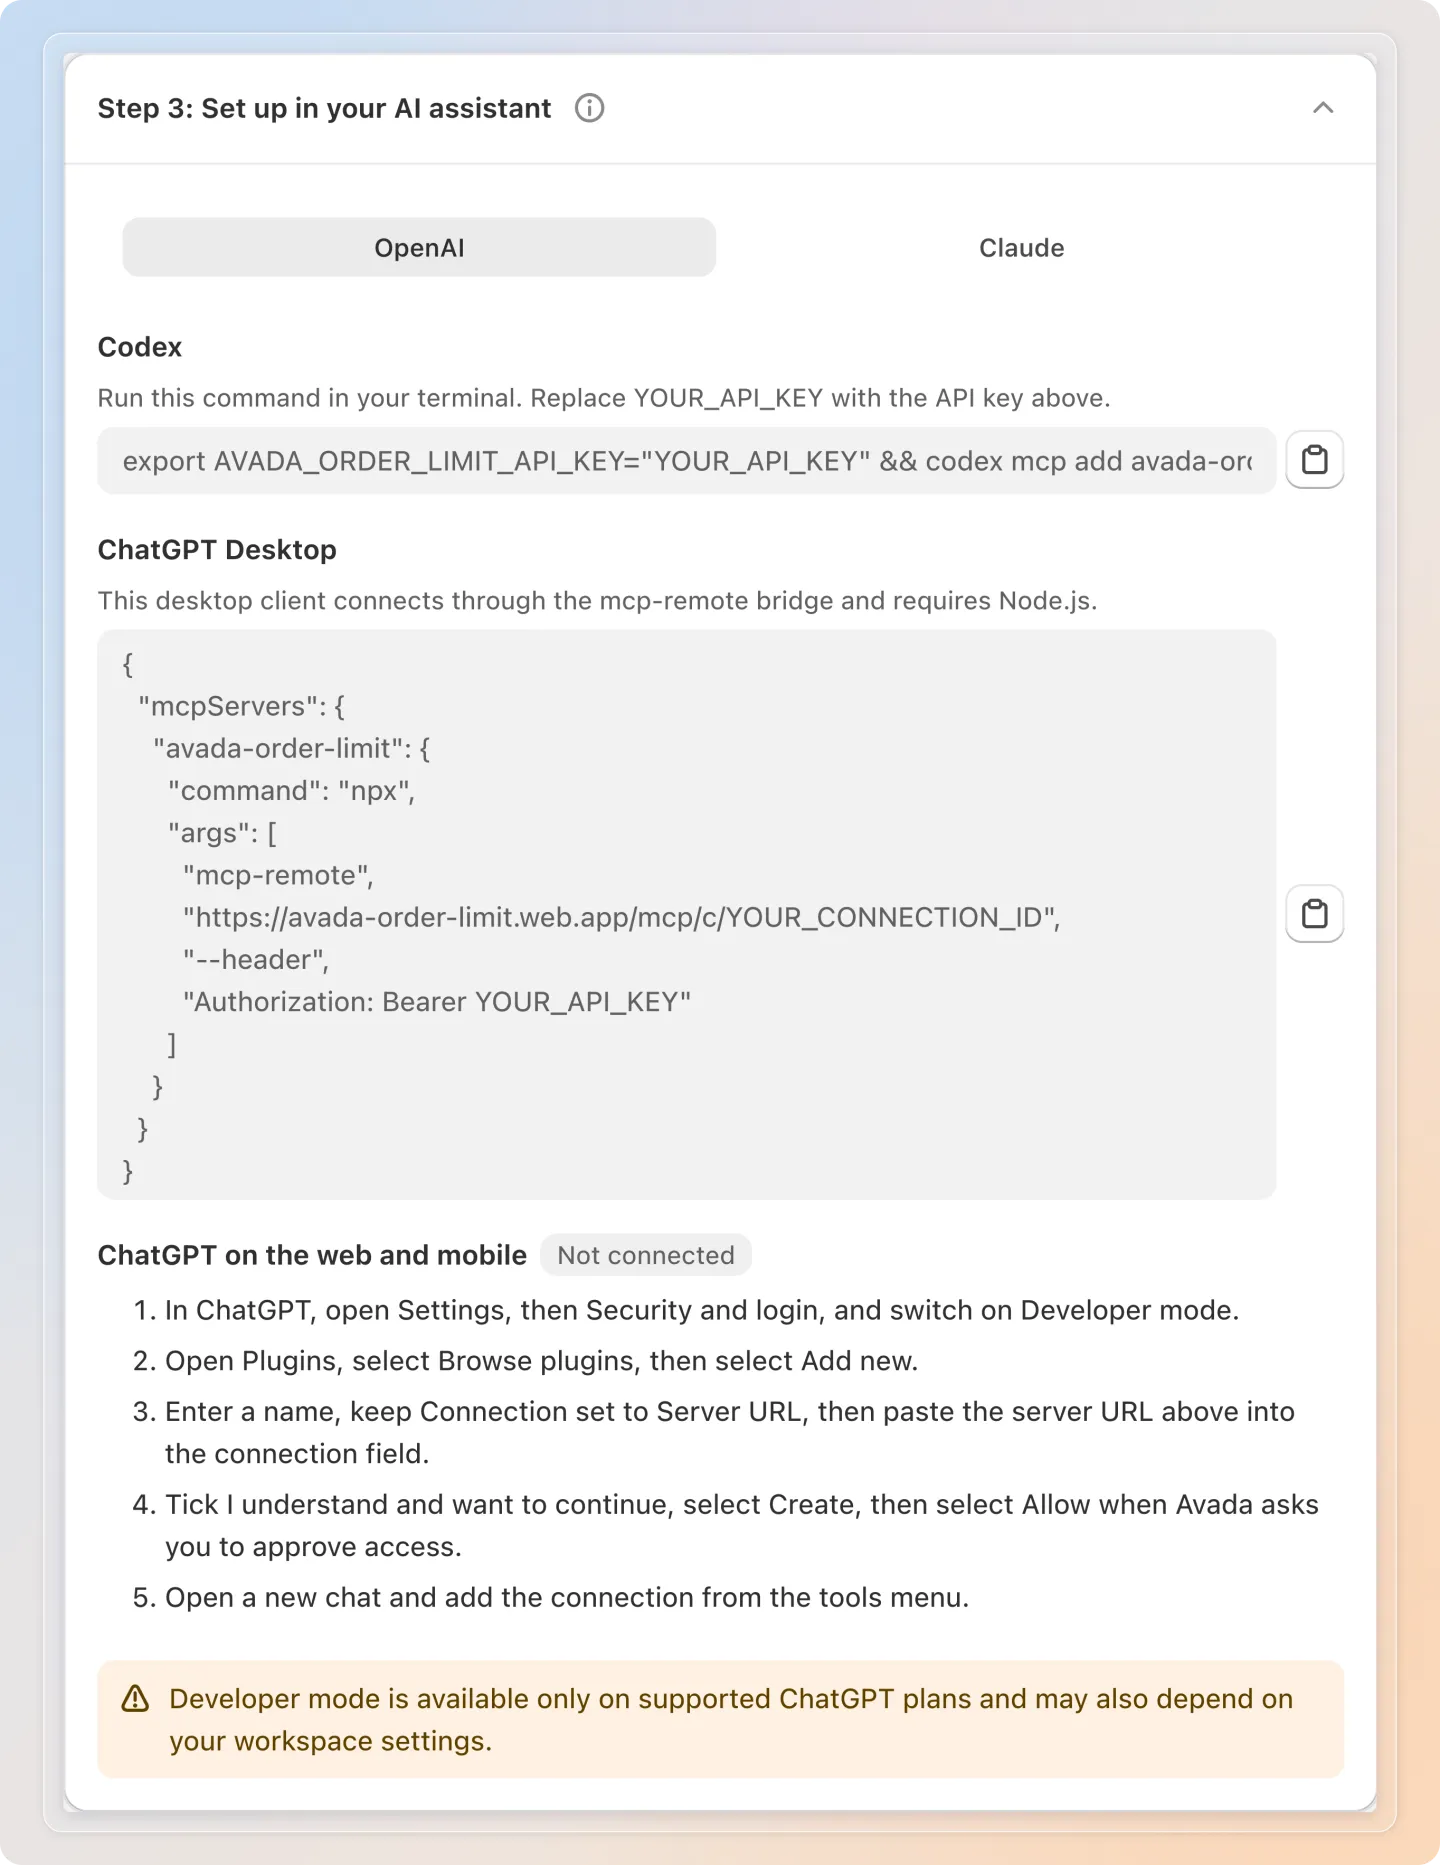
Open Step 3: Set up in your AI assistant and pick the tab for the assistant you use. Each tab has three ways to connect.
Claude on the web and mobile
- In Claude, open Settings, then Connectors.
- Select Add custom connector, paste the server URL, then select Add.
- On the connector screen, select Connect, then select Allow when Avada asks you to approve access.
- Open a new chat and add the connection from the tools menu.
ChatGPT on the web and mobile
- In ChatGPT, open Settings, then Security and login, and switch on Developer mode.
- Open Plugins, select Browse plugins, then select Add new.
- Enter a name, keep Connection set to Server URL, then paste the server URL into the connection field.
- Tick I understand and want to continue, select Create, then select Allow when Avada asks you to approve access.
- Open a new chat and add the connection from the tools menu.
Claude Code, Claude Desktop, Codex and ChatGPT Desktop
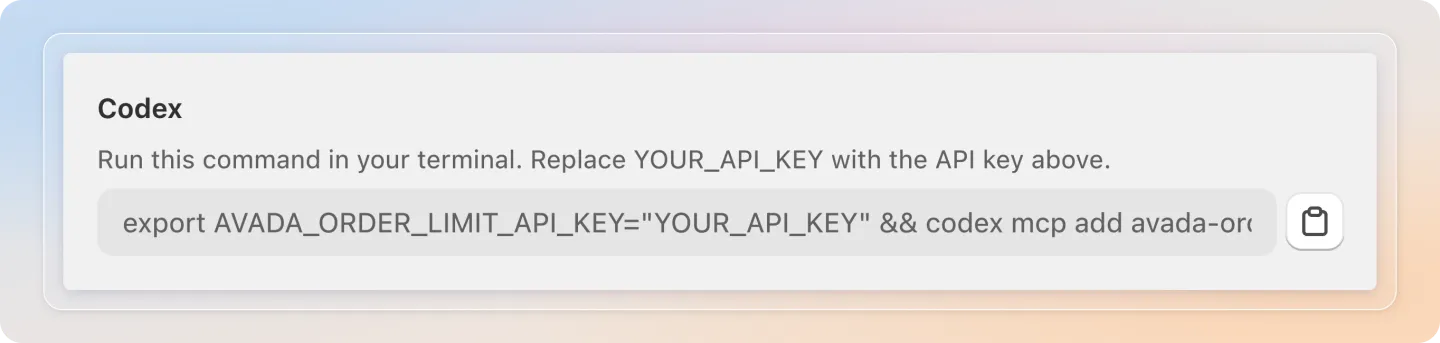
These clients sign in with the API key instead of asking you to approve access in the browser. Each tab shows a ready-made command or configuration block with a copy button. Paste your own key where the command says YOUR_API_KEY.
Step 7: Ask your first question
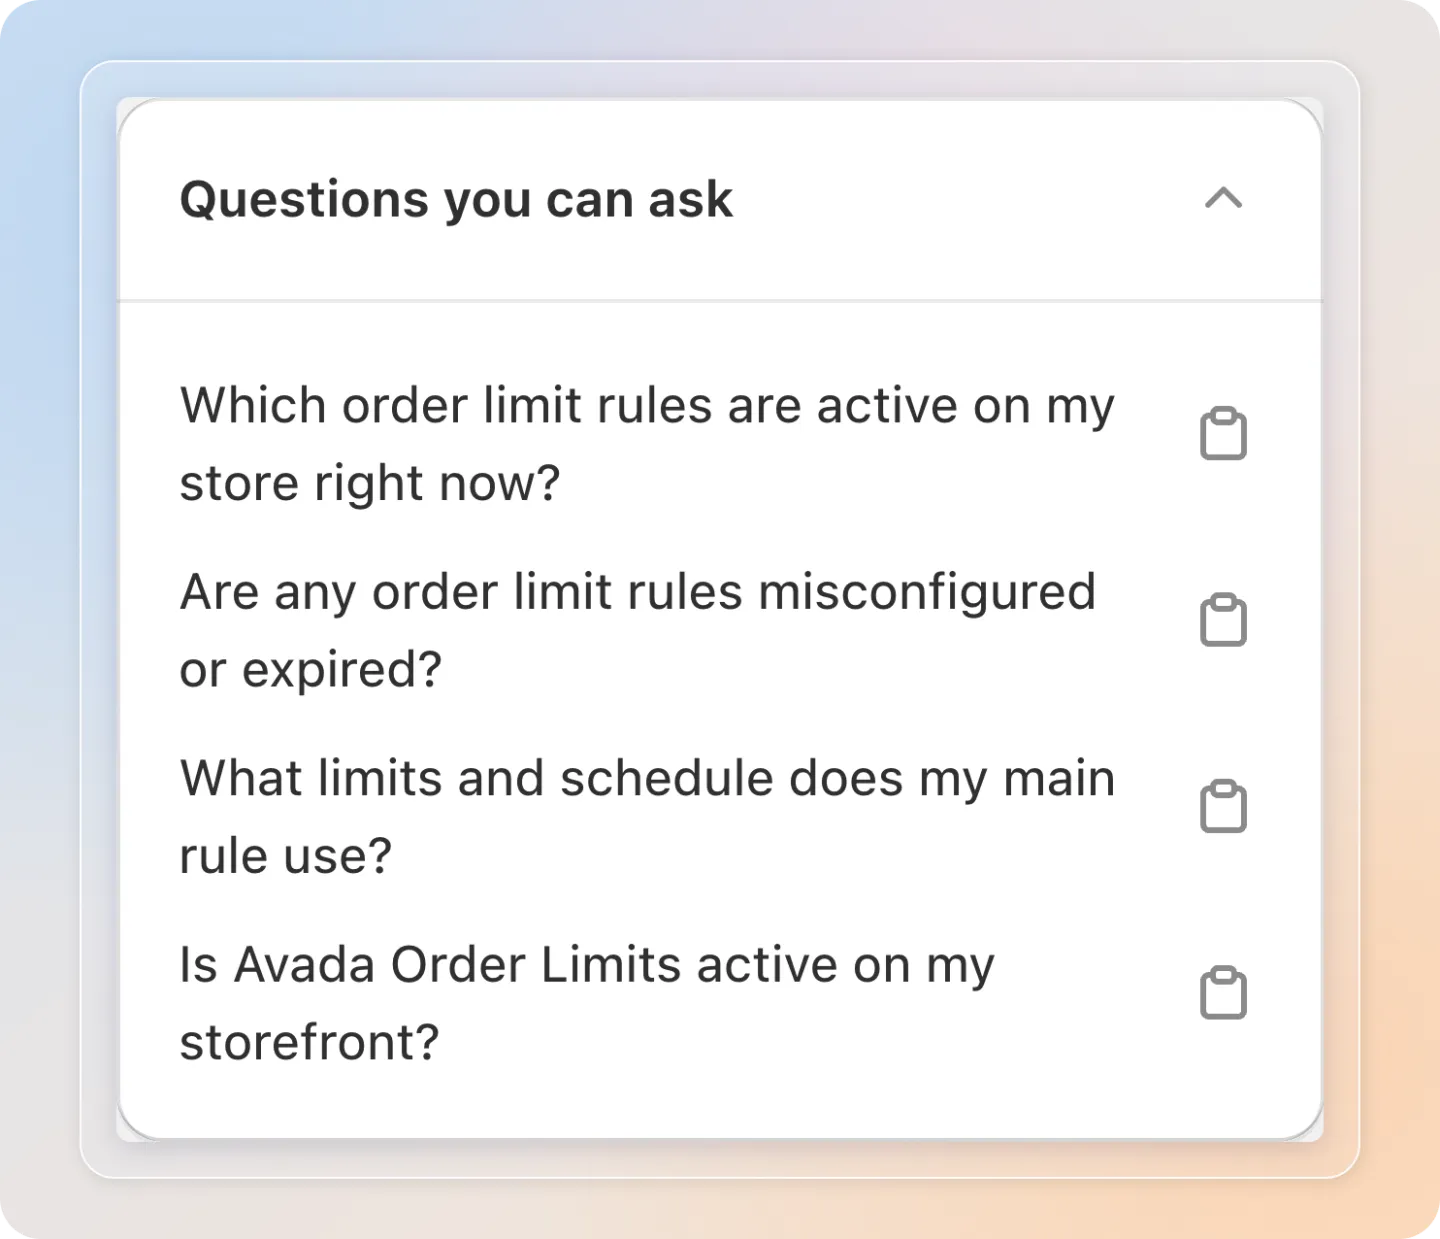
Open a new chat with the connection enabled and try one of these. The same questions are listed in the Questions you can ask card, each with a copy button.
- Which order limit rules are active on my store right now?
- Are any order limit rules misconfigured or expired?
- What limits and schedule does my main rule use?
- Is Avada Order Limits active on my storefront?
The first three questions need the Order limit rules group. The last one needs App status. The card only shows the questions your connection can actually answer, so a group you did not tick takes its questions off the list.
If you gave the connection Full access, you can also tell it what to do:
- Set the maximum quantity on my main rule to 5.
- Turn off the rule that expired last week.
What your assistant can change
With Full access, and only inside the groups you ticked, the assistant can change:
| Group | What it can change |
|---|---|
| Order limit rules | Minimum, maximum and multiple quantity · the effective period, meaning the start and end date · the minimum, maximum and multiple messages shown to shoppers, up to 150 characters each · a rule's status, active or inactive · one setup-health issue the app is currently reporting on that rule |
| App status | Nothing. This group is read-only at every access level. |
Everything else stays read-only: rule names, rule types, the products, collections and customer tags a rule targets, exclusions, re-purchase settings, and anything on the never-shared list.
About the setup-health fix. The assistant has a separate tool for repairing a rule the app already flags as broken: an invalid limit range, an invalid multiple, an invalid start date, an invalid effective period, or a missing minimum or maximum message. It re-checks the issue in the app immediately before writing, so it can only fix a problem that still exists on that exact rule. A fix that is out of date, or aimed at something the app is not reporting, is refused.
There is no undo. If a change is not what you wanted, open the app and set the value back yourself.
Check what your assistant has been doing
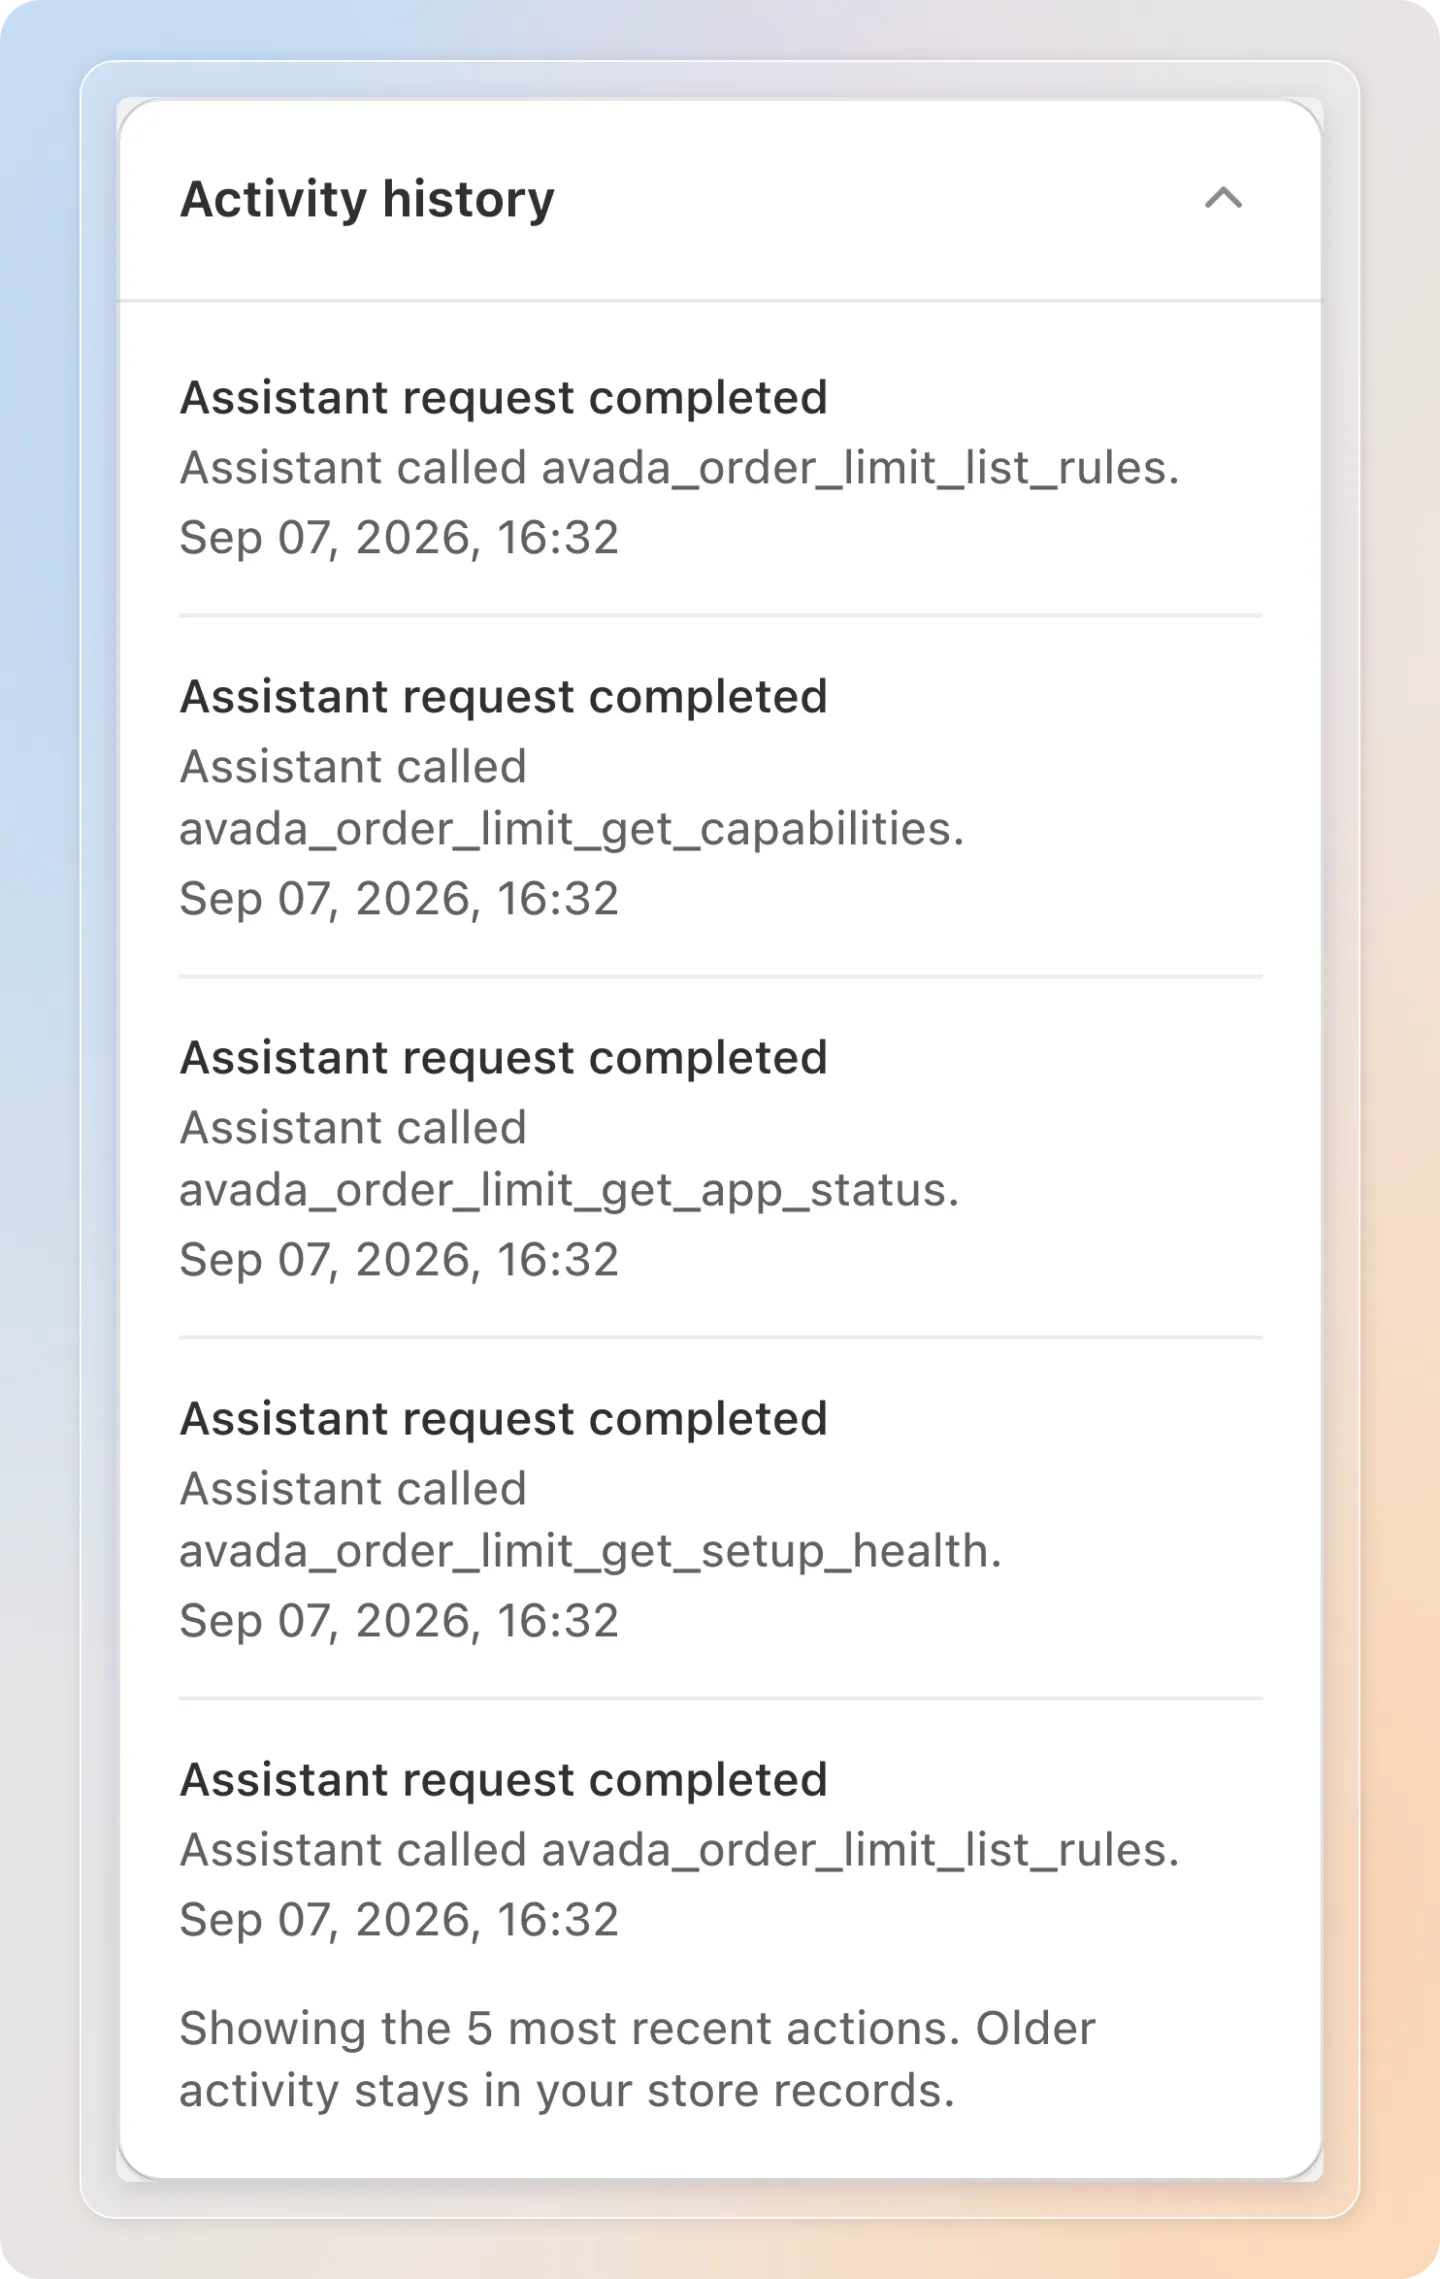
The Activity history card on the connection page lists the five most recent actions, with the tool that was called and when. It fills up after your assistant uses the connection for the first time.
Change what your assistant can do
Open your connection, change the Access level or tick and untick groups under Step 1: Data scope, then select Save in the bar that appears at the top of the page.
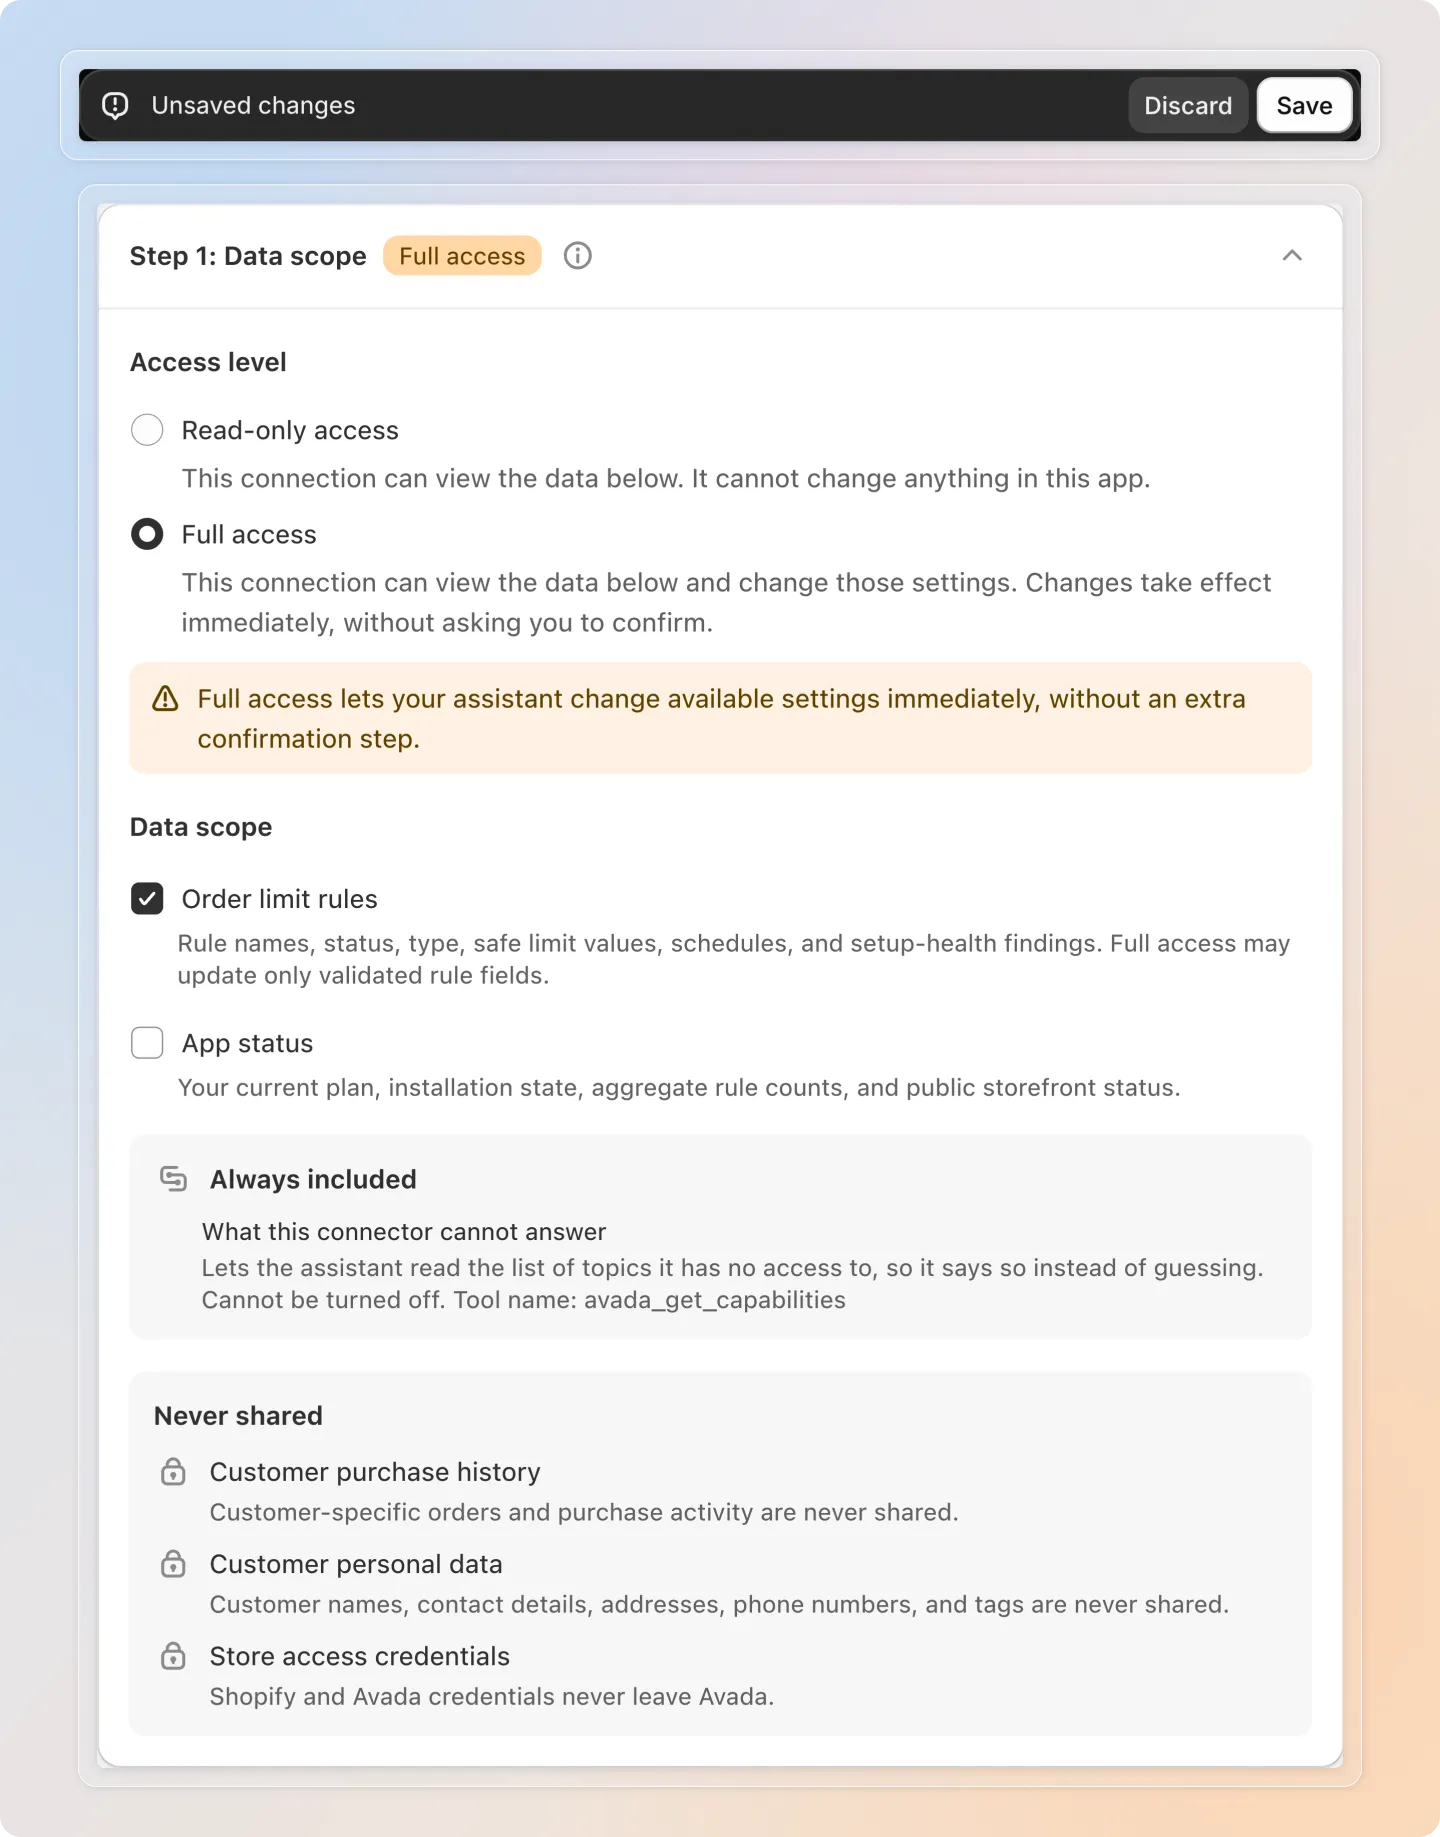
The change applies to the next request your assistant makes. You do not have to set the connection up again in Claude or ChatGPT. If you try to leave the page while a change is still unsaved, you are asked to confirm first.
Turn it off or revoke it
| Action | What happens | Reversible |
|---|---|---|
| Turn off in Step 2 | Your assistant stops getting answers immediately. Your server URL and API key stay in place. | Yes. When you turn it on again you confirm the access level and data scope once more. |
| Revoke connection on the connection page | The API key and every approval for this connection stop working immediately. AI Access is turned off as well. | No. You can turn AI Access on again later and confirm a new data scope. |
Neither one puts back a rule value that was already changed. They stop what happens next.
Tips
- One connection per store. Each store has a single connection in this app, so there is one server URL and one API key to look after.
- One connection per app. Avada Order Limits cannot see your Cookie Consent or Age Verification data. Each app has its own URL, its own approval and its own connector.
- There is a limit on changes. A connection can make 5 changes per minute, and the store can take 30 changes per hour. Questions do not count towards it.
- Answers are raw data, not advice. What comes back is what the app holds about your rules and your app status.
Troubleshooting
| Symptom | Likely cause | What to do |
|---|---|---|
| No place to add a connector in ChatGPT | Developer mode is off, or your plan does not have it | Switch it on under Settings then Security and login. It does not exist on the Free plan. |
| Claude will not add the connector | Claude Free allows one custom connector and you already have one | Remove the existing connector, or use a paid plan. |
| The connector exists but the assistant never uses it | The connection is not added to that chat | Open a new chat and add the connection from the tools menu. |
| The assistant says a tool is not available | The question needs a group this connection did not open | Open your connection, tick the group under Step 1: Data scope, then select Save. |
| The assistant says it cannot change a rule | The connection is Read-only access | Open your connection, switch the access level to Full access, then select Save. |
| The assistant will not change anything under App status | That group is read-only at every access level | Nothing to fix. Open the app to change those settings there. |
| The assistant says a setup fix no longer applies | The app is no longer reporting that issue on that rule | Ask it to check setup health again, then ask for the fix it reports now. |
| The assistant says Avada does not share that data | The question touches blocked data, such as orders or customer details | Nothing to fix. Open the app to see it there. |
| Everything is refused | AI Access is off, or the connection was revoked | Check the badge next to AI Access on the page, then the badge on the connection. |
| You are asked to approve access again | The approval expired, or access was interrupted for a security reason | Approve again from your assistant. This is expected. |
You're all set. AI Access is ready whenever you want your assistant to help with this app.