Shopify Flow
Shopify Flow is a low-code automation tool built by Shopify. With this integration, Avada Order Limit becomes a trigger inside Flow — you can tag the customer, send a Slack or email alert, push the event to Klaviyo or Omnisend, or chain any other app you already use. Don't worry, we'll walk you through every step.
Prerequisites
- Avada Order Limit is installed and at least one limit rule is published
- Shopify Flow is installed on your store from the Shopify App Store
- (Optional) The third-party app you want to connect to
Step 1: Connect Avada Order Limit to Shopify Flow
Open Avada Order Limit and go to Integrations > Shopify Flow from the left menu. You will see two cards: Integrate with any apps and Connect to Shopify Flow.
- Locate the Connect to Shopify Flow card
- Click the Connect button on the right
- Wait for the status badge next to the page title to change from Disconnected to Connected
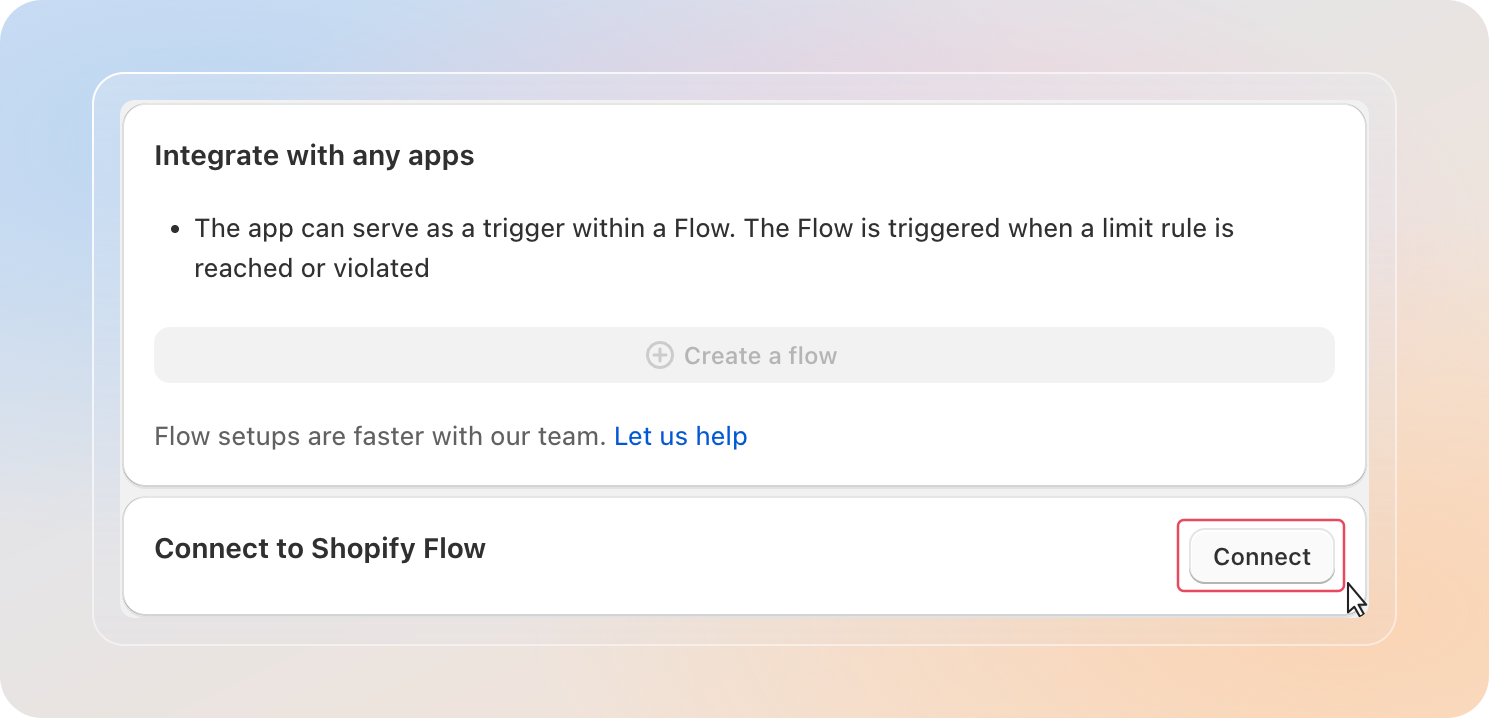
Note: The Create a flow button stays disabled until the integration shows as Connected. If the badge still says Disconnected, refresh the page and try again.
Step 2: Open the Shopify Flow editor
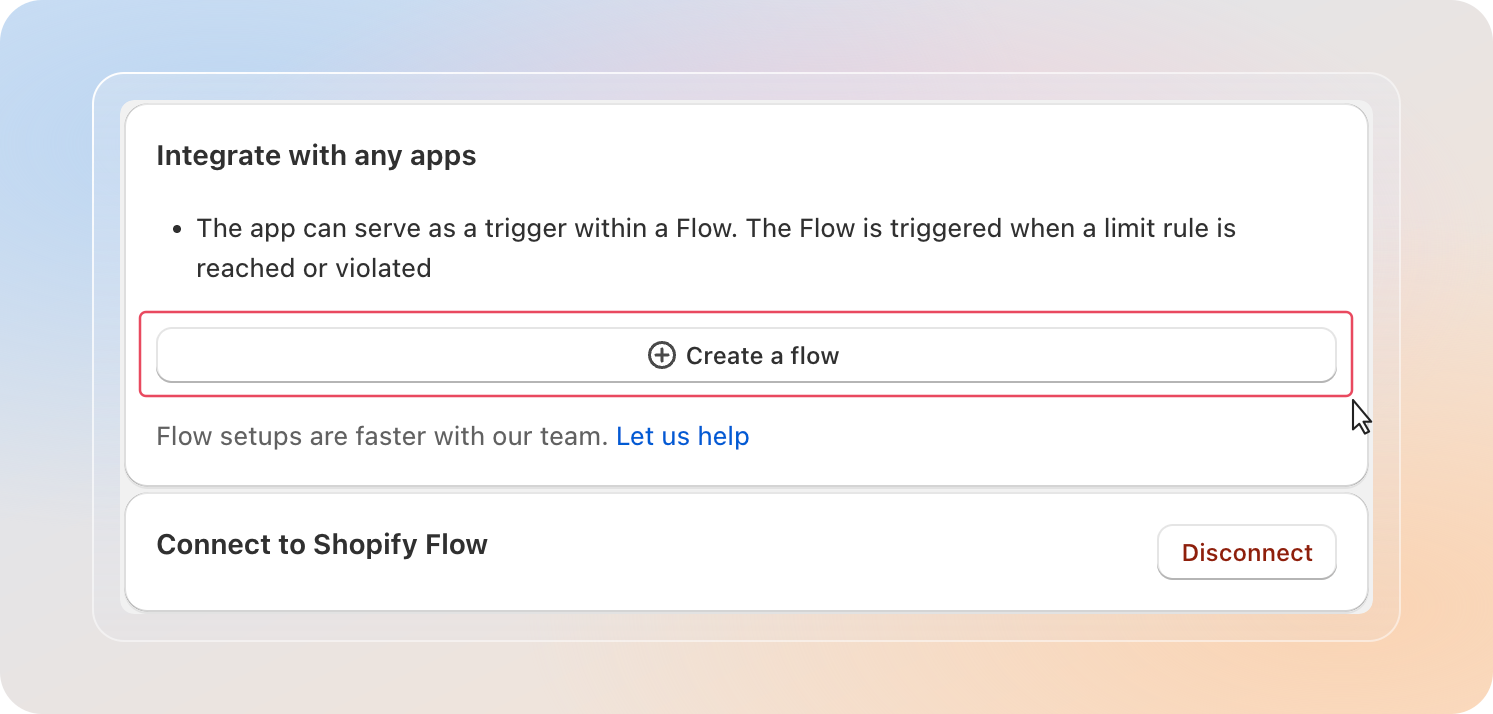
From the same screen, click Create a flow on the Integrate with any apps card. This opens the Shopify Flow editor in a new tab, ready for you to build your automation.
Tip: You can also reach the editor directly from Shopify admin > Apps > Flow > Create workflow, but starting from Avada saves a few clicks because the trigger app is already linked.
Step 3: Choose an Avada Order Limit trigger
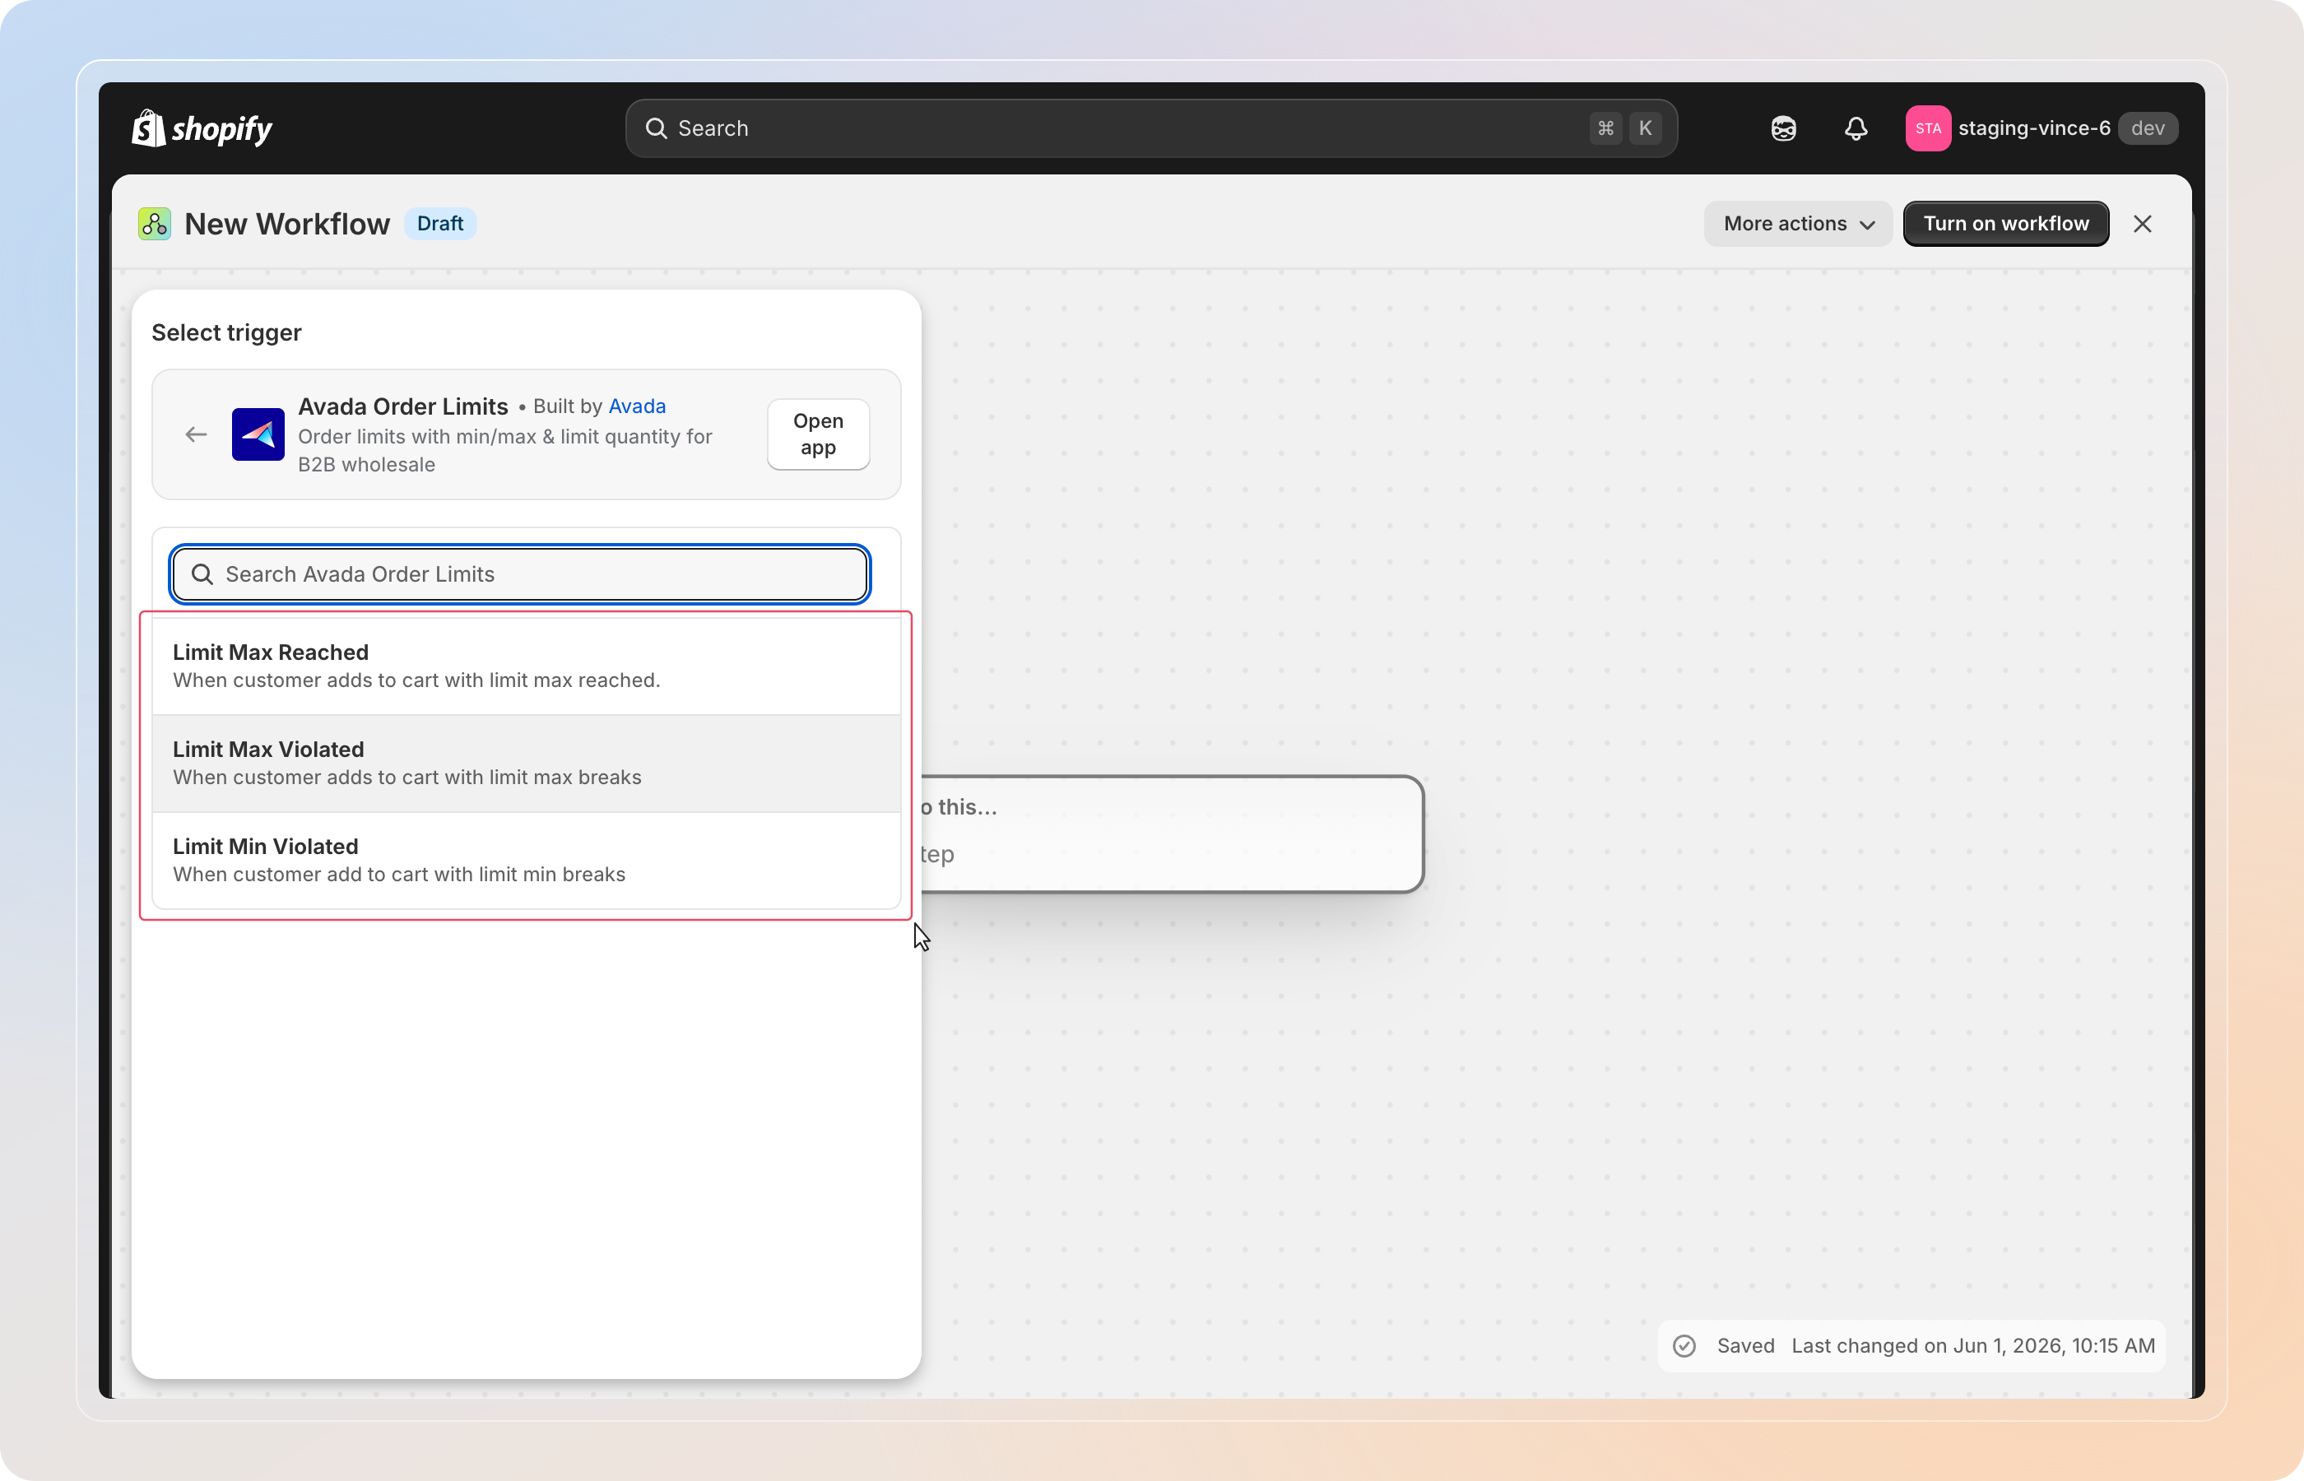
In the Flow editor, click the Trigger node, search for Avada Order Limit, and pick one of the three triggers below.
| Trigger | Fires when |
|---|---|
| Limit Max Reached | A customer adds an item to cart and reaches the maximum quantity allowed by your rule |
| Limit Max Violated | A customer tries to exceed the maximum quantity allowed by your rule |
| Limit Min Violated | A customer's cart falls below the minimum quantity required by your rule |
Each trigger exposes the same payload, so you can use any of the following fields downstream:
Customer Id,Customer EmailMin value,Max value,MultipleRule Name,Rule TypeProduct Name,Collection Name
Step 4: Add conditions (optional)
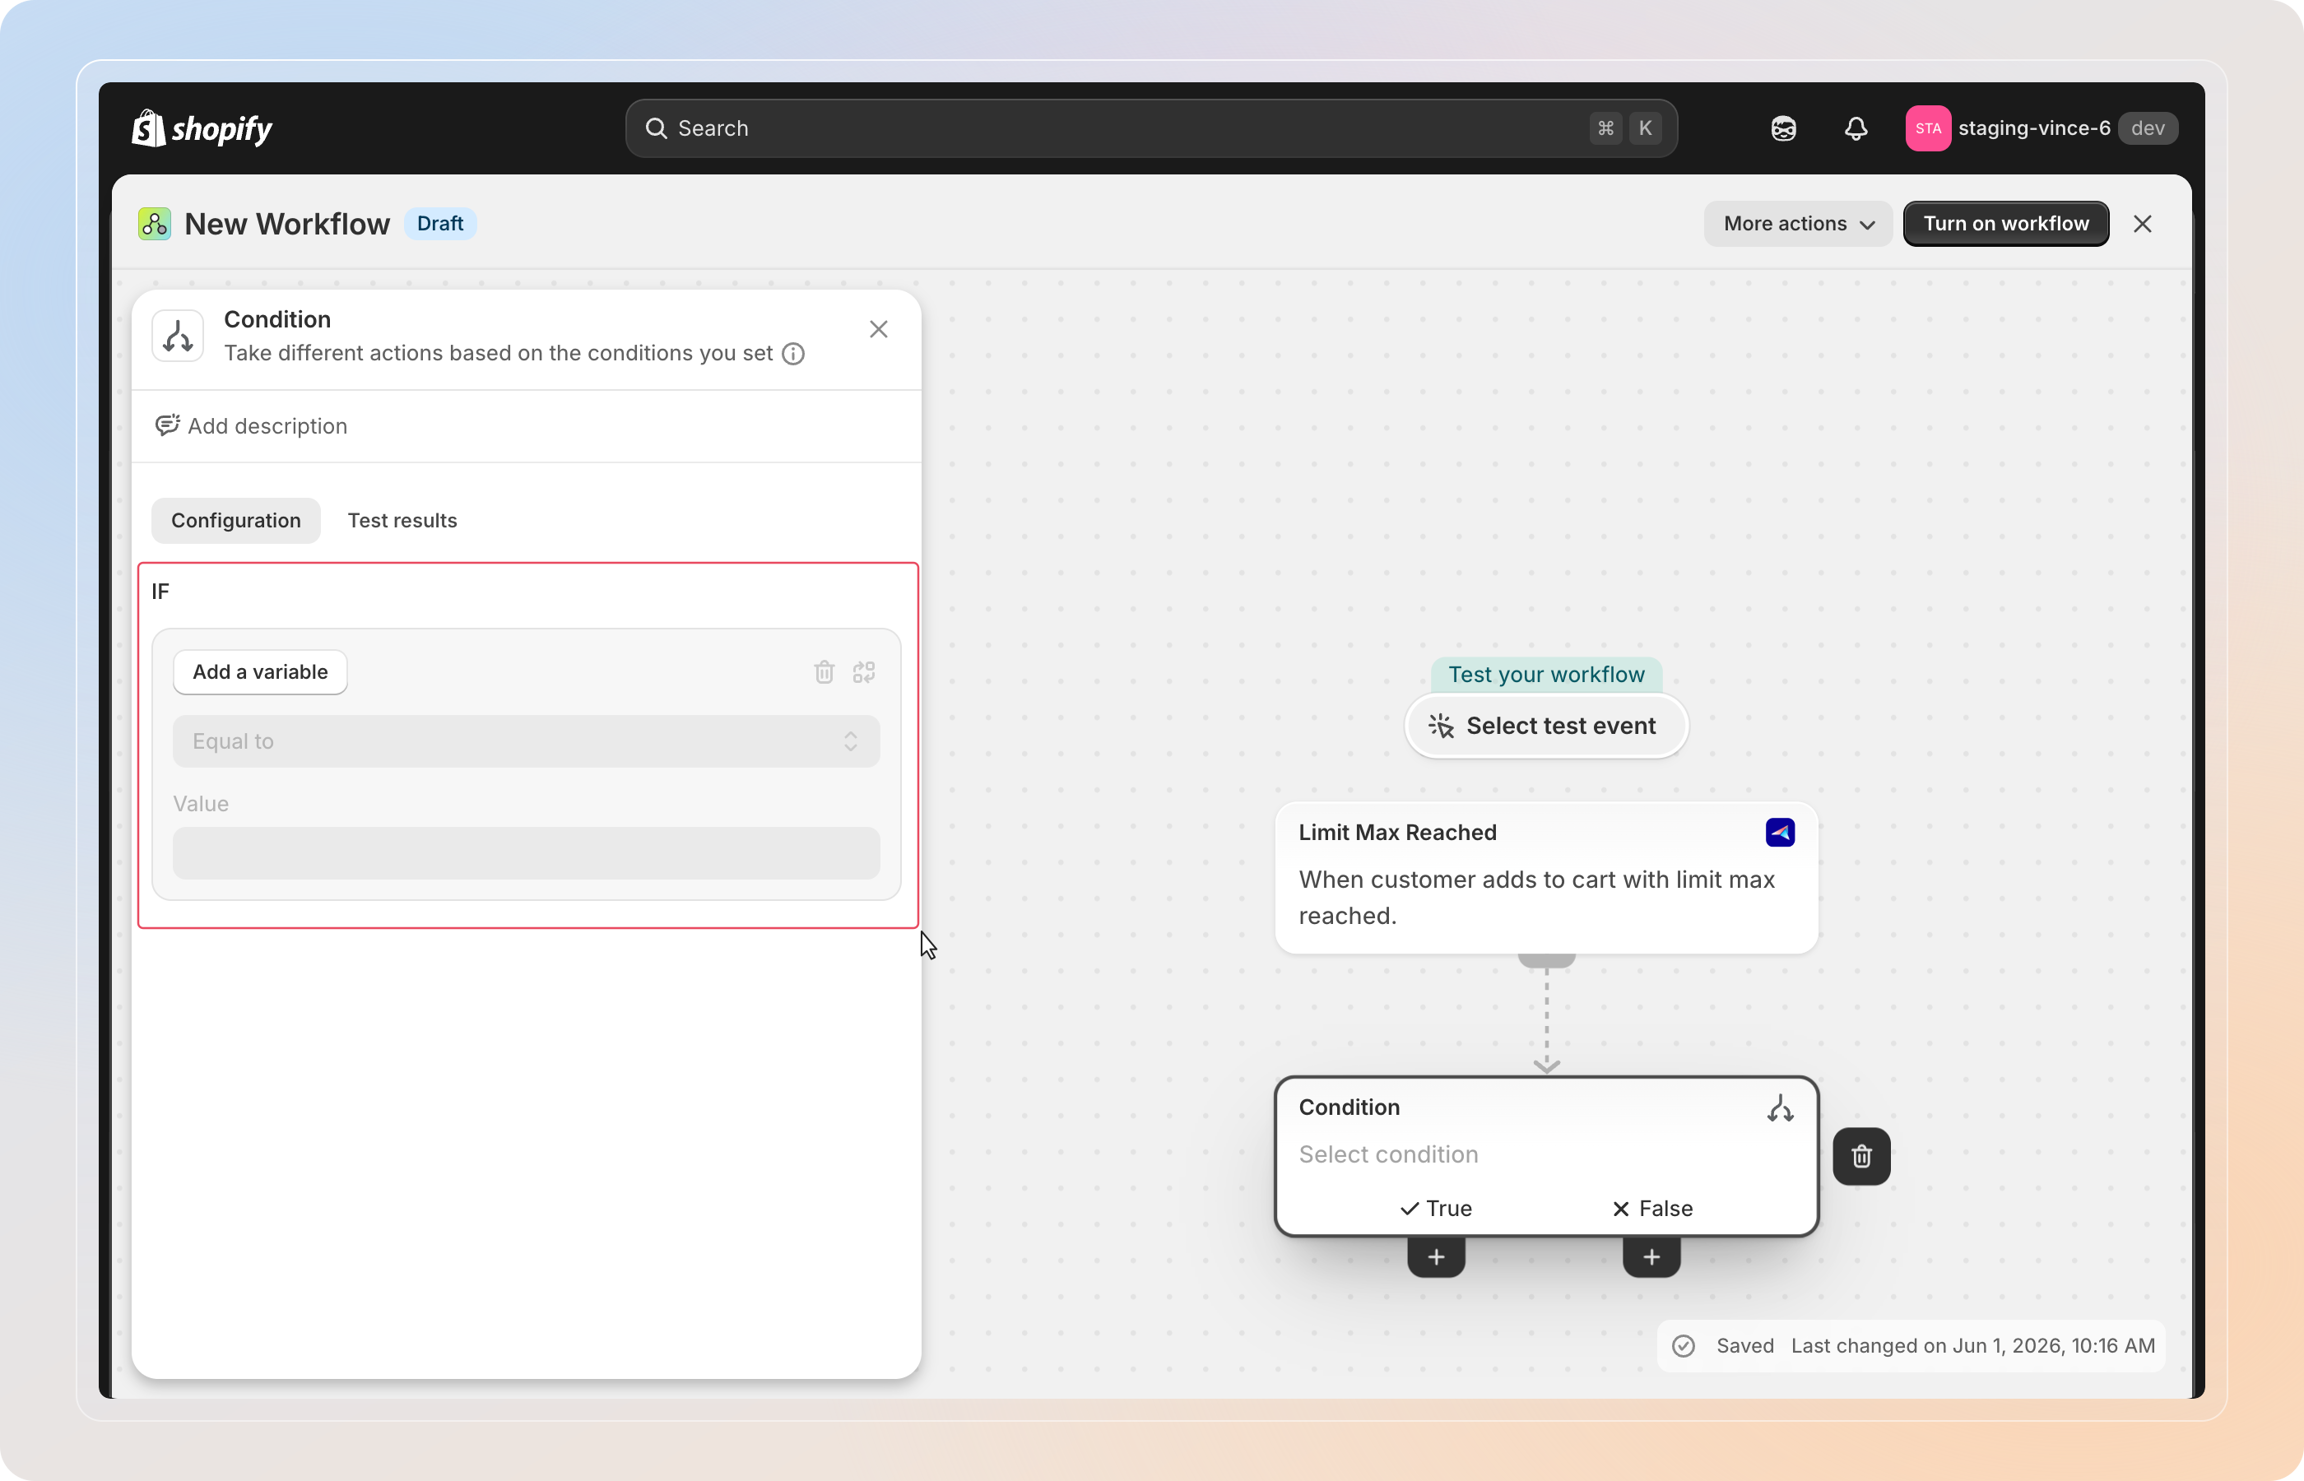
Conditions let you narrow the automation to specific rules or products. Click the + under the trigger and choose Condition.
Common examples:
- Run the flow only when
Rule NameequalsMOQ 20 - Run the flow only when
Product Namestarts withSample - Run the flow only when
Rule TypeequalsProduct Limit
Tip: Skip this step if you want the automation to run for every limit event — you can always add conditions later.
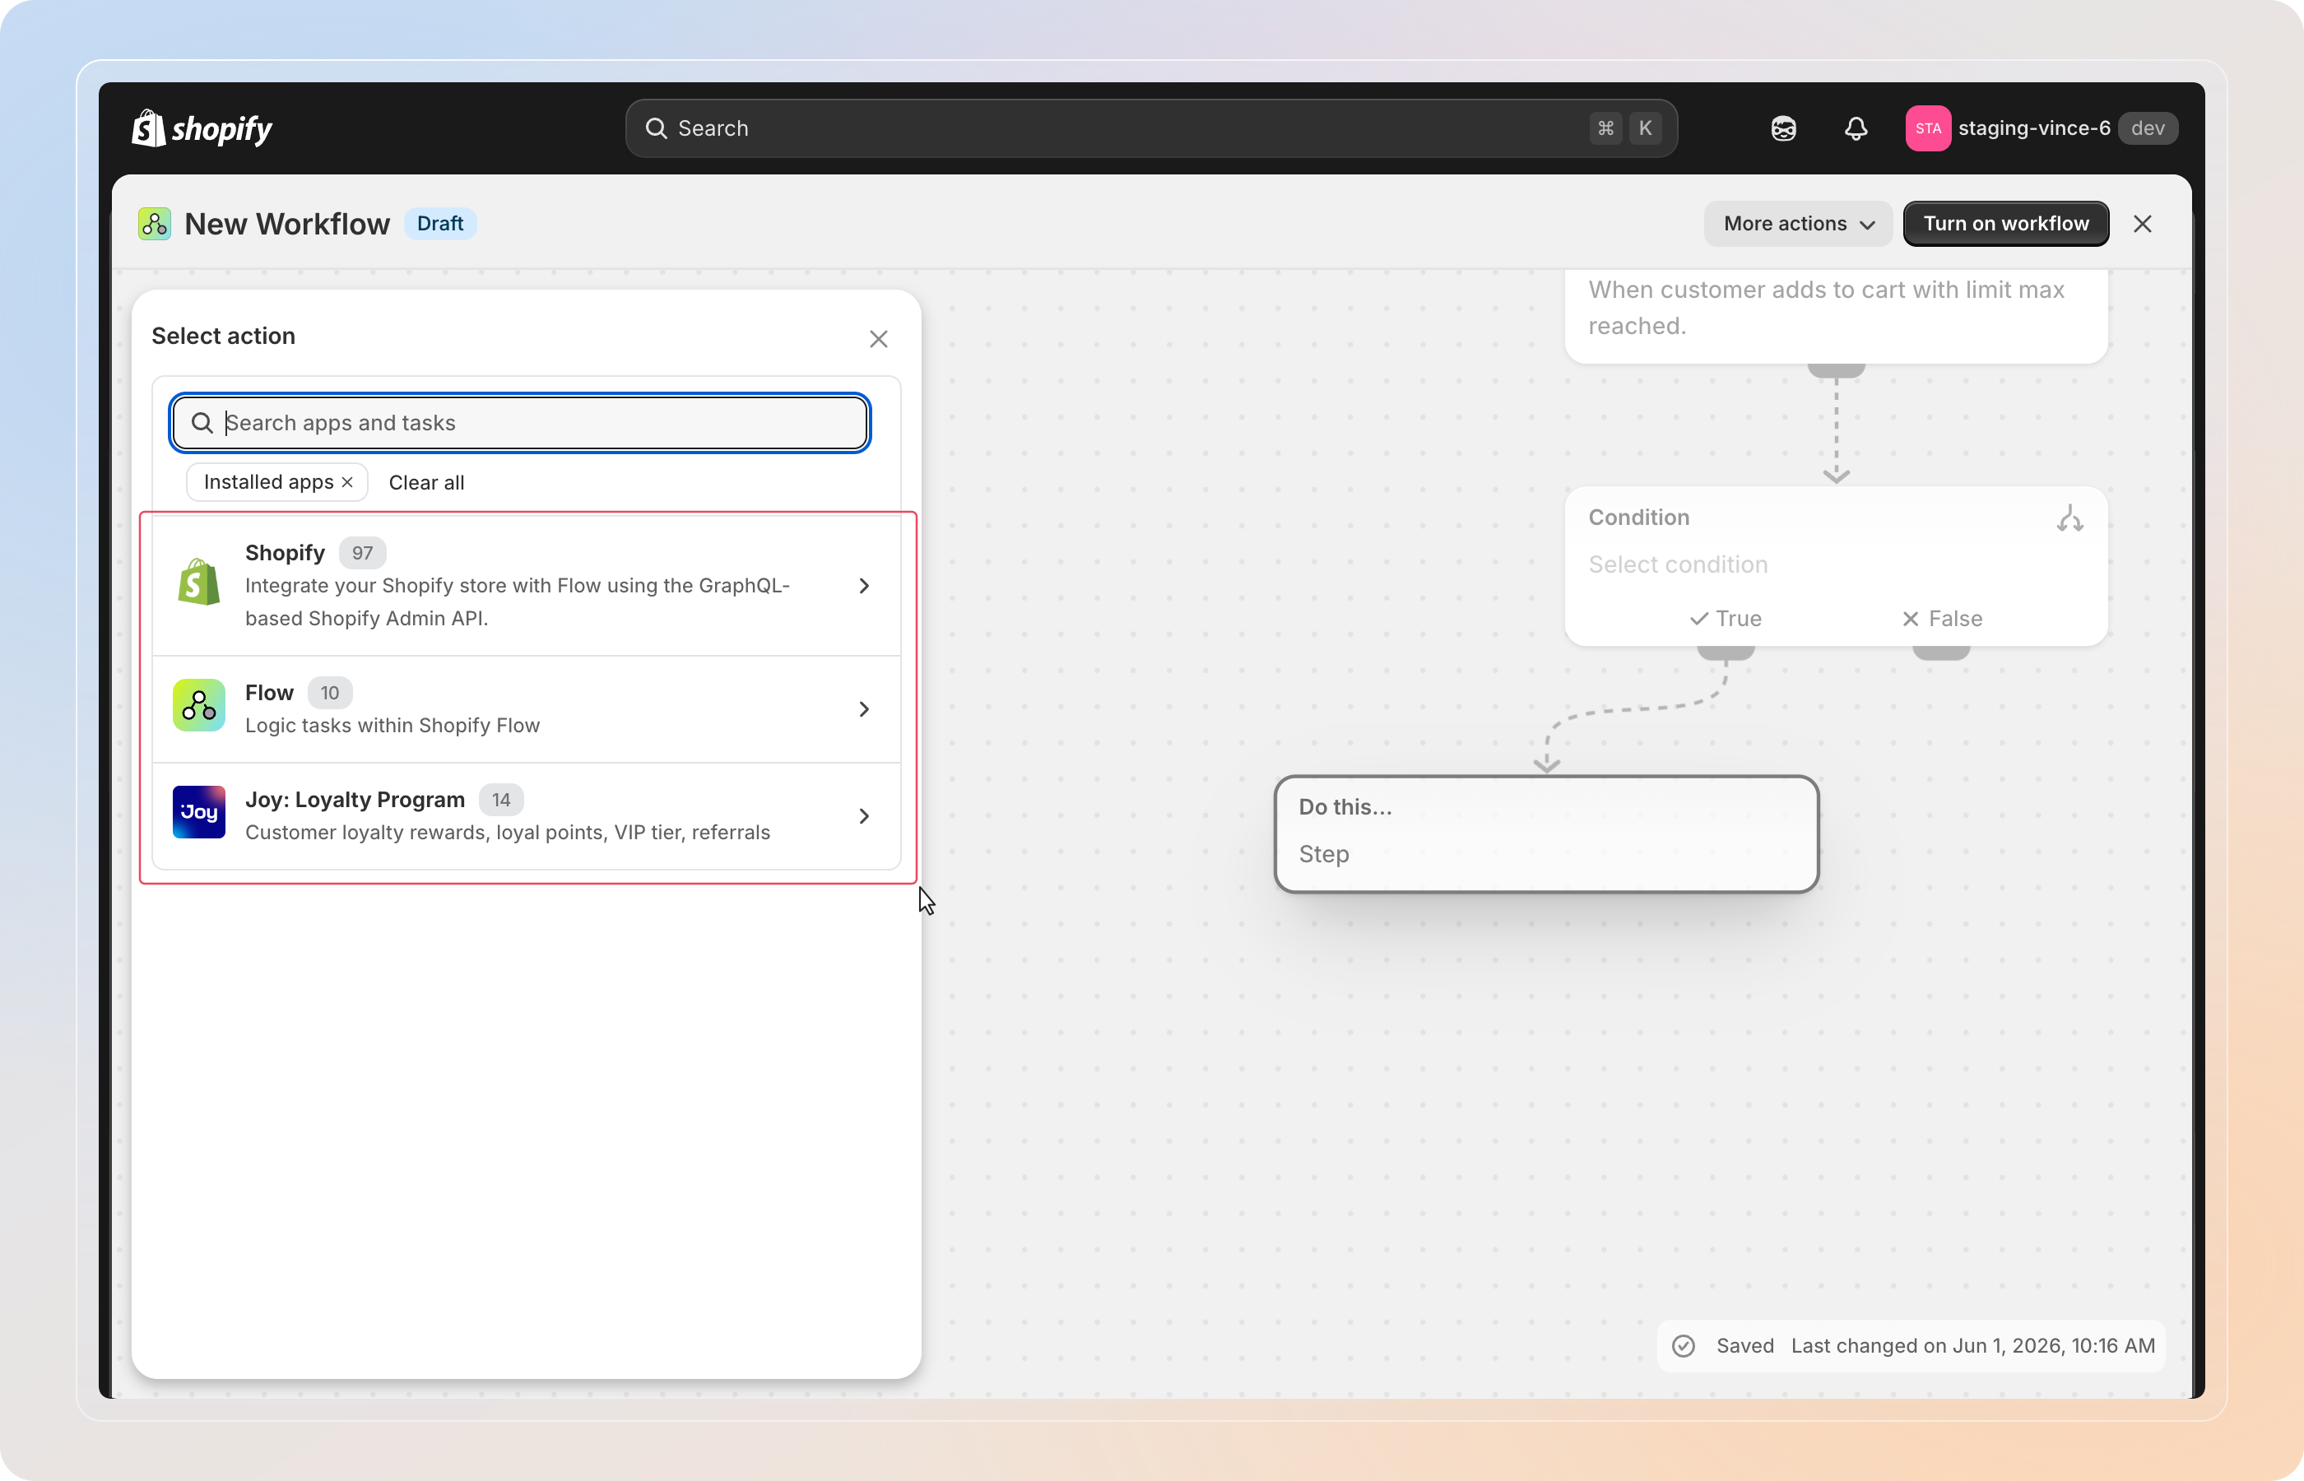
Step 5: Add the action
Click the + at the end of the branch and choose Action. Pick the app you want to fire — Shopify, Klaviyo, Omnisend, Slack, Google Sheets, or anything else available in your Flow library.
Popular actions for Order Limit events:
- Add customer tag — segment customers who keep hitting the max
- Send Slack message — alert your team about wholesale violations
- Send Klaviyo/Omnisend event — trigger a follow-up email or SMS
- Create draft order — convert a max-violated cart into a sales conversation
- Update customer metafield — flag VIPs or rule-breakers for later use
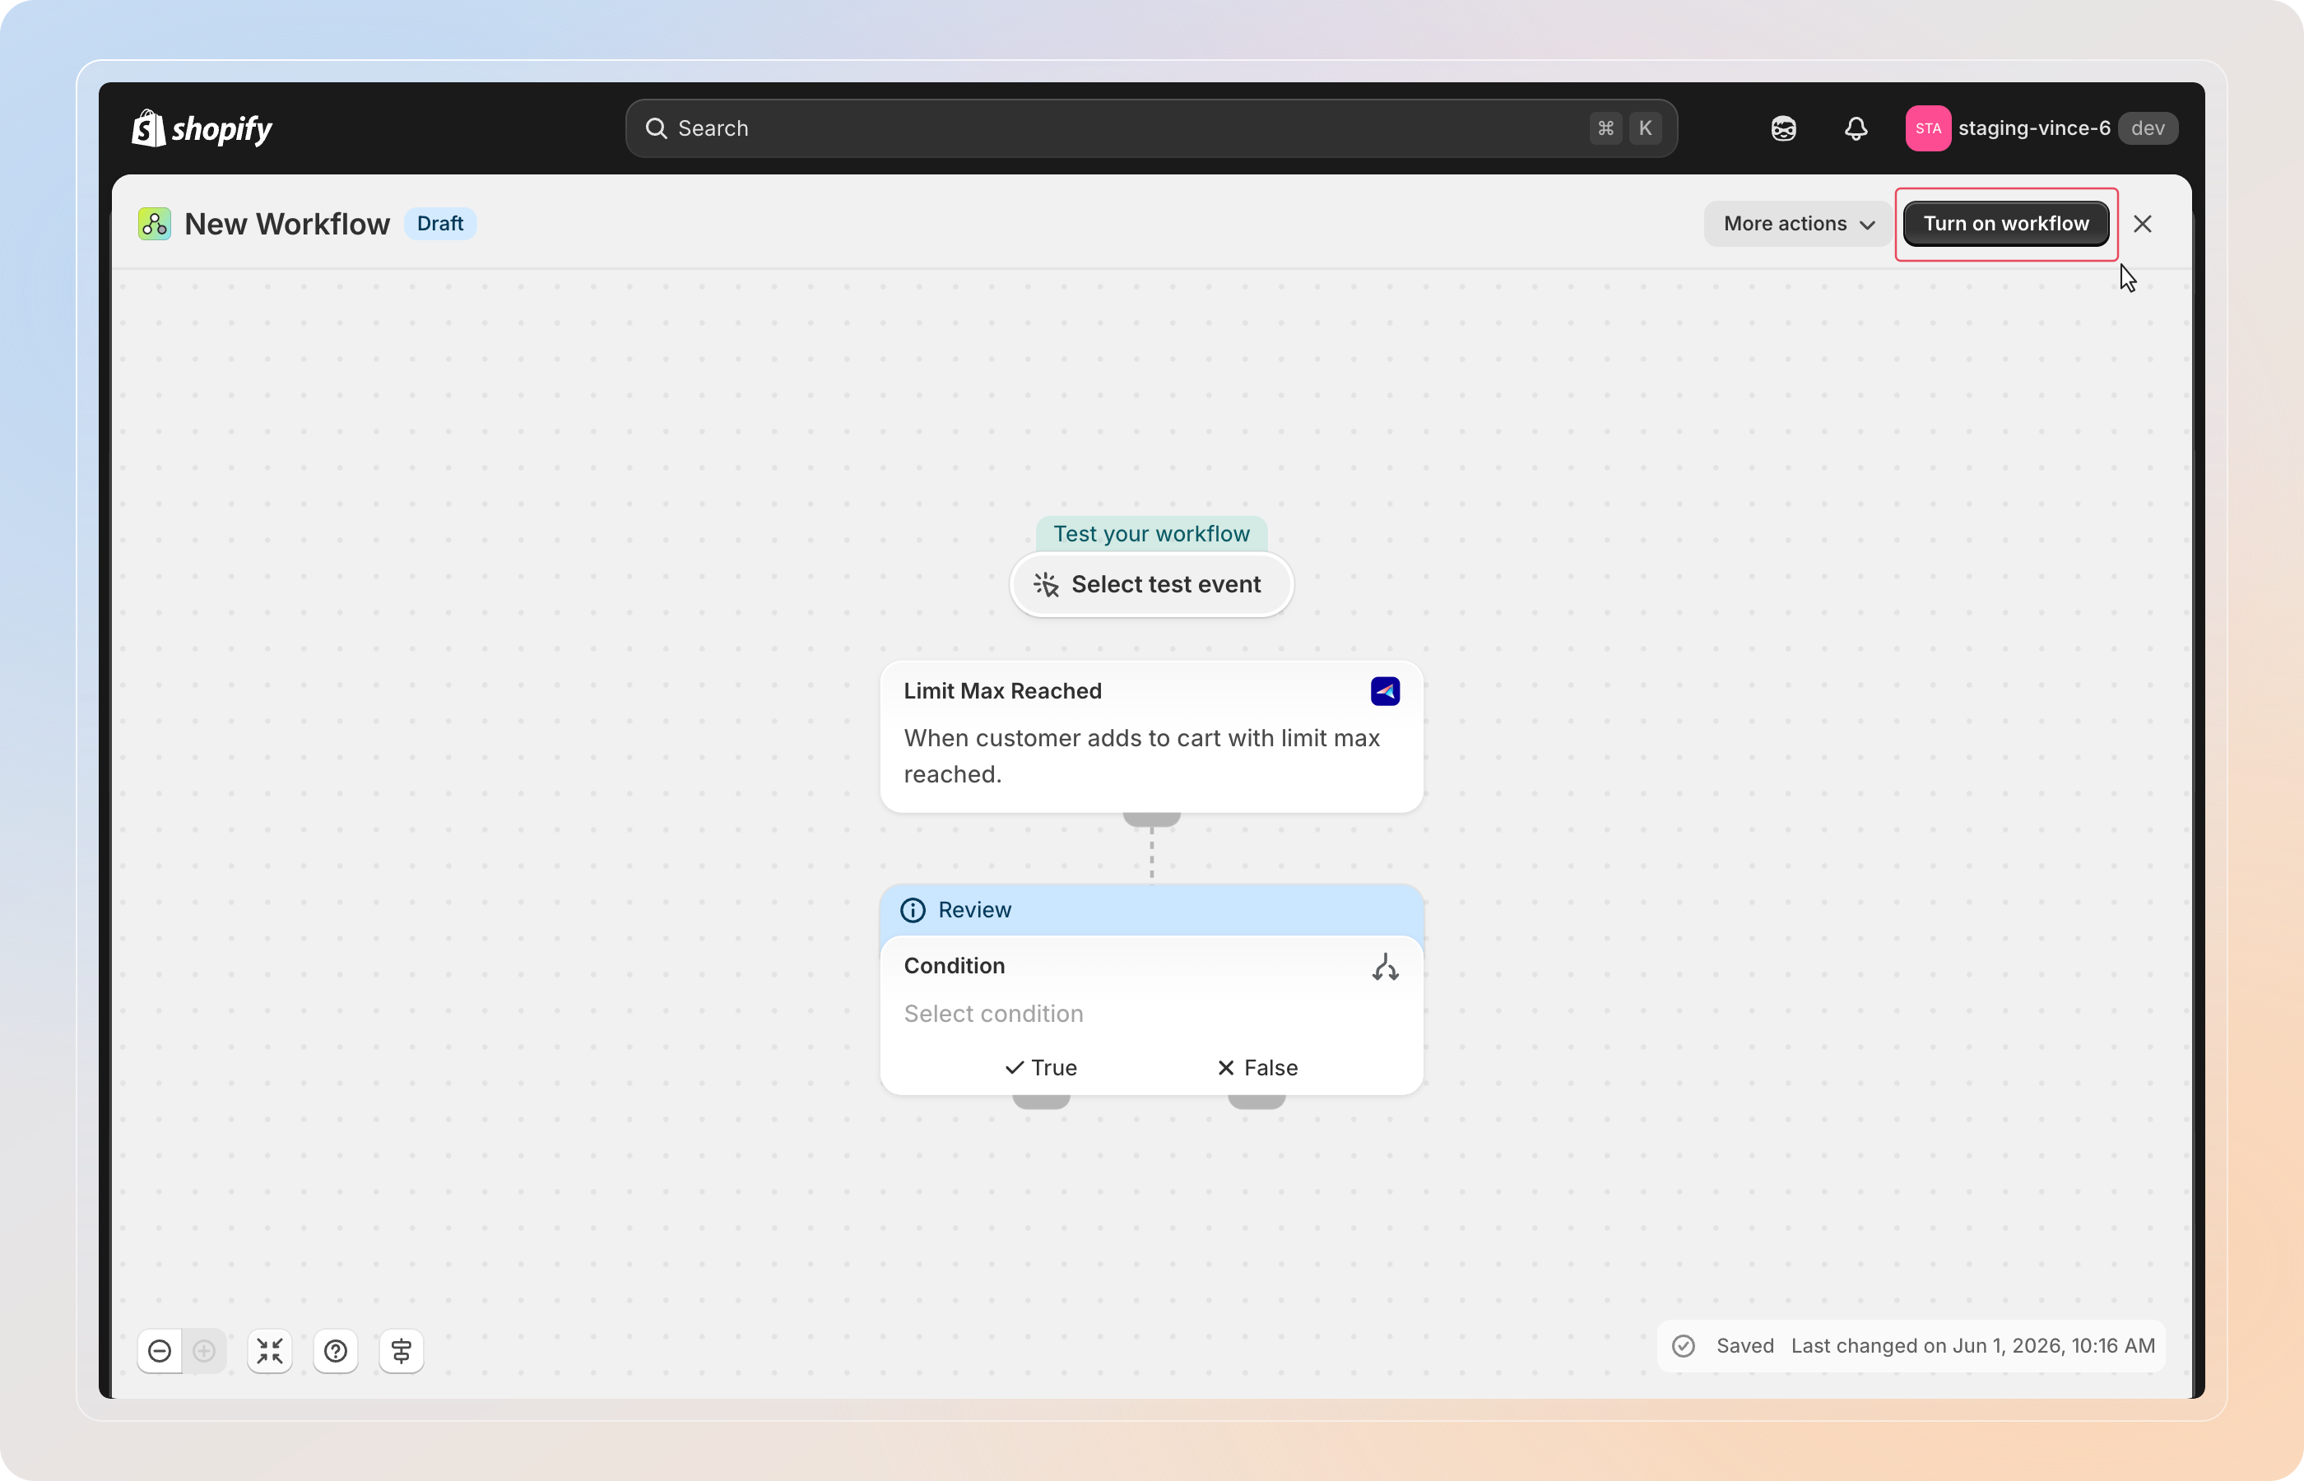
Step 6: Name, turn on, and test the flow
- Click the flow title at the top and rename it to something descriptive (e.g.,
Tag wholesale violators) - Click Turn on workflow in the top-right
- Open your storefront and trigger the limit rule — for example, add more units than allowed to the cart
- Return to Shopify Flow and open the Runs tab to confirm the run completed successfully
Important: A flow runs only when both conditions are true — the workflow is On in Shopify Flow, and the integration is Connected in Avada Order Limit. If runs are missing, check both sides.
Managing the integration
Come back to Integrations > Shopify Flow in Avada Order Limit at any time to:
- Disconnect — click the Disconnect button on the Connect to Shopify Flow card to pause all Avada triggers in Flow. Existing flows stay saved, they just won't fire.
- Reconnect — click Connect again to resume.
- Need a hand? — click Let us help under the Create a flow button to chat with our support team about a custom flow.
Tips
- Use the
Rule Namecondition to keep one flow per rule clean — easier to debug than one giant flow with many branches. - If a flow doesn't fire, check the Runs tab in Shopify Flow. A missing run usually means the trigger never matched (wrong rule name, customer not logged in, etc.).
- The
Customer Emailfield is empty for guest checkouts. Add a Condition: Customer Email is not empty branch if your action requires an email. - Test each new flow with a draft rule before turning it on for live shoppers — Shopify Flow does not have a sandbox mode.
And there you have it! You've successfully connected Avada Order Limit with Shopify Flow. Every time a customer hits or breaks a limit rule, your automation will take over from there — no manual work required.
If you have any questions or run into any issues, don't hesitate to reach out. We're here to help!