Customize the Form's Appearance
Make the withdrawal form match your store: rename the fields customers see, choose which ones appear, and set the form's colors. You'll do this on the Widget & Form page, across the Content and Style tabs.
Edit the form field labels
Open Avada Withdrawal Form, go to the Widget & Form page, and open the Content tab. In the Form field labels table, rename the text shown above each field on the storefront form.
| Field | Default label |
|---|---|
| Form title | Withdraw contract |
| Form subtitle | Fill out the form to withdraw your contract |
| Name field | Your Name |
| Email field | Email Address |
| Order number field | Order Number |
| Items field | Items to Return |
| Notes field | Additional Notes |
| Submit button | Submit Request |
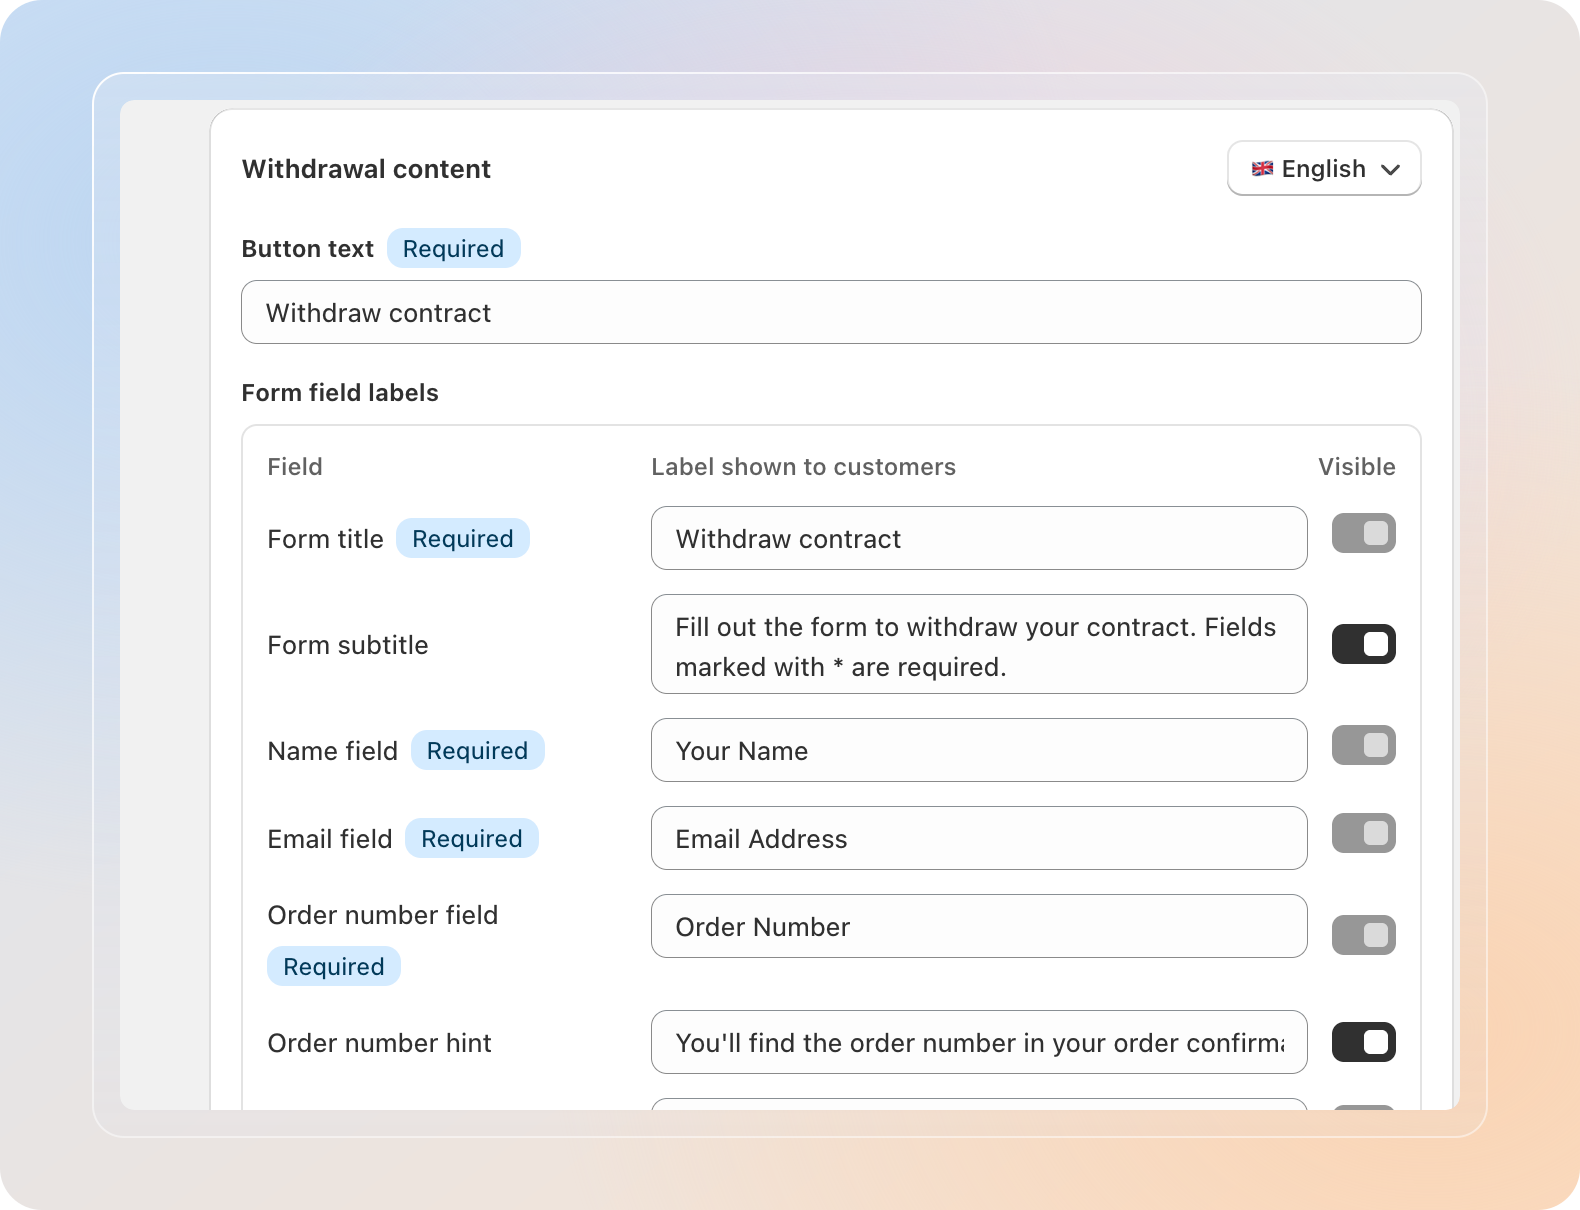
The Name, Email, and Order number fields are marked Required and can't be hidden, because the app needs them to look up the order.
Show or hide optional fields
In the same table, use the Visible toggle on the right of each row to control which optional fields appear.
- Turn Notes field on to let customers add extra details, or off to keep the form short.
- Toggle the Form subtitle and other optional rows the same way.
Translate labels per language
Use the Language selector at the top of the Content tab to set labels for each storefront language your customers use.
- Pick a language, then enter custom labels for it.
- Leave a field empty to use the auto-translated default for that language.
Editing labels in multiple languages is a Pro feature. See Plans & Pricing.
Set the form colors
Switch to the Style tab. In the Colors section, under Form, set how the form looks.
- Background color for the form area.
- Text color for labels and field text.
- Submit button color for the submit button.
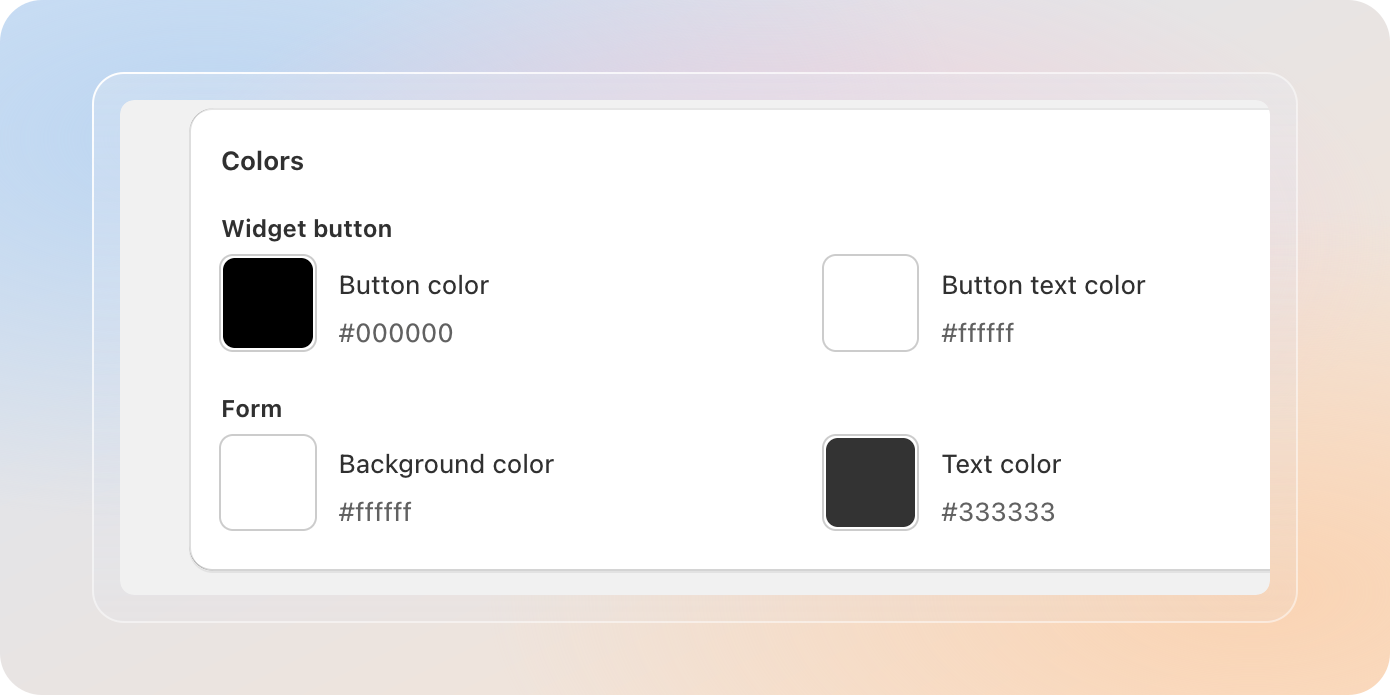
Watch the Preview panel on the right update live as you change each color.
Save and apply
- Click Save to apply your changes.
- Your settings sync to the storefront form automatically.
Need finer control? On the Style tab, open Advanced settings to add Custom CSS in the developer zone.
Tips
- Use the live Preview panel to check each change before saving.
- Keep field labels short and clear so customers know exactly what to enter.
- Use Custom CSS only if you're comfortable with code; small tweaks there can override the color settings above.
Related Articles
- Configure the Storefront Widget Button
- Add the Withdrawal Form & Button to Your Storefront
- Manage Withdrawal Requests
And there you have it! You've customized the withdrawal form's appearance. The form now matches your store's look and shows only the fields you want.
If you have any questions or run into any issues, don't hesitate to reach out. We're here to help!