Manage Withdrawal Requests
Prerequisites
- The Avada Withdrawal Form must be active on your storefront so customers can submit requests.
View your requests list
Open Avada Withdrawal Form and go to the Withdrawal request page to see the Withdrawal Requests list.
- Each row shows the Customer, Email, Order, Status, and Date.
- Three stat cards at the top summarize Open Withdrawals, Received Today, and Processed.
- Use Add filter to narrow the list, and the sort button on the right to reorder it.
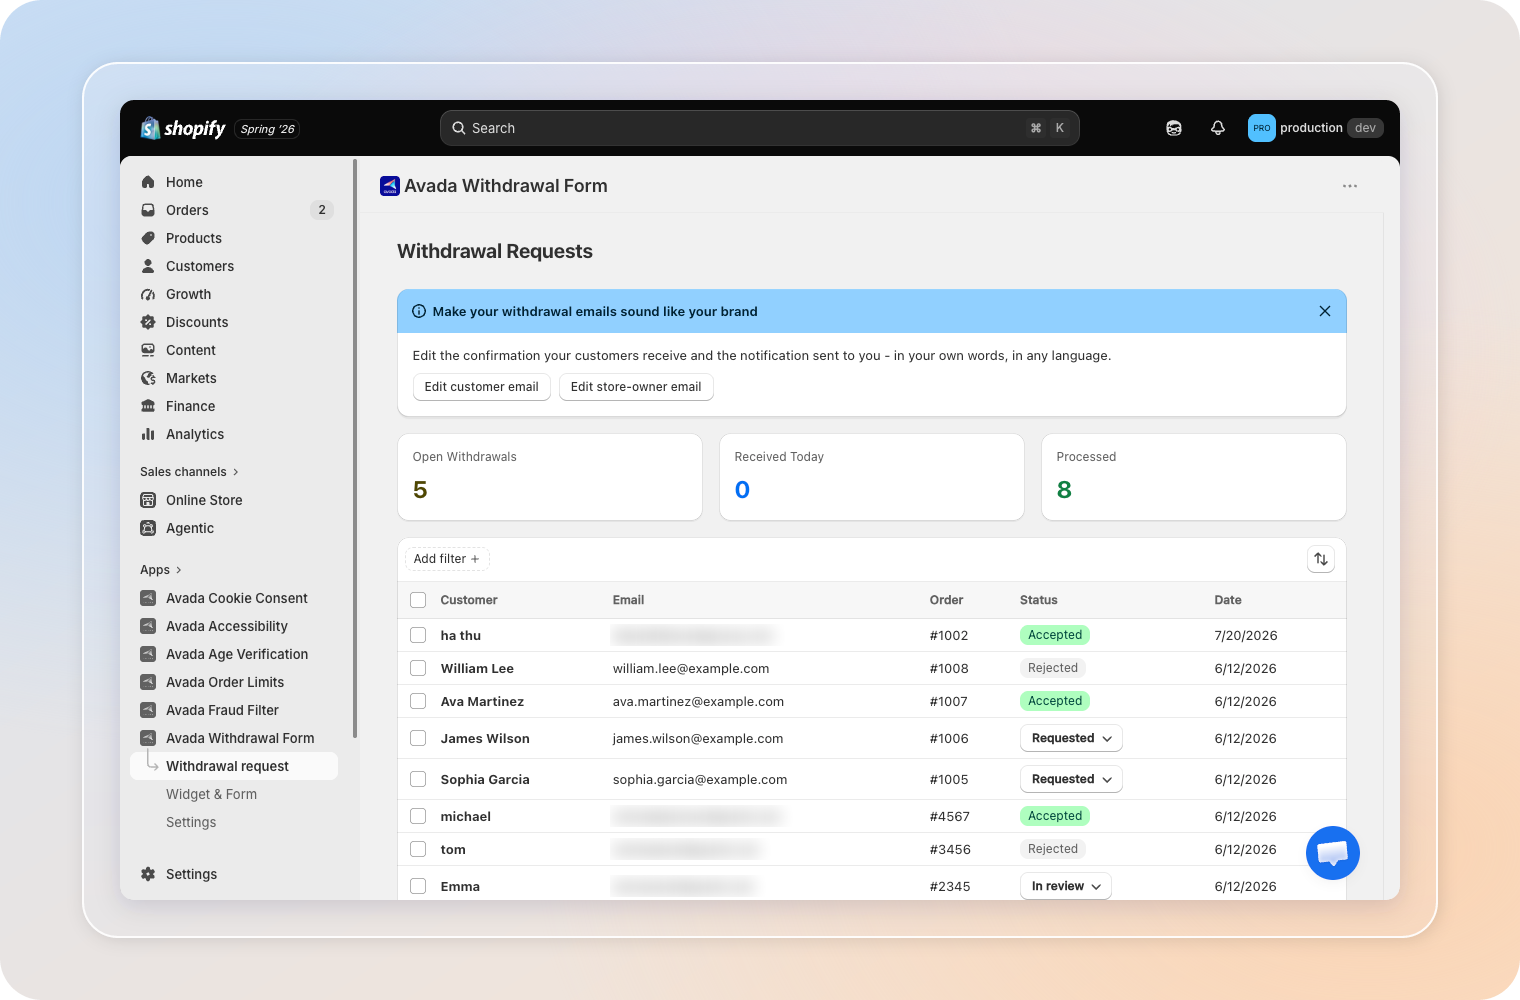
Click any row to open that request's detail page.
Understand status values
Every request moves through a single status track, shown as a colored badge.
| Status | Meaning |
|---|---|
| Requested | The customer just submitted the request; you haven't actioned it yet. |
| In review | You're actively looking into the request. |
| Accepted | You approved the request. |
| Rejected | You turned down the request. |
| Refunded | The linked order has been refunded. |
Accepted, Rejected, and Refunded are final states — you can only reach them by using the matching action button on the detail page (see below), not by picking them from a dropdown. From the list or detail page you can still switch a request back and forth between Requested and In review while you're looking into it.
Open a request and take action
Click a row to open the request's detail page. The Status card on the right shows the current status, and the Actions card below it lets you resolve the request.
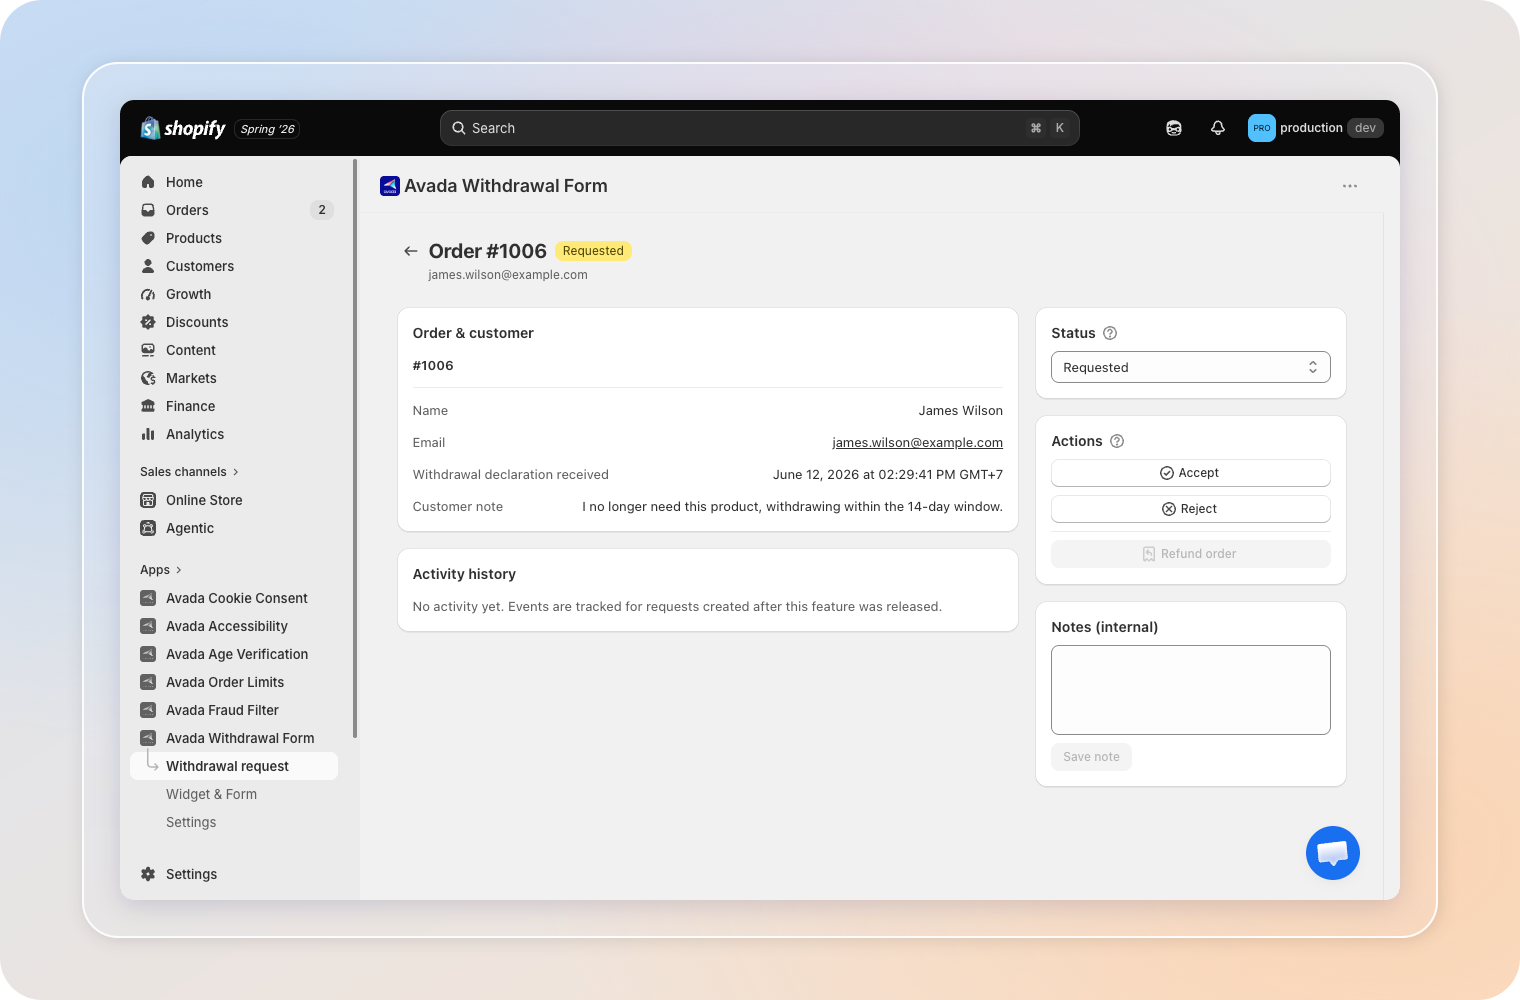
| Action | What it does |
|---|---|
| Accept | Marks the request as Accepted. |
| Reject | Marks the request as Rejected. You must type a reason — it's included in the email the customer receives. |
| Refund order | Opens Shopify's standard refund screen for the linked order (choose quantity, whether to refund shipping, and whether to restock). Once you confirm, the request moves to Refunded. |
Refund order is only enabled once the request is eligible for a refund. Confirming a refund is final and can't be undone from here — if you click it more than once, the order is only refunded once.
Track activity history
The Activity history section on the detail page lists every action taken on the request — who did what, and when — so you have a record you can refer back to if a customer asks about their request later.
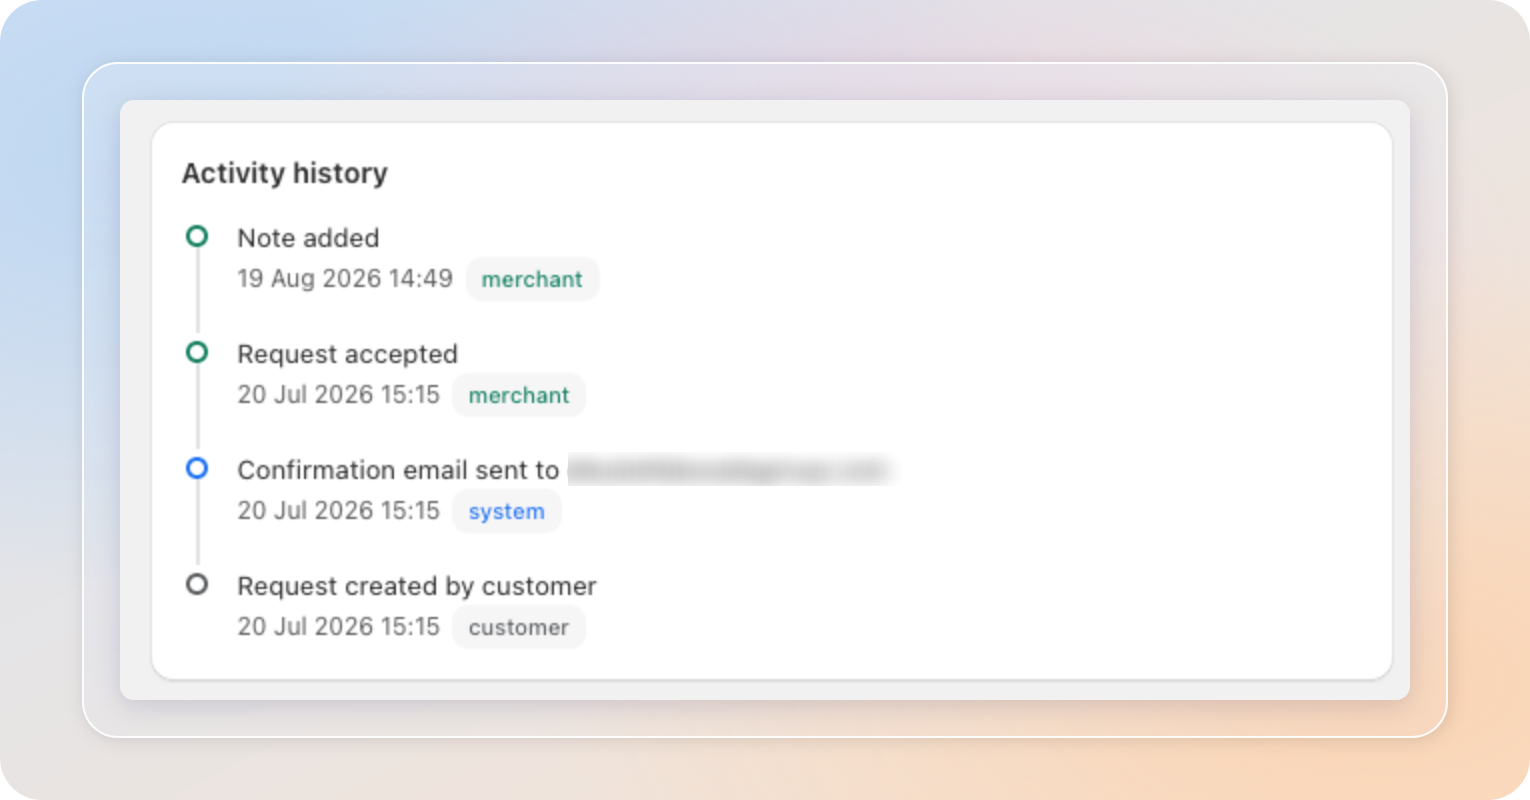
Activity history is only recorded for requests created after this feature was released. Requests submitted earlier show "No activity yet."
Add internal notes
Keep private context on a request without sharing it with the customer.
- On the request detail page, type in the Notes (internal) field.
- Click Save note to store your note.
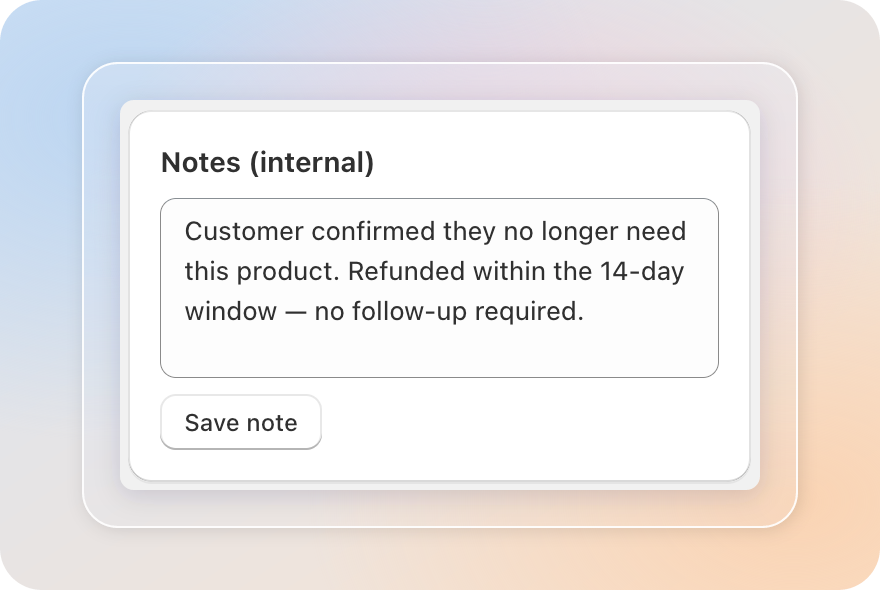
Internal notes are for your team only and are never shown to the customer.
Tips
- Use the Open Withdrawals stat card as your daily to-do count for requests that still need action.
- Click a customer's email on the detail page to start a reply in your mail app.
- Turn on Auto email customer, Auto-tag orders, Auto cancel order, or Auto refund in Configure Automation if you'd rather have the app take these actions for you after you accept a request.
Related Articles
And there you have it! You've successfully reviewed and managed your withdrawal requests. Each request now moves cleanly from submission to resolution, with a full history you can always look back on.
If you have any questions or run into any issues, don't hesitate to reach out. We're here to help!