Image compression
What is Image compression?
Big image files are usually the biggest reason a store loads slowly. A single uncompressed product photo can be several megabytes.
Image compression squeezes those files down to a fraction of their size while keeping them looking sharp. Customers see the same photos — they just arrive much faster.
If you don't like how an optimized image turned out, you can roll back to a previous version in seconds.
Why use Image compression?
- Faster page loads — smaller image files are the single biggest speed win for most stores.
- No visible quality loss — Automatic mode keeps photos sharp while cutting file size.
- Full control when you want it — choose fixed quality levels or compress specific images by hand.
- Saves your quota — "Optimize unoptimized" skips already-processed images.
- Risk-free — revert to any earlier version in seconds.
⚙️ How to use Image compression
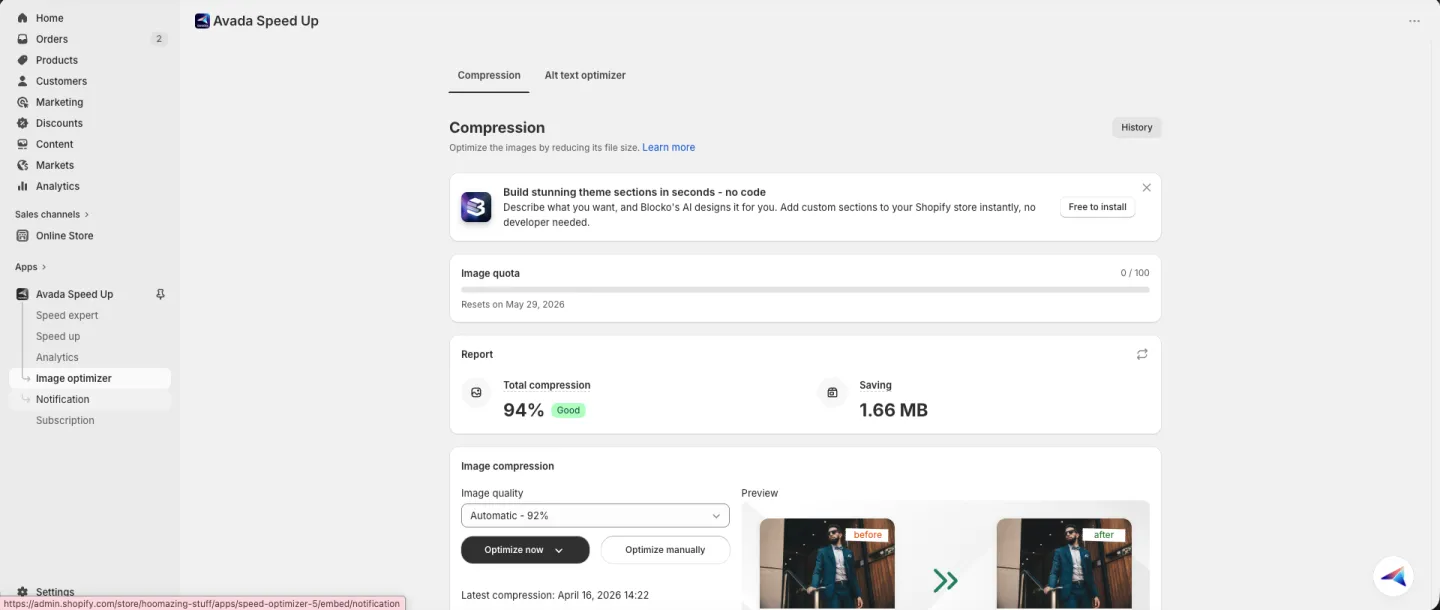
Step 1: Open the Compression tab
Go to Image optimizer → Compression.
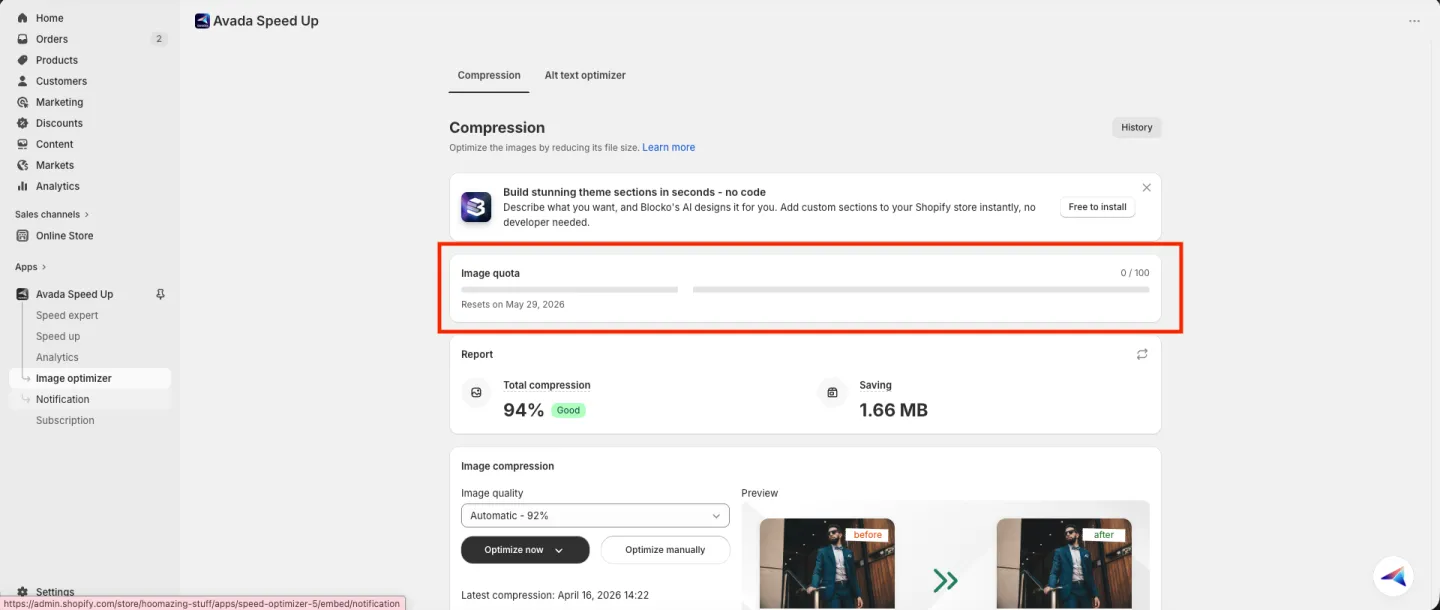
Step 2: Check your image quota
Check the Image quota bar near the top to see how many images you have left this month and when your quota resets.
Step 3: Review your Report
Look at the Report card to see your current savings — Total compression % (with a status badge like "Good") and Saving in MB.
Step 4: Choose your image quality
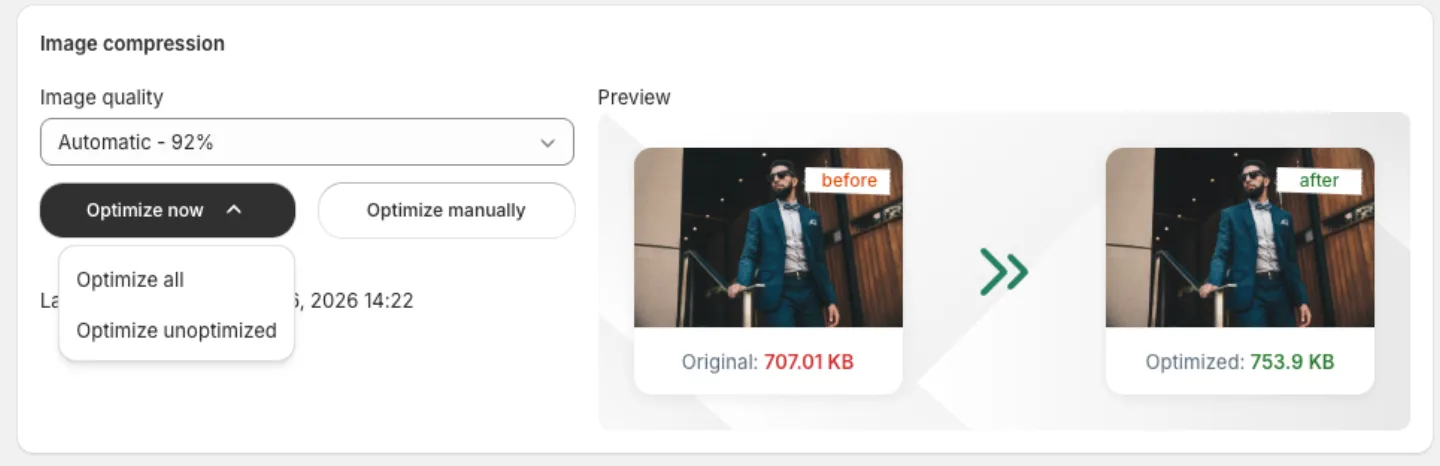
In the Image compression card, choose your Image quality:
- Automatic – 92% (default) — keeps your photos looking sharp while still cutting the file size. Best for most stores.
- 92%, 80%, and other fixed levels — pick a specific quality if you want full control. Lower numbers mean smaller files but more visible quality loss.
Step 5: Run the optimization
You have three ways to run the compression:
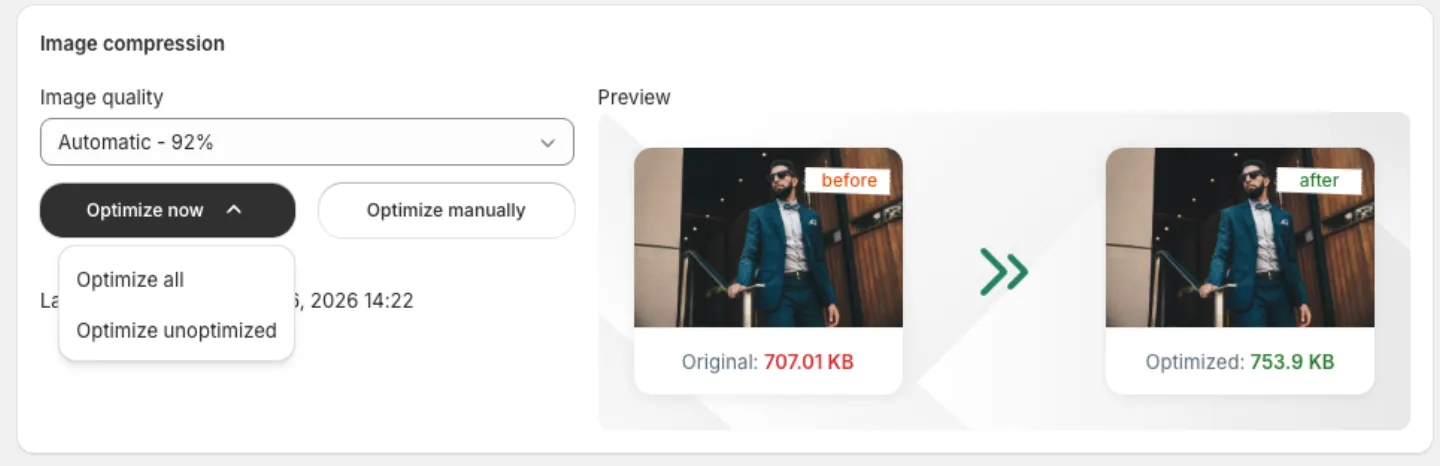
- Optimize all — click Optimize now → Optimize all to recompress every image in your store. Use this when you've changed the Image quality setting and want to re-run on everything.
- Optimize unoptimized — click Optimize now → Optimize unoptimized to only compress images that haven't been processed yet. Faster, and saves quota.
- Optimize manually — click Optimize manually to open the Image manager and pick specific images by hand.
Step 6: Let it run in the background
While the job runs, you can keep using the app — it works in the background. Click Notify me to get a notification when the optimization is done.
Revert to a previous version
Didn't like how the compression turned out? You can go back to any earlier version.
-
Click the revert icon (the circular arrow) next to Optimize manually.
-
Pick which version to go back to:
- Revert to original version — restores your images before any compression. Available on Basic, Pro, and Expert.
- A recent version from the list — restores a specific earlier version. Available on the Expert plan only.
- View more versions — opens the full History page.
-
Confirm the revert. The card switches to a progress view while your images are restored. You can keep browsing — the job continues in the background.
-
When it's done, your store's images are back to the chosen version automatically. A success toast confirms the revert.
📌 Merchant Notes
- Click History at the top right of the page to see a full log of every optimization and revert.
- Automatic – 92% is the best choice for most stores; only drop to lower fixed levels if you specifically want smaller files and accept some visible quality loss.
- Use Optimize unoptimized to save quota — it skips images that have already been processed.
- Compression counts against your monthly quota (Free: 100 · Basic: 10,000 · Pro: 50,000 · Expert: unlimited); the quota bar shows when it resets.
- You can revert any time to your original images or an earlier version — reverts run in the background.
- To improve your image alt text for SEO and accessibility, see Alt text optimizer.
Contact us in live chat if you have any problems.