Settings
Instead of pressing Sync every time a price changes, connect your channels once and let your feeds update on a schedule.
What is in Settings?
Go to Settings in the app menu. It has two tabs:
- General: connect Google and Meta, set your sync schedule, and choose which fields follow Shopify.
- Metafields: pick which extra product details from Shopify, like material or GTIN, the app can use in your feeds.
When you change a schedule or the timezone, a save bar appears at the top. Click Save to keep your changes, or Discard to undo them.
Accounts
Connect a channel so your products can show up in Google Shopping or Meta ads. The Accounts section on the General tab lists Google and Meta. A badge shows Connected, Not connected or Reconnect needed. Click the arrow at the right of a row to open it.
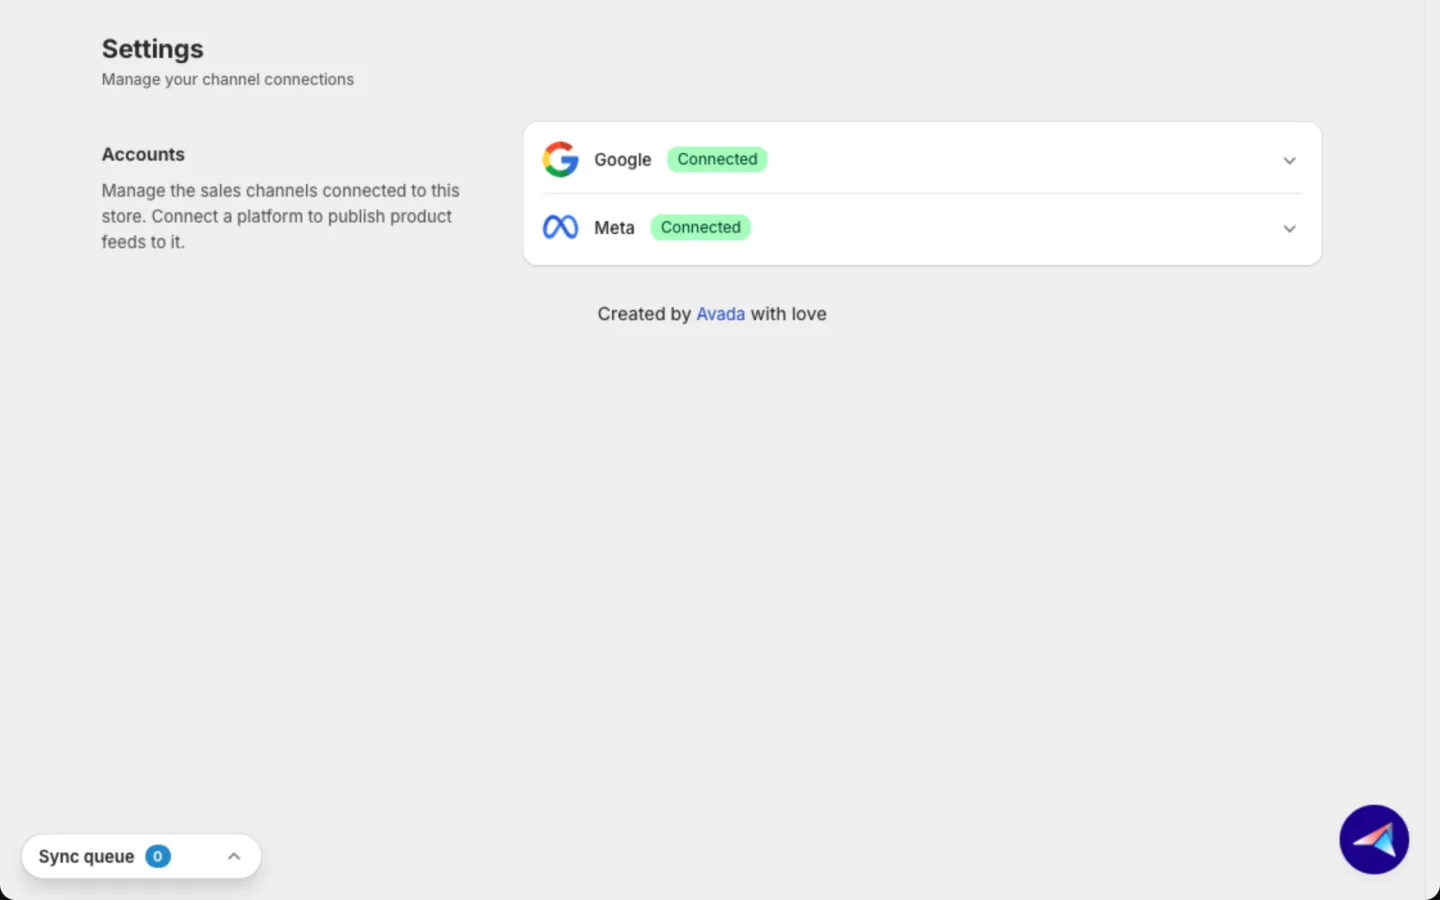
Connect Google
- Open the Google row and click Connect Google account.
- Sign in with Google and pick your Merchant Center account from the list. Merchant Center is where Google keeps the products it shows in Shopping ads. Your choice saves right away.
If you see Verify your website, Google has not confirmed you own your store's website yet. Click Business info to fix it in Merchant Center, then click Recheck. Until then, Google may not approve your products.
Connect Meta
- Open the Meta row and click Connect Meta account.
- Sign in with Facebook and pick your portfolio in the Business portfolio list. Your choice saves right away.
If your Meta connection expires, you see Reconnect your Meta Business account. Click Reconnect and sign in again.
To switch accounts on either channel, click Change account. To remove a connection, click Disconnect.
Sync schedule
Keep prices, stock and product details on Google and Meta up to date without lifting a finger. Edits you make in Shopify reach your feeds at the next scheduled sync, or when you click Regenerate XML file on a feed.
The Sync schedule section has three parts:
- Schedule timezone: the clock both schedules run on.
- Automatic sync: sends your products to your channels. Pick a Frequency (Once a day or Once a week) and a Preferred time.
- Automatic status sync: brings approval status back from Google and Meta, so you see which products are showing. It has its own Frequency and Preferred time.

Turn on automatic sync
Find the banner
Automatic sync is locked when you install the app. While it is locked, you see a Stop pressing Sync banner. The timezone, both schedules and Choose fields are greyed out.
Ask us to unlock it
Click Turn it on in the banner. A chat with our team opens with a message ready to send. Send it, and we turn it on for your store.
Set your schedule
Once unlocked, pick your Schedule timezone, Frequency and Preferred time. Click Save.
A scheduled sync starts within about an hour after your preferred time. It sends only products that changed since the last sync. Every 7 days, it sends all your products again.
Fields synced automatically
Choose which product details always match Shopify, and which ones you edit by hand in the app.
Open the field list
Under Synced fields, click Choose fields. The Fields synced automatically window opens.

Pick a channel
Pick the Google or Meta tab.
Check or uncheck fields
Leave a field checked to keep it matching Shopify. Uncheck it to edit that field by hand for each product. Click Save.
While a field is checked, edits you make to it inside a feed are not used. Link, Price and Availability always come from Shopify, so your ads never show a wrong price or sell out-of-stock items.
Metafields
Metafields are extra product details you store in Shopify, like material, GTIN (the barcode number Google uses to identify a product) or care instructions. Use them in your feeds, so Google and Meta get complete product data with no copy-paste.
Open the Metafields tab. The table shows each metafield's Key, Owner (Product, Variant or Collection) and Type. Coverage shows how many products have a value, out of all products checked. Use the tabs, search and sort to find one.

To add a metafield to a feed, insert it as a variable in the feed's attributes. See Create a feed.
Stop or resume a metafield
Click Stop syncing on a row. It then shows Not synced. Click Resume syncing to bring it back. You can also select several rows and use the same buttons. These save right away.
Keep metafields up to date
- Click Sync now to refresh the list and values right away. A progress bar shows how far it has got.
- Turn on Automatic metafield sync to refresh on a schedule. It is off by default. Pick a Frequency and a Preferred time. It uses the same Schedule timezone, and it works even while automatic sync is locked.
Good to know
- Changes in Settings never edit your Shopify store.
- Account connections save as soon as you pick an account. Schedules need Save.
- New products get their metafield values after the next metafield sync.
FAQs
Why didn't my Shopify price change show up on Google yet?
Changes reach your feeds at the next scheduled sync. To update the file now, open the feed and click Regenerate XML file. Google or Meta picks it up at the next fetch.
Why is the schedule greyed out?
Automatic sync is locked at install. Click Turn it on in the Stop pressing Sync banner to ask our team to unlock it.
Can I edit a field by hand instead of taking it from Shopify?
Yes, except Link, Price and Availability. In Choose fields, uncheck that field on the Google or Meta tab, then click Save.
Do I need automatic sync to keep metafields fresh?
No. Automatic metafield sync works even while automatic sync is locked.
Still have questions?
Chat with us from the app, any time. See also Limits and FAQ and AI assistants.