Set Up Cookie Bar Display
This guide walks you through configuring your cookie consent banner's appearance, behavior, and content.
Activate App
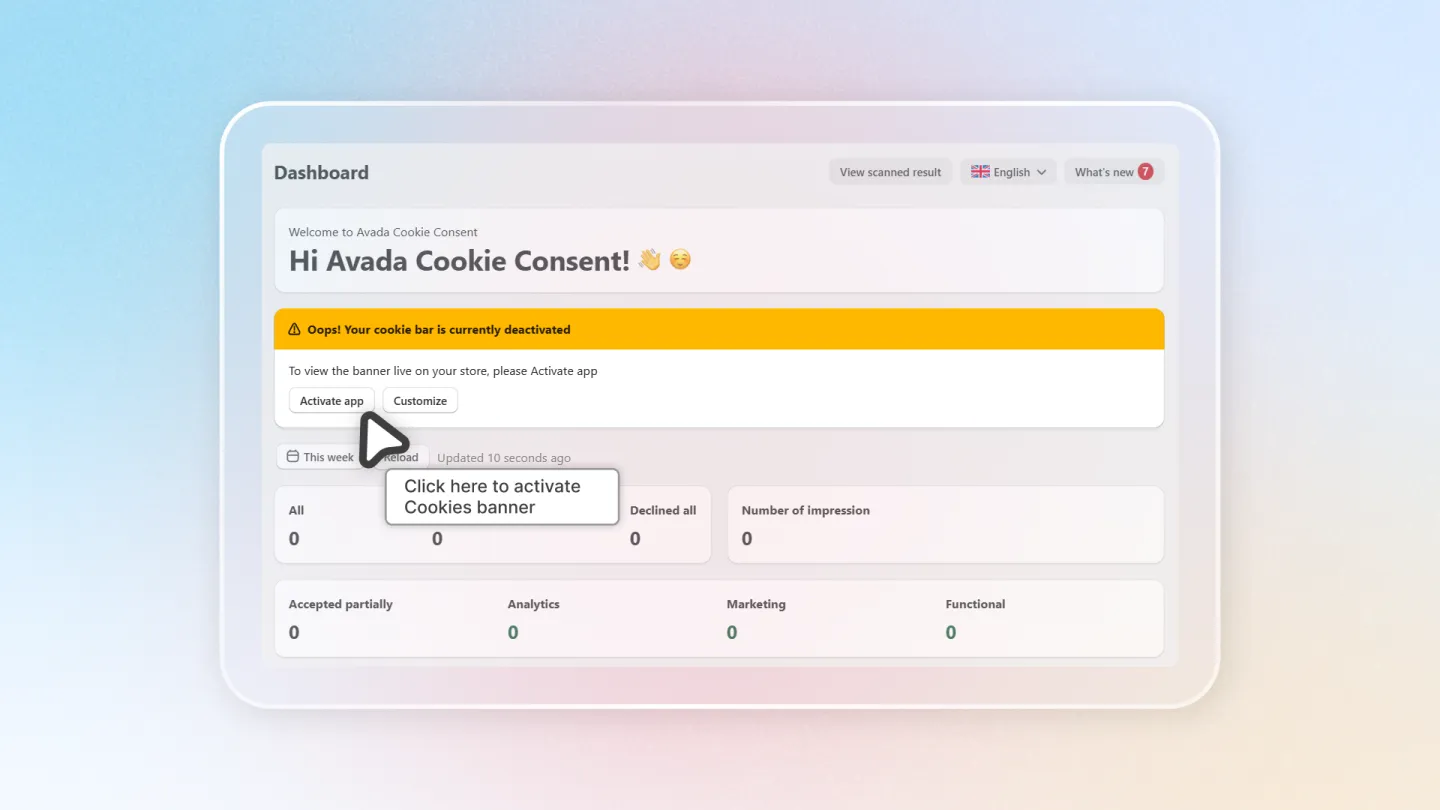
First, make sure the Avada Cookie Consent app is activated. Go to the app dashboard and toggle the app status to Active.
Customize Banner Appearance
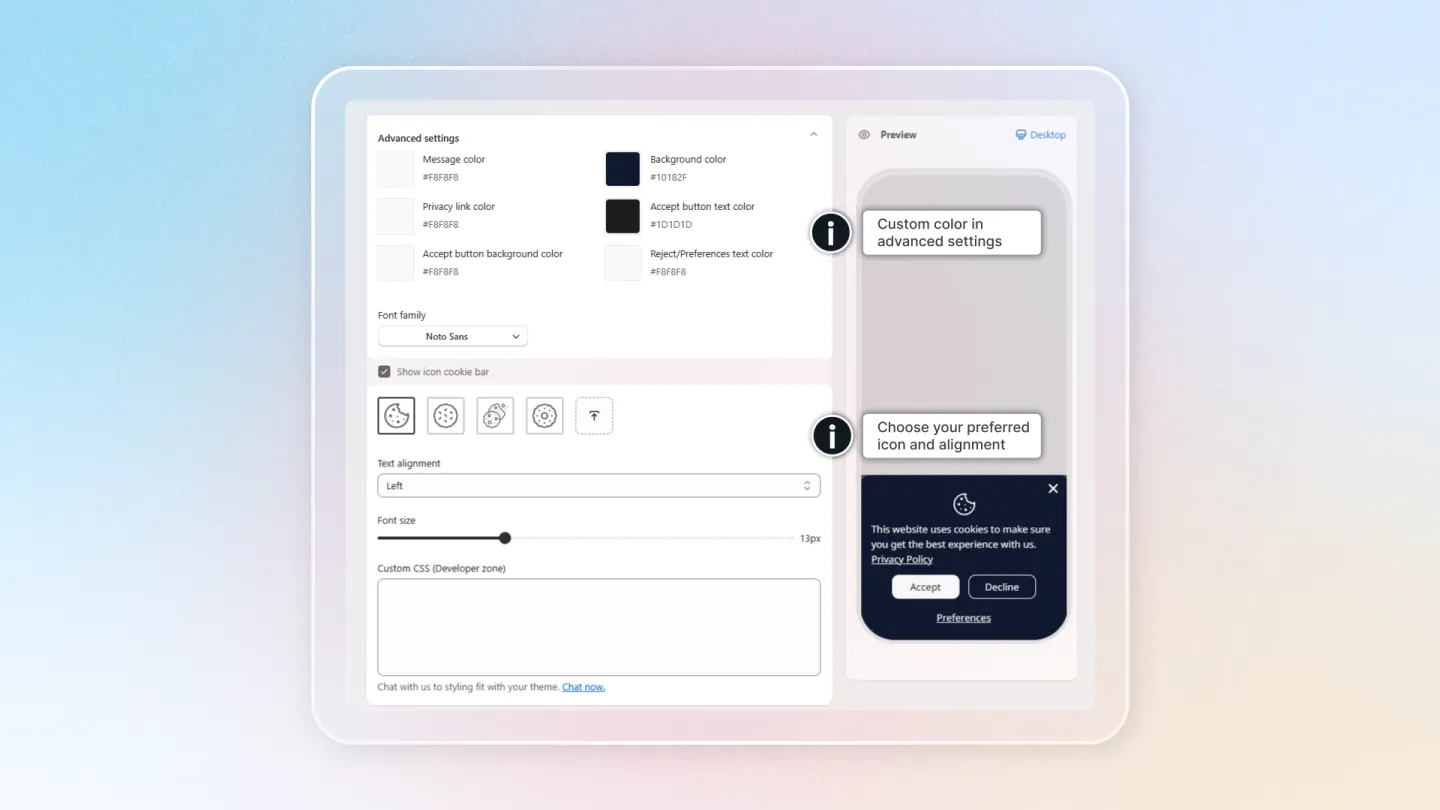
Navigate to Banner Settings and open the Style tab. Here you can customize:
- Display Type — Choose between different banner layouts (bar, popup, floating widget).
- Colors — Set background color, text color, button colors, and link colors.
- Cookie Image — Upload a custom cookie icon or use the default.
- Alignment — Position the banner at the top, bottom, or as a floating element.
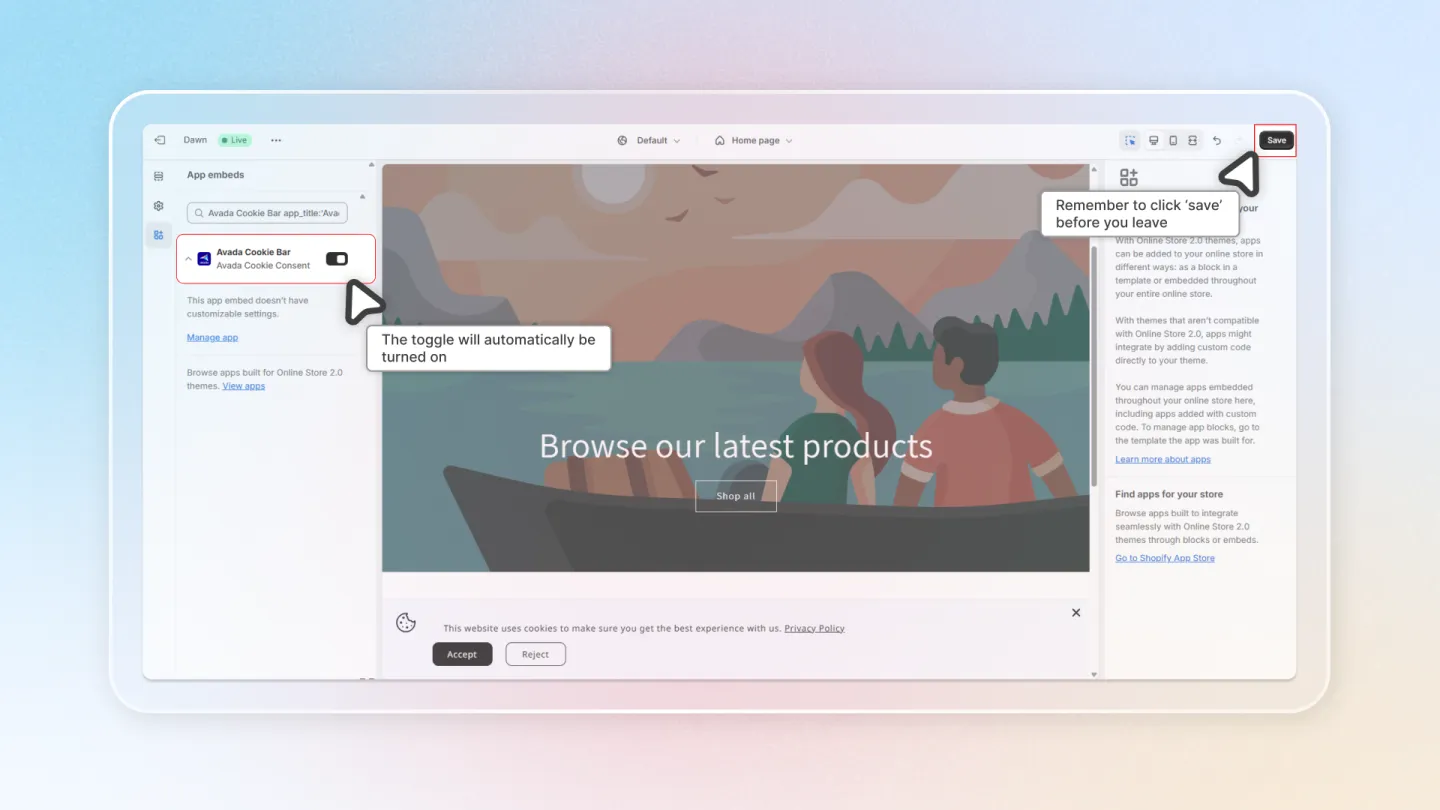
Use the Preview feature to see how your banner looks on desktop and mobile devices before saving.
Set Compliance Region
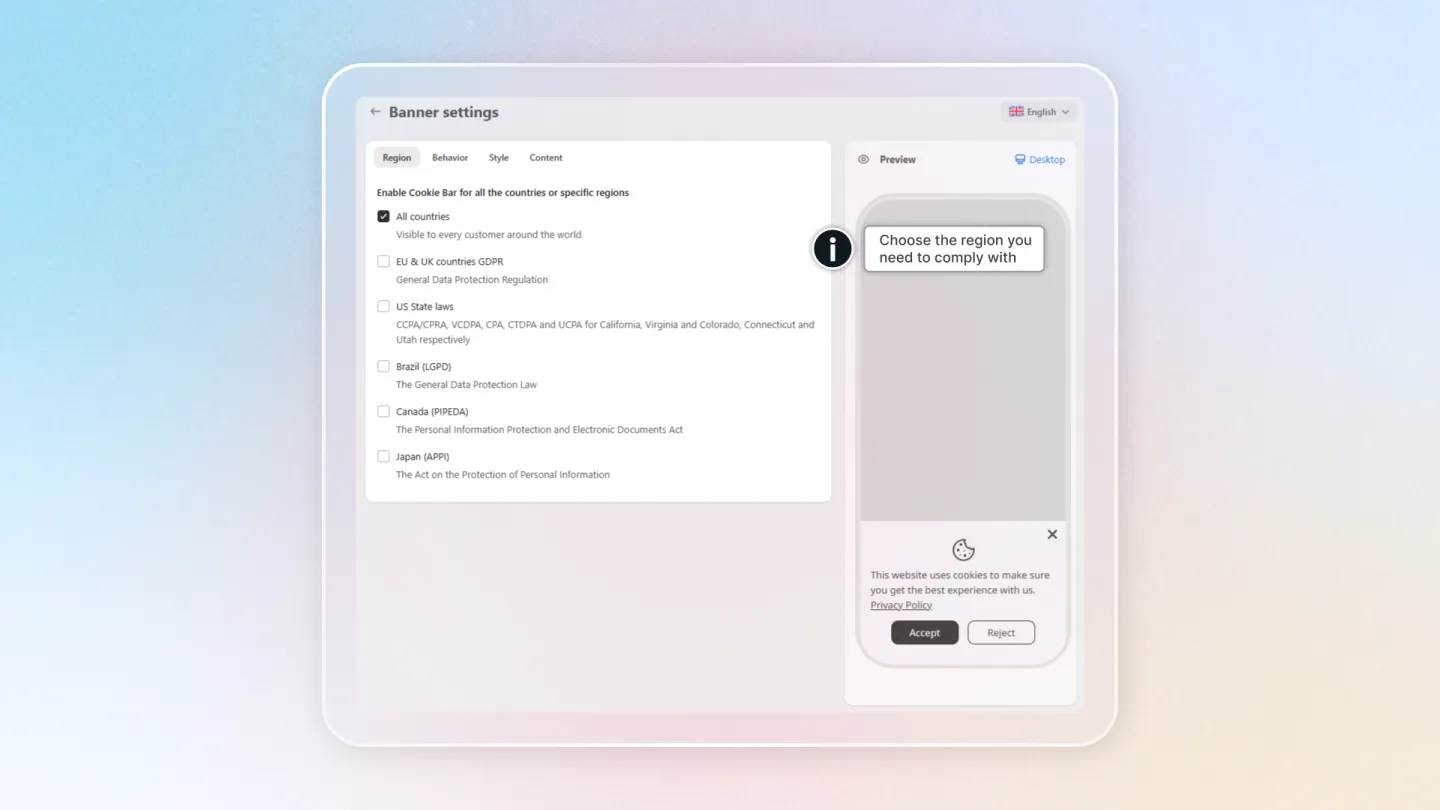
Choose which regions should see the cookie consent banner:
| Option | Description |
|---|---|
| EU/UK Only | Show the banner only to visitors from EU/EEA countries and the UK |
| All Countries | Show the banner to all visitors regardless of location |
| Custom | Select specific countries or regions |
Adjust Banner Behavior
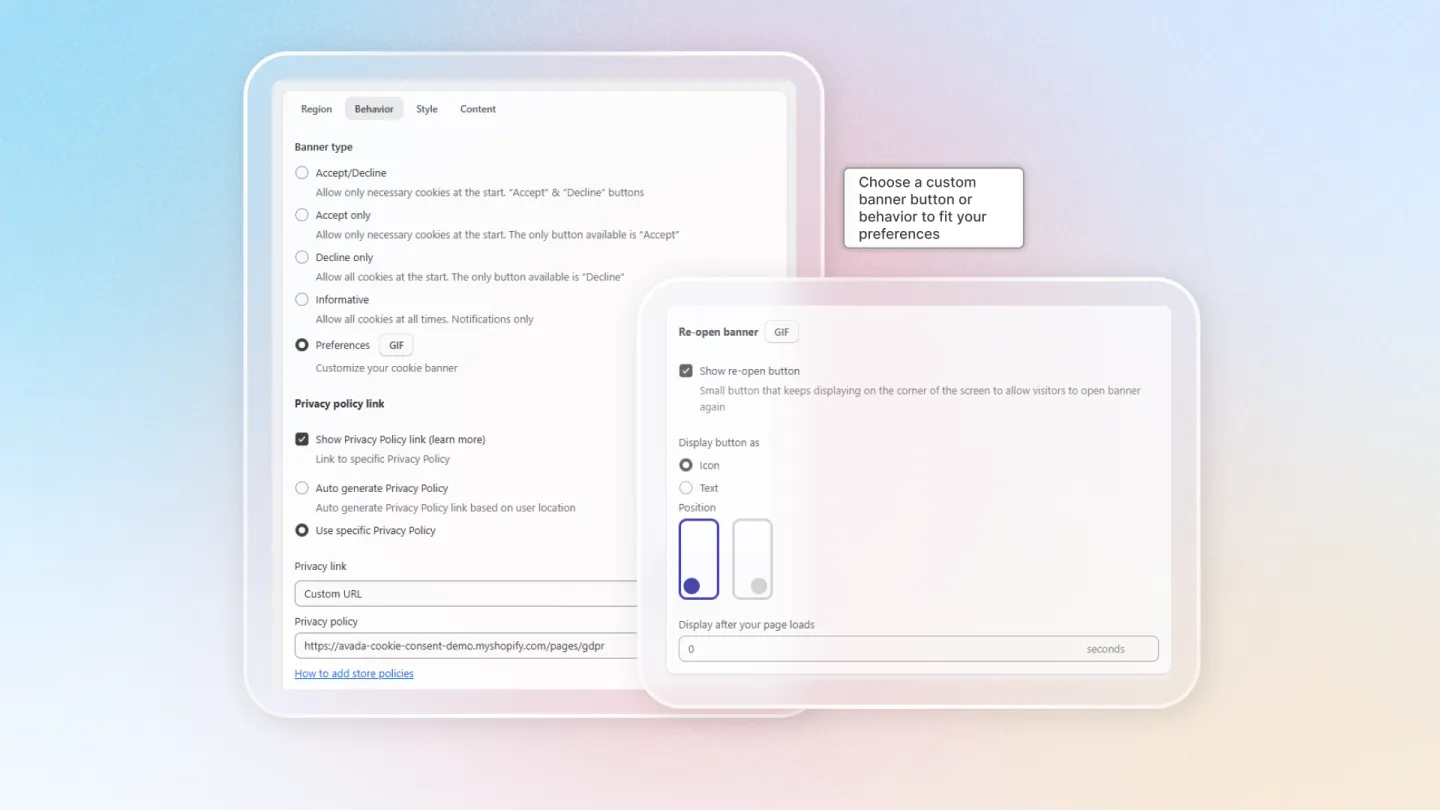
Configure how the banner behaves after visitor interaction:
- The cookie bar disappears as soon as consent is given.
- Choose whether to show a cookie icon after the banner is closed (for reopening preferences).
Finalize Content
Switch to the Content tab to customize the banner text:
- Consent Message — Edit the main message displayed on the banner.
- Agree Button Text — Customize the accept button label (e.g., "Accept All", "I Agree").
- Deny Button Text — Customize the decline button label (e.g., "Decline", "Reject All").
- Privacy Policy Link — Add a link to your store's privacy policy page.
⚠️
Make sure your consent message clearly explains what cookies are used for and what data is collected. Vague or misleading messages may not satisfy GDPR requirements.