Custom meta tags
Conditional rules that override default meta tags for specific groups of pages
Previously called "Meta tags rule". Your existing rules are preserved with their priorities and conditions.
Custom meta tags are conditional rules that override your Default meta tags for specific groups of pages. Use them when you need different meta content for a subset of your catalog — for example, products tagged "sale", items from a specific vendor, or blog posts by a particular author.
All other pages that don't match any rule will stay the same as your default content in Shopify (opens in a new tab).
Where to find it
Go to Search appearance → Meta tags → select a tab (Product, Collection, or Blog post) → find the Custom meta tags card below Default meta tags.
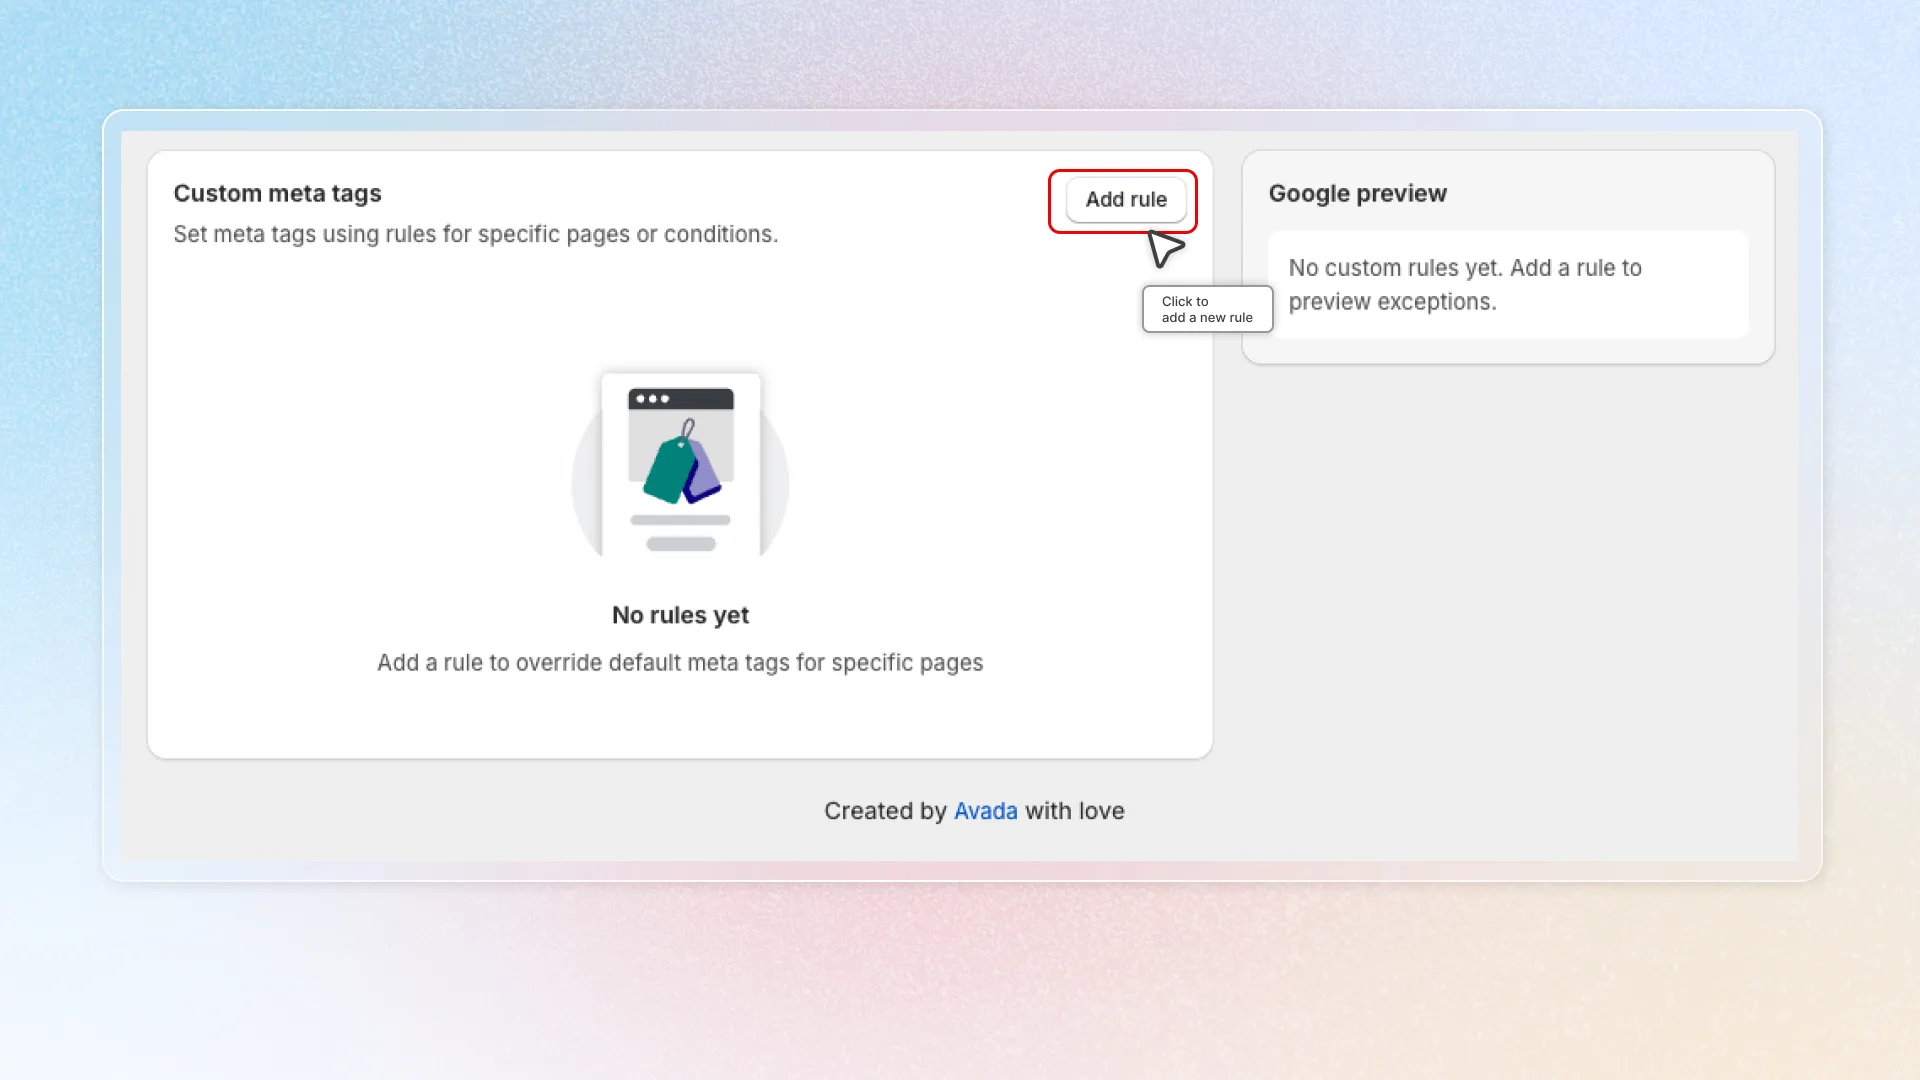
The card contains:
- An Add rule button to create new rules
- A table listing all rules for the current tab
- A tip to hover a rule for a live preview on the right
Rules are scoped per tab — rules you create in the Product tab only apply to Product pages, and so on.
Create a rule
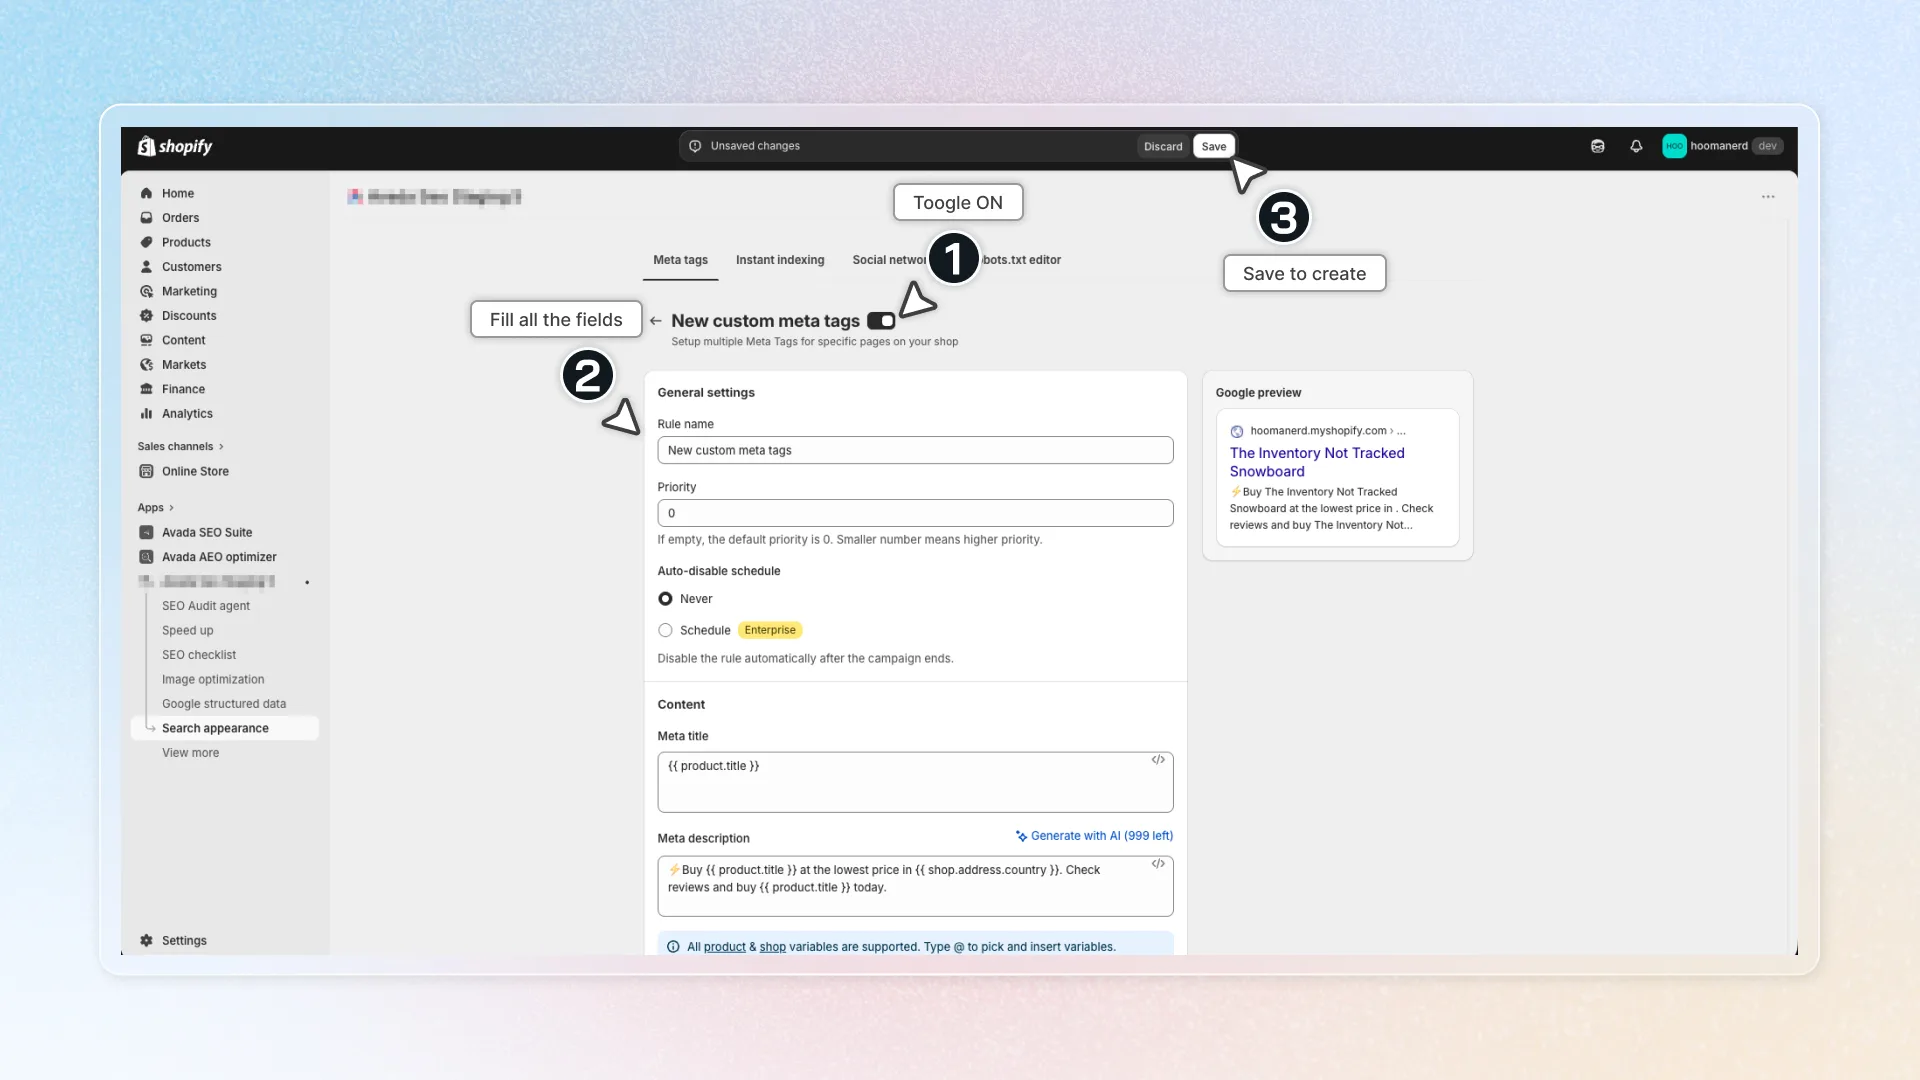
- Click Add rule
- The rule editor opens with three sections — fill them in (details below)
- Toggle the rule On at the top of the form
- Click Save
Section 1 — General settings
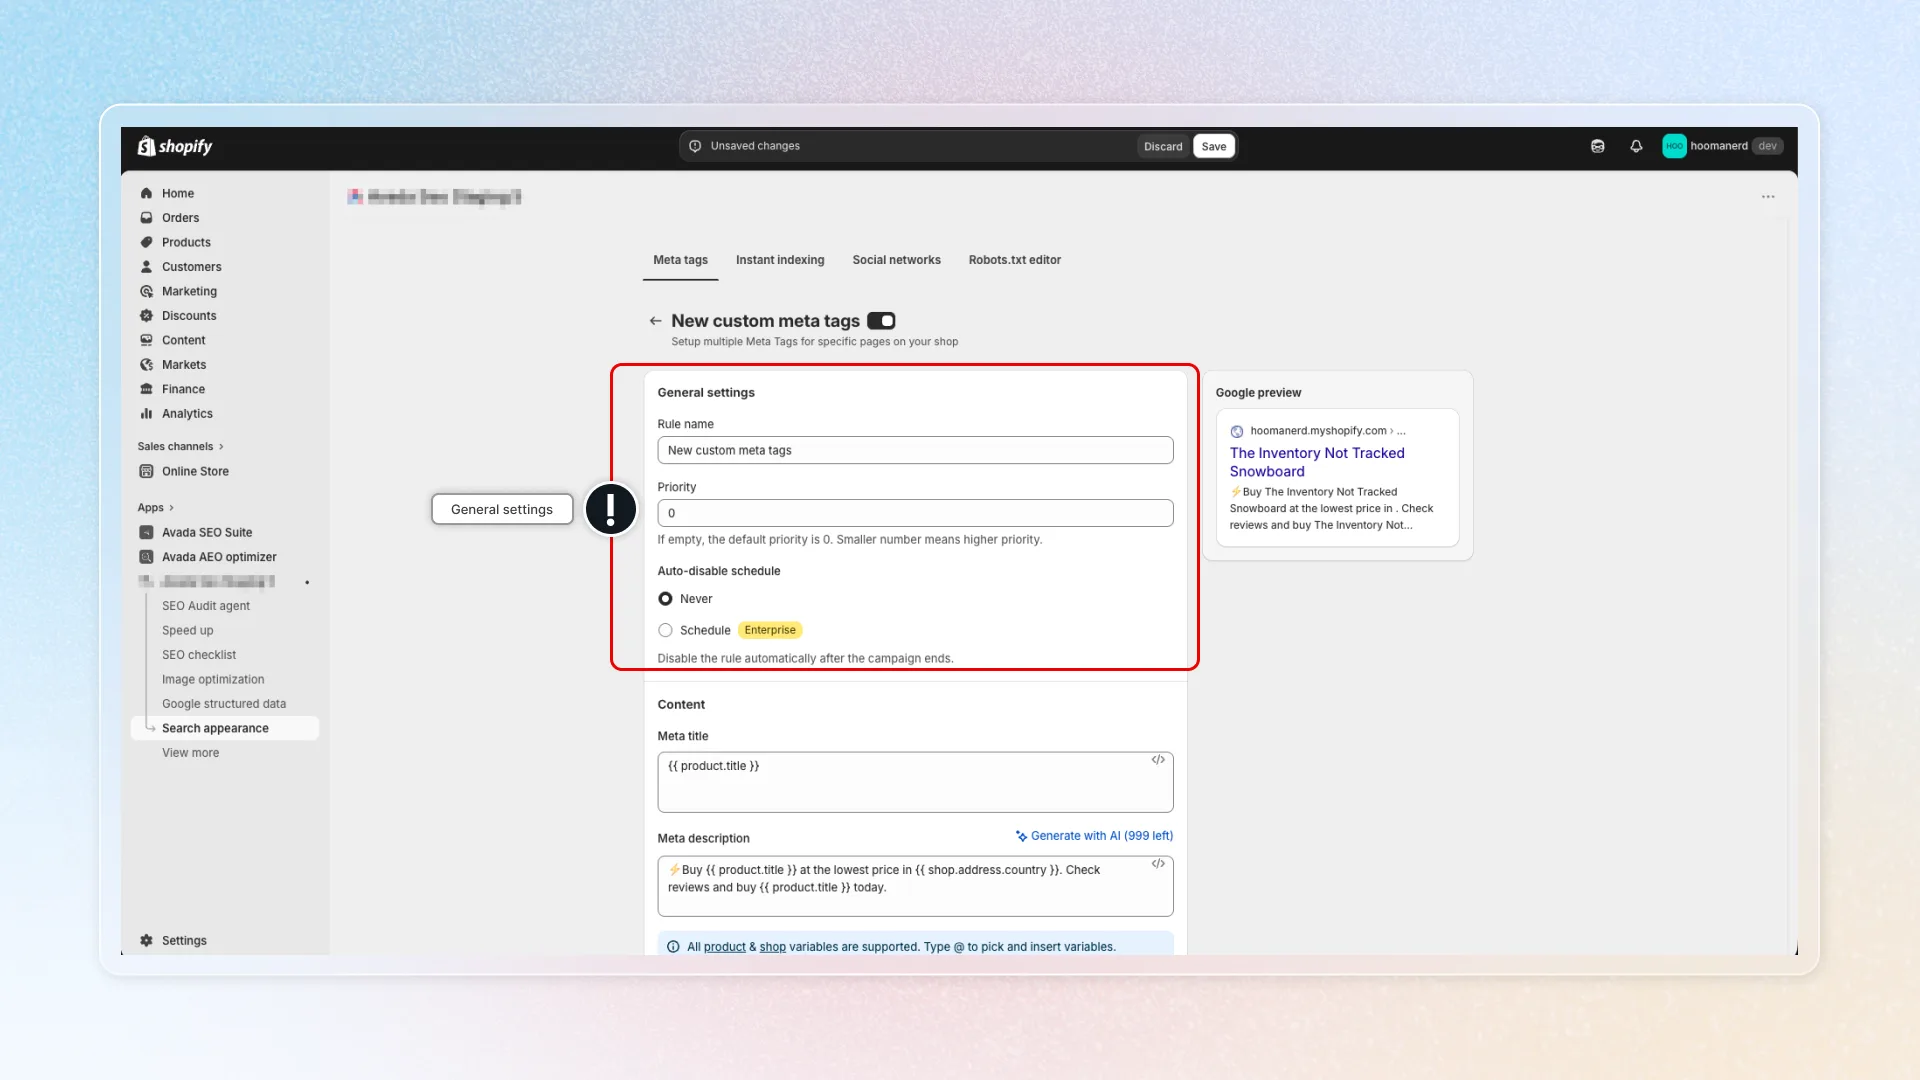
- Rule name — a descriptive name for yourself (e.g., "Nike sale products", "Summer collection"). Not visible to shoppers.
- Priority — a number starting at 0; lower numbers apply first when multiple rules match the same page. Use 0 for the most important rules, higher numbers for catch-all rules.
- Auto-disable schedule — Never (default) or Schedule. See Auto-disable schedule below.
Section 2 — Content
Enter the Meta title and Meta description for this rule. The same tools from Default meta tags work here:
- Type
@in any field to open the variable picker - Click the
</>icon to browse variables including custom metafields - Click Generate with AI next to the Meta description label to auto-generate content (costs 1 credit per generation)
See the variables reference for the full list.
Section 3 — Display conditions
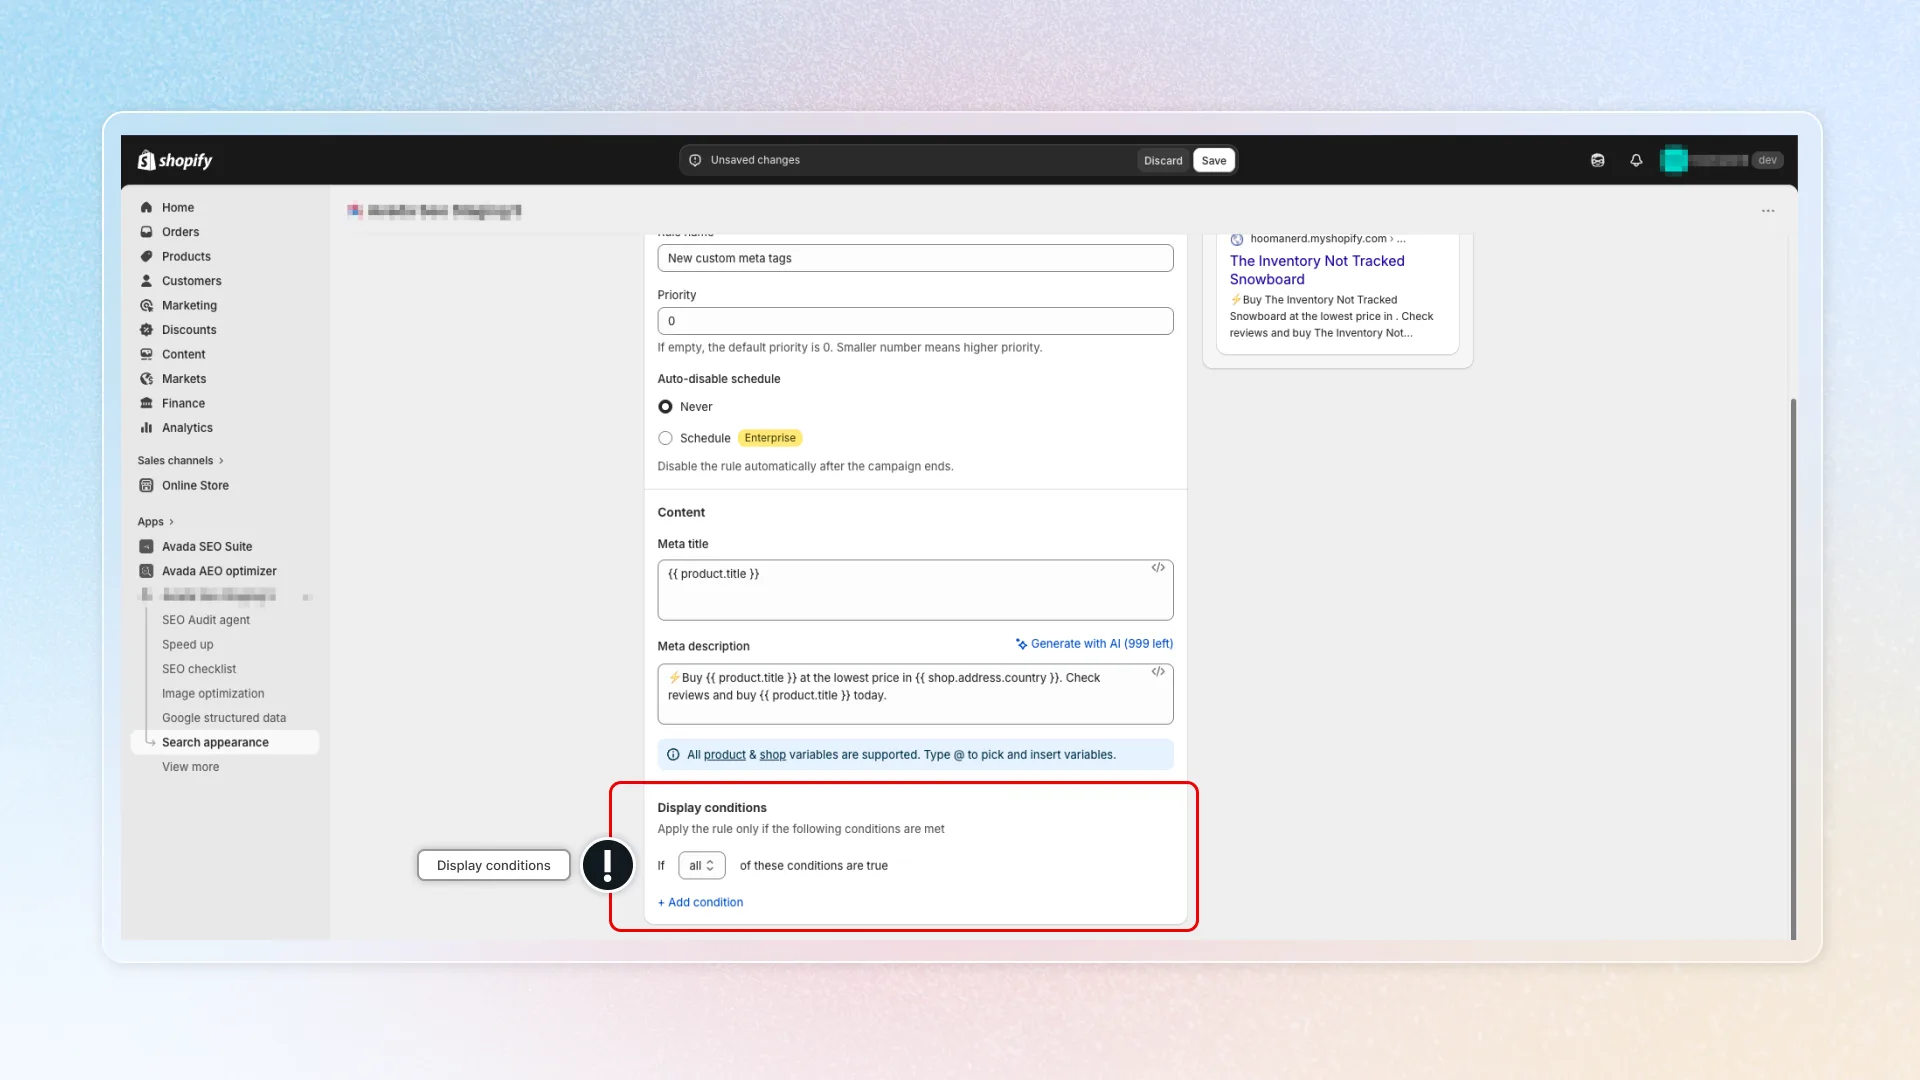
Conditions decide which pages the rule applies to.
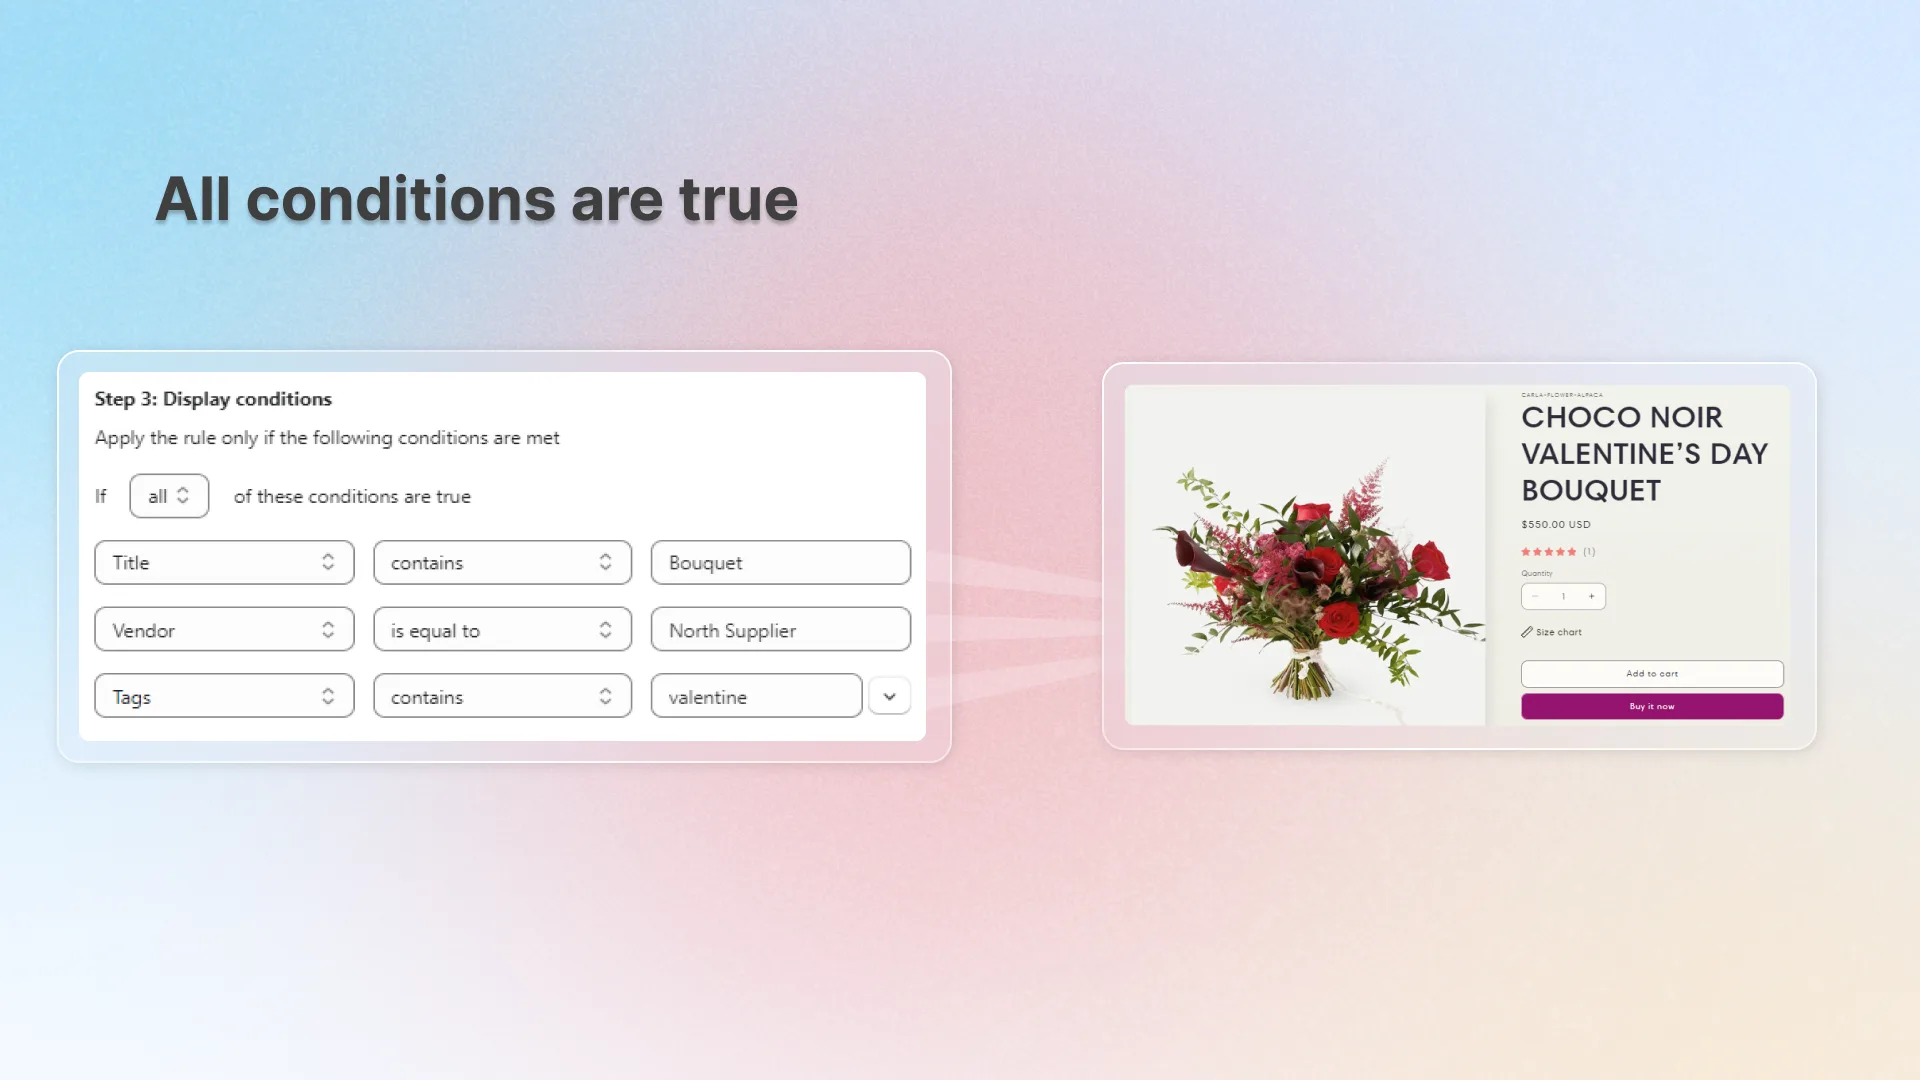
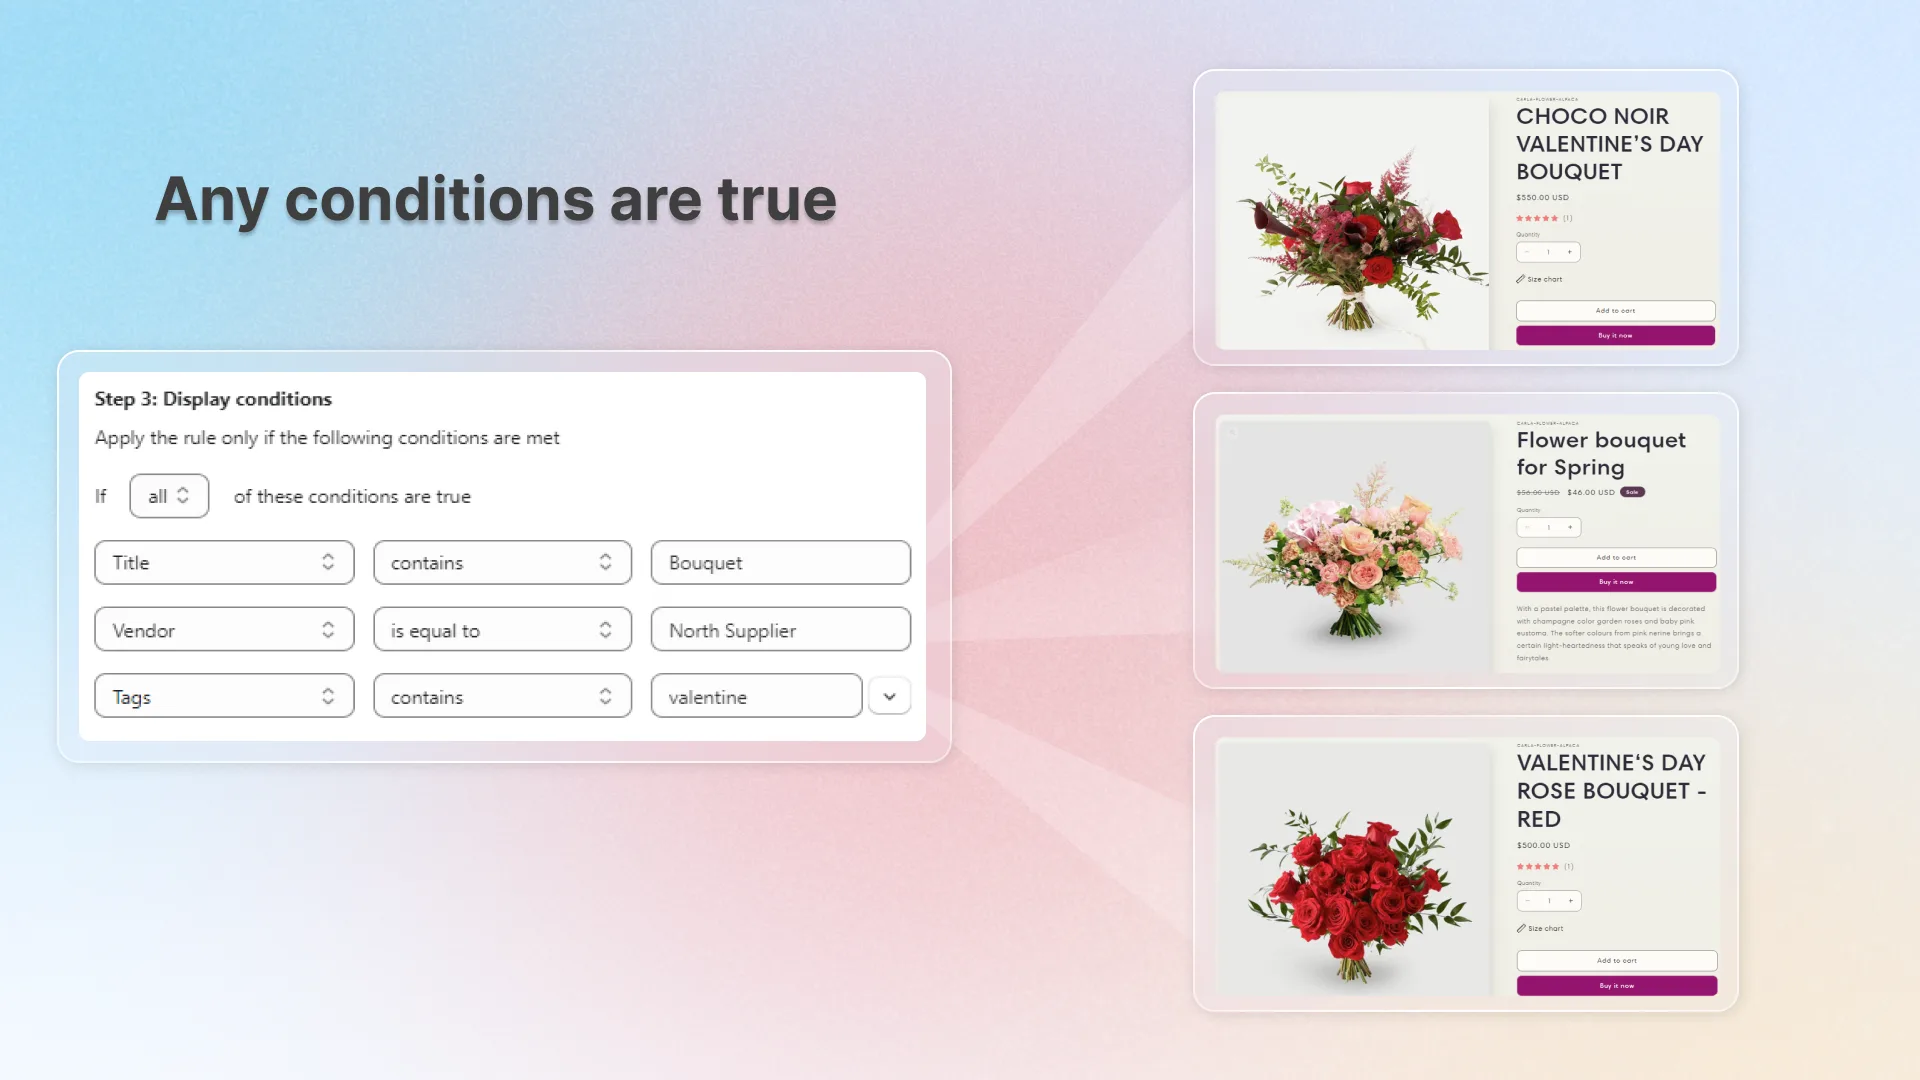
- Choose a logic: If all of these conditions are true (AND) or If any of these conditions are true (OR)
- Click + Add condition to add a condition
- Each condition has three parts: field + operator + value
Available conditions depend on the tab:
| Tab | Fields | Operators |
|---|---|---|
| Product | Title, Type, Vendor | equals, not equals, contains, not contains |
| Product | Tags, Collections | contains, not contains |
| Collection | Title | equals, not equals, contains, not contains |
| Collection | Tags | contains, not contains |
| Blog post | Title, Authors | equals, not equals, contains, not contains |
| Blog post | Tags | contains, not contains |
Example rule — Nike sale products
- Logic: all
- Condition 1: Vendor equals "Nike"
- Condition 2: Tags contains "sale"
Only Nike products that are also tagged "sale" will use this rule.
A rule with no conditions applies to every page in the current tab. Use this for a catch-all override.
Auto-disable schedule (Enterprise plan)
Running a Black Friday, flash sale, or holiday campaign? Auto-disable schedule turns the rule off automatically at a time you choose — no risk of stale sale meta tags lingering on Google after the campaign ends.
- In the rule's General settings, select Schedule under Auto-disable schedule
- Pick the date and time the rule should turn off
- Save
At the scheduled time, the rule's status flips to Off automatically. The rule stays in your list and can be turned back on manually at any time. You'll receive an in-app notification when a rule auto-disables.
Free and Pro plans can only use Never. The Schedule option shows an Enterprise badge on those plans.
The table paginates at 10 rules per page. Change the page size from the selector at the bottom right.
How rules compete — priority resolution
When a page matches multiple rules, the rule with the lowest priority number wins. If two rules share the same priority number, the one created first wins (tie-breaker: earliest Created at).
Example
| Rule | Priority | Condition | Result on a Nike product tagged "sale" |
|---|---|---|---|
| "Sale products" | 0 | Tags contains "sale" | ✅ Wins (priority 0) |
| "Nike products" | 1 | Vendor equals "Nike" | Doesn't apply (rule 0 already won) |
Tip: use low priority numbers (0, 1, 2) for specific rules with multiple conditions, and high numbers (10, 20) for catch-all rules that should apply last.
Pages that don't match any rule fall through to your Default meta tags — or to Shopify's native meta tags if Default is turned off for that tab.
Condition reference
1. All / any
- If all conditions are true — the product or collection must match all conditions.
- If any condition is true — the product or collection only needs to match at least one condition.
2. Basic operators
- Contains / Not contains — checks if a certain piece of text is included in the variable.
- Equals to / Not equals to — checks if the variable matches exactly or is different from a specific value.
3. Product rule
- Title — product title
- Type — a custom category you create for a product. See product type on Shopify (opens in a new tab).
- Vendor — the source of the products you sell. Manage vendor info (opens in a new tab).
- Tags — product tags. We list all available tags for you to pick from quickly.
- Collections — collections the product belongs to. We list all available collections for you to pick from quickly.
4. Collection rule
- Title — collection title
- Tags — collection tags
5. Blog rule
- Title — blog title
- Authors — authors of the blog
- Tags — blog tags