Quick Start (3 Steps)
This guide takes you from a freshly installed app to your first live affiliate program in about 10 minutes. You will:
- Create your first program — decide how much commission to pay.
- Add your first affiliate — either manually or via a signup link.
- Share the referral link — and wait for your first conversion.
Before you start: make sure you have installed the app from the Shopify App Store. All setup happens inside the app — you do not need to touch your theme or code for the Quick Start.
Step 1 — Create your first program
A program is a set of rules that decide how much commission an affiliate earns and on what.
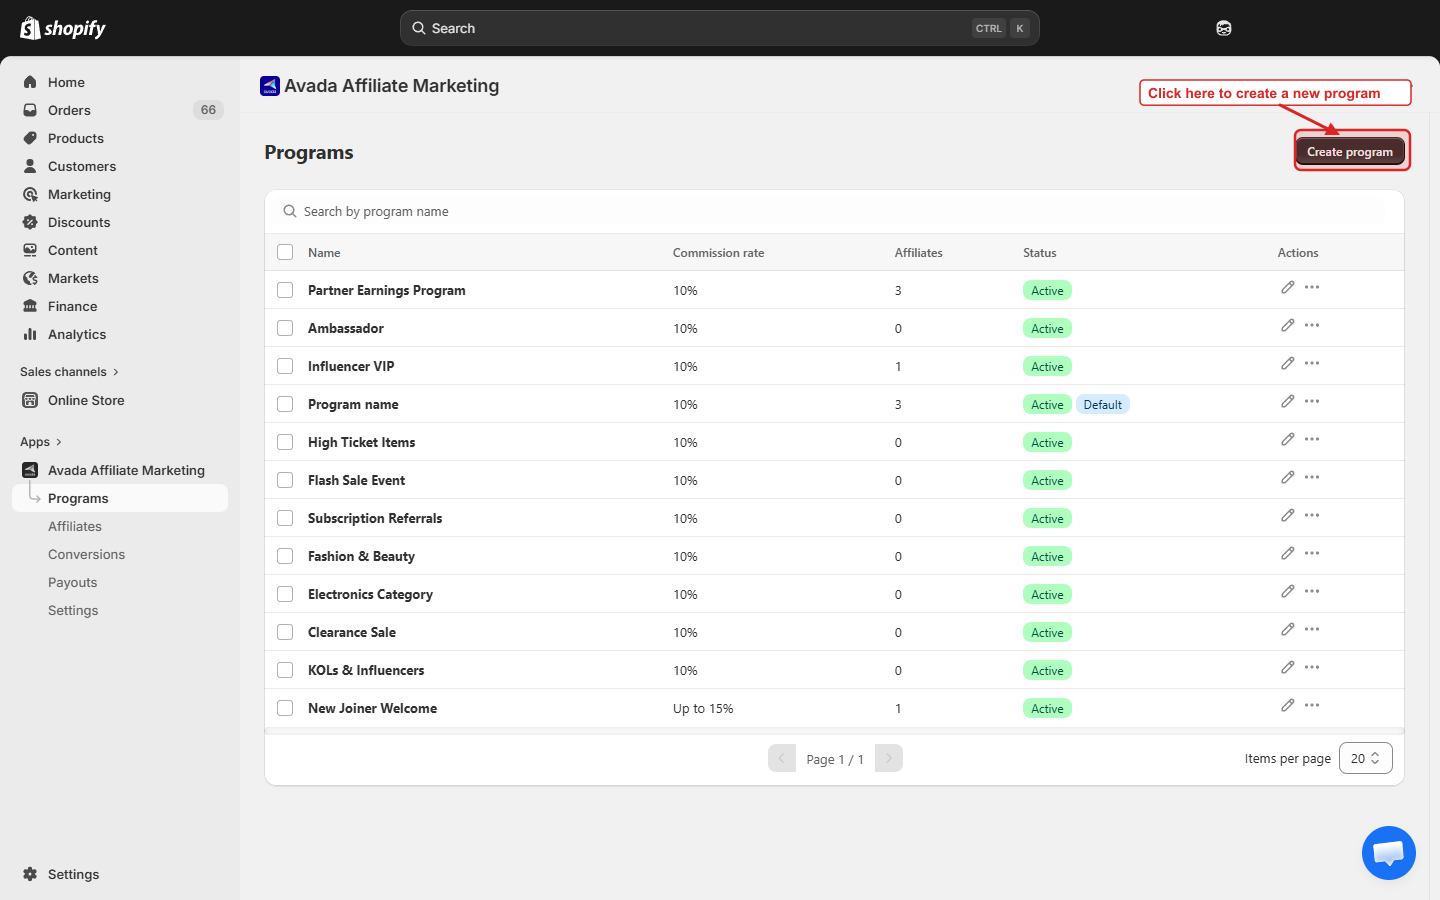
- In the app sidebar, click Programs.
- Click Create program in the top-right.
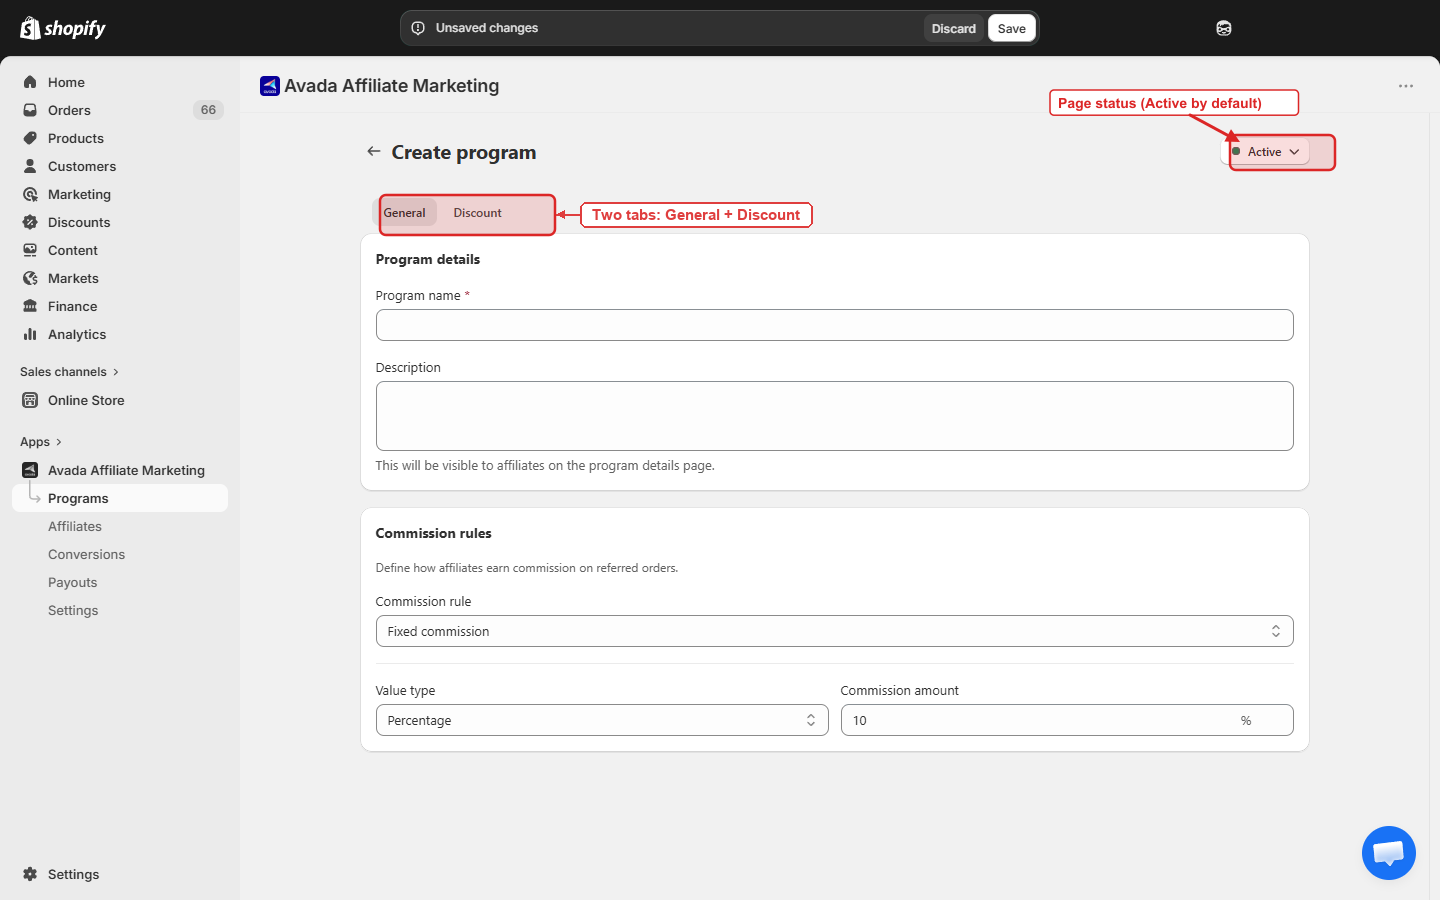
- Fill in the form (the General tab is open by default):
| Field | What to enter |
|---|---|
| Program name | A name your affiliates will see — e.g. Standard 10% |
| Description (optional) | Shown to affiliates on their portal — leave blank for now |
| Commission rule | Start with Fixed commission to keep it simple |
| Value type | Pick Percentage |
| Commission amount | Enter 10 (or any number you like) |
The program is Active by default. You can change this any time from the status menu in the top-right of the page.
Cookie duration is a shop-wide setting, not a per-program one. The default is 30 days and you can change it later in Settings → Tracking.
-
Click Save (top-right of the page). You are taken to the program's edit page and a Saved successfully toast appears.
-
Click the back arrow to return to the Programs list — your new program is there with an Active badge. You can always come back and add tiers, product overrides, or a coupon code later.
Tip: If this is the only program you plan to run, click the ⋯ menu on the row and pick Set as default. New affiliates who register through your public signup link will automatically be assigned to it.
Step 2 — Add your first affiliate
You have two ways to bring affiliates in. Pick whichever matches how you recruit them:
Option A — Add them manually
Use this when you already know the person (a friend, an influencer you contacted directly).
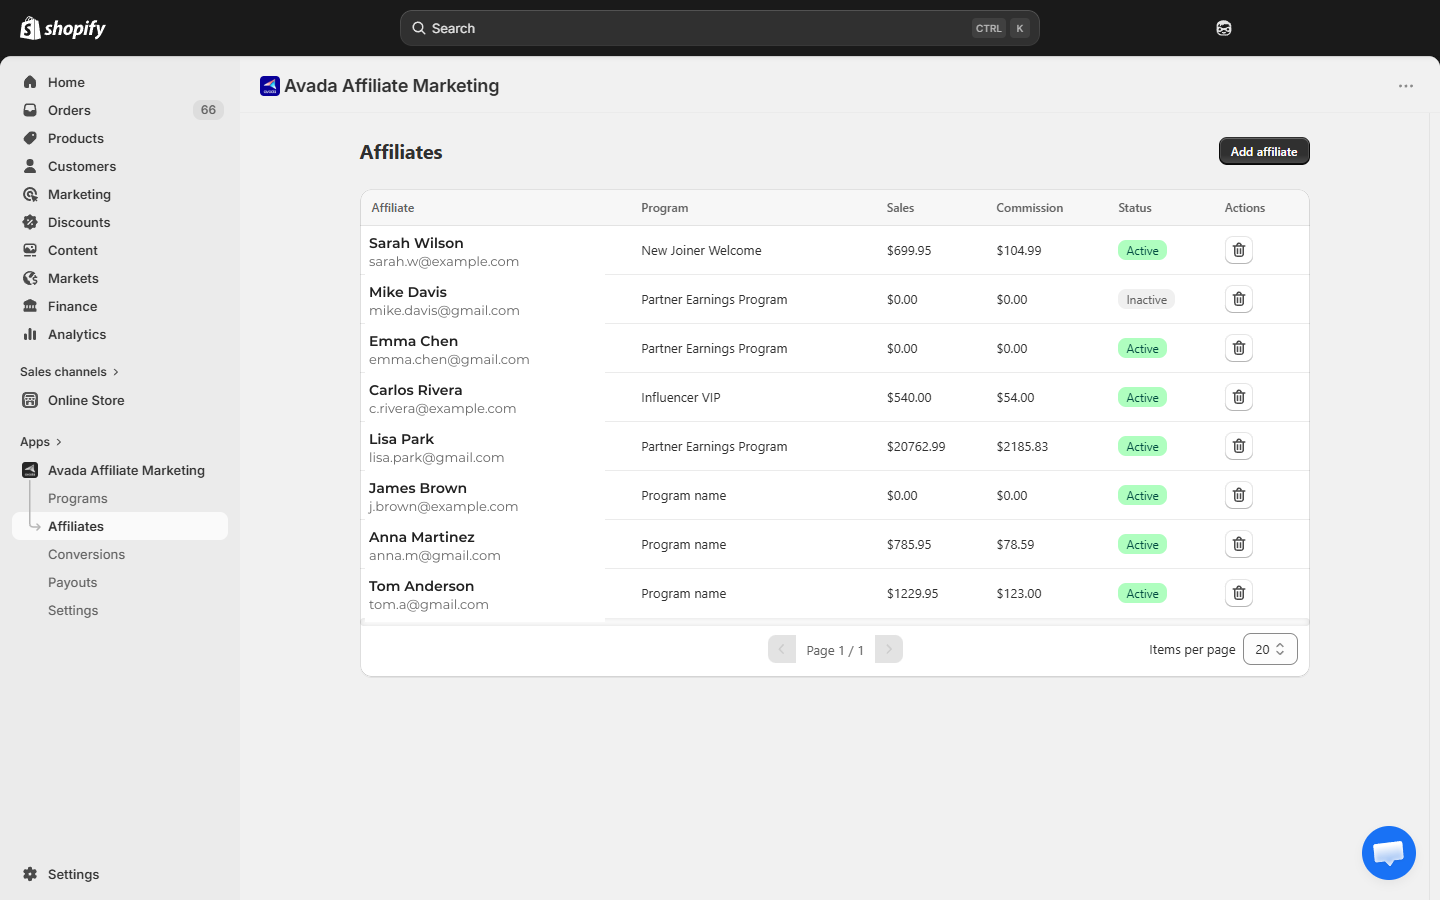
- Click Affiliates in the sidebar.
- Click Add affiliate in the top-right.
- Fill in the modal:
| Field | Required | Notes |
|---|---|---|
| Yes | The affiliate will use this to log in to the portal | |
| First name | Yes | Shown in reports and the portal |
| Last name | Yes | Shown in reports and the portal |
| Program | Yes | Pick the program you just created |
An info banner reminds you: An invitation email with a login link will be sent to the affiliate. Manually-added affiliates are created with Active status, so they can start referring immediately — no approval step needed.
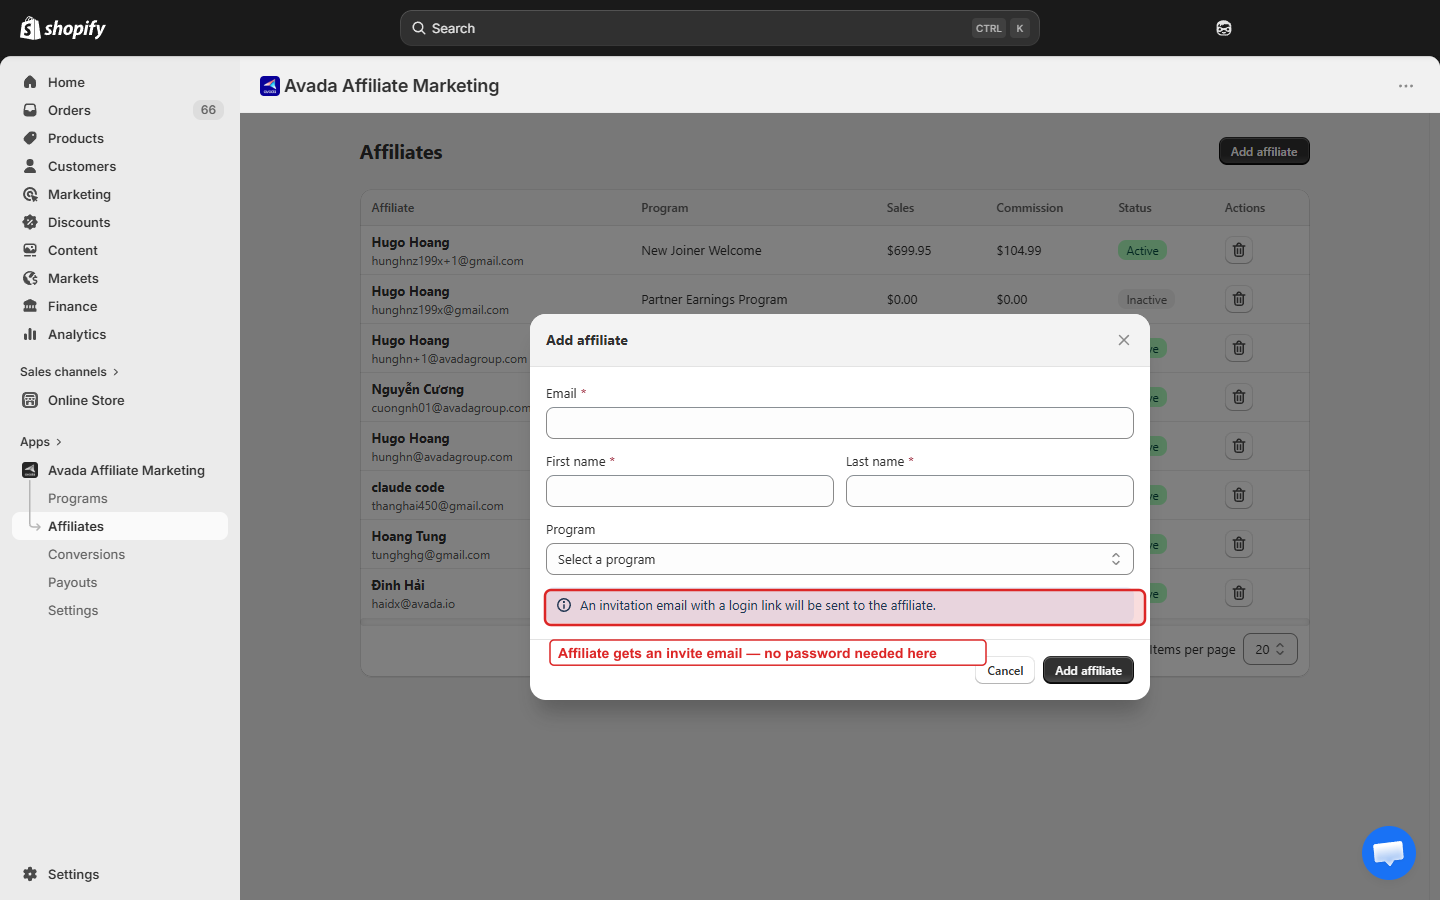
- Click Add affiliate. The affiliate is created and receives an invite email with a link to set their password.
Option B — Share the signup link
Use this when you want to let anyone sign up as an affiliate from a public page.
- Go to Home.
- Find the Affiliate portal links card.
- In the Registration page row, click the copy icon at the right of the URL field. Paste the link into your emails, social bio, or a page on your site.
Anyone who opens the link can register themselves. Self-registered affiliates arrive in your Affiliates list with Pending status — you decide whether to approve or disapprove them.
Step 3 — Share the referral link
Every affiliate has a unique referral link the moment they are created. When someone clicks it, the app drops a tracking cookie on that shopper's browser. If they buy anything in the next 30 days, the affiliate earns commission.
There are two ways to find the referral link:
- You, the merchant: on the Affiliates page, click an affiliate's row → the detail panel shows their link.
- The affiliate themselves: they log in to the Affiliate Portal and copy it from their dashboard.
The link looks like this:
https://your-store.myshopify.com?affily_ref=AFF-XXXXXXEvery affiliate has a 6-character code (e.g. AFF-ABC123) that identifies them in the link.
Send it to the affiliate and they are ready to start promoting your store.
What happens next?
Once an affiliate shares their link and somebody buys:
- The sale shows up on the Conversions page with status Pending.
- You approve or deny it.
- When you are ready to pay, go to Payouts, enter the amount, and click Mark as paid.
That is the whole loop. Everything else in this guide explains the details of each step.